
The Most Effective Solution for Kitchen Cabinet Installation Costs
Kitchen Cabinet Installation: Get the Fit Right and Keep Costs in Check
For kitchen cabinet installation, plan the layout before you buy or drill. Check the room and cabinet measurements, find the highest point of the floor, and mark the wall studs. Install wall cabinets first, then level and secure the base cabinets. Add fillers and trim only after the cabinets are aligned. To control costs, decide early whether the job also needs wall repairs, countertop work, or changes to plumbing and electrical lines.
A careful plan helps you compare DIY and professional installation without overlooking work that affects the budget. If the walls cannot safely support the cabinets, or utilities need to move, bring in qualified help.
I’m Mark Apicella, owner of Turn Key Remodel in Orange County. My team handles kitchen cabinet installation as part of full-service remodels, coordinating design, construction, and the finishing details.
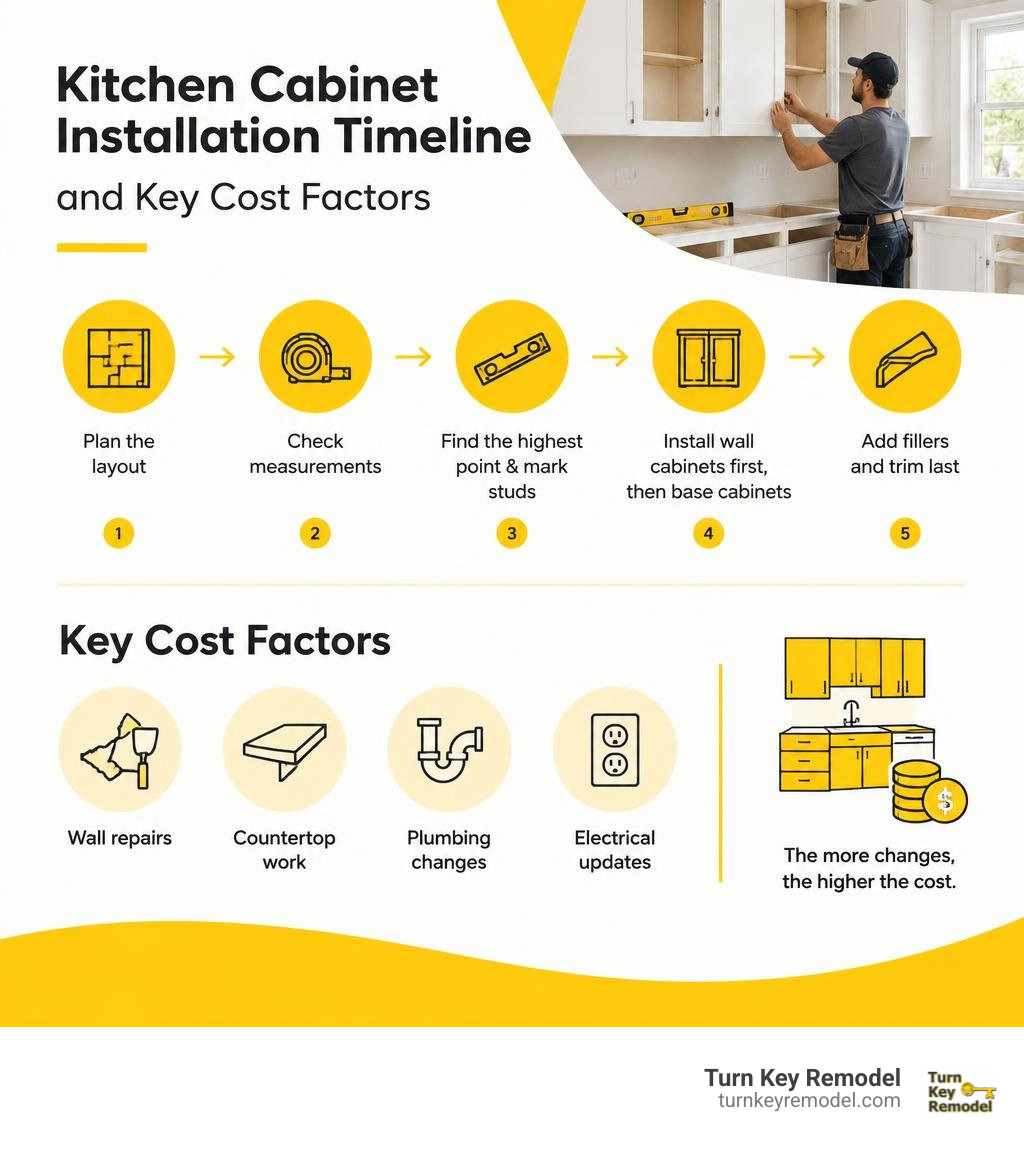
Simple kitchen cabinet installation word guide:
- adding crown molding to cabinets
- building a kitchen island with ikea cabinets
- farmhouse sink in existing cabinet
Planning and Pre-Installation Preparation
Careful preparation prevents mistakes during installation. Before lifting a single cabinet box or unboxing your order, ensure the site is safe and clear. First, turn off the water, gas, and electrical breakers supplying the kitchen. Modern building codes require electrical, gas, and plumbing connections to be handled according to local safety regulations.
Always wear ANSI Z87.1 approved eye protection and a dust mask when cutting wood or drilling into studs. Mapping the wall framing is essential. Use an electronic stud finder to locate every wall stud along the cabinet runs, then verify each edge using a fine finish nail in areas that will be hidden by the cabinet backs. Wood framing is usually spaced 16 inches on center, and every cabinet requires secure anchoring into structural timber.
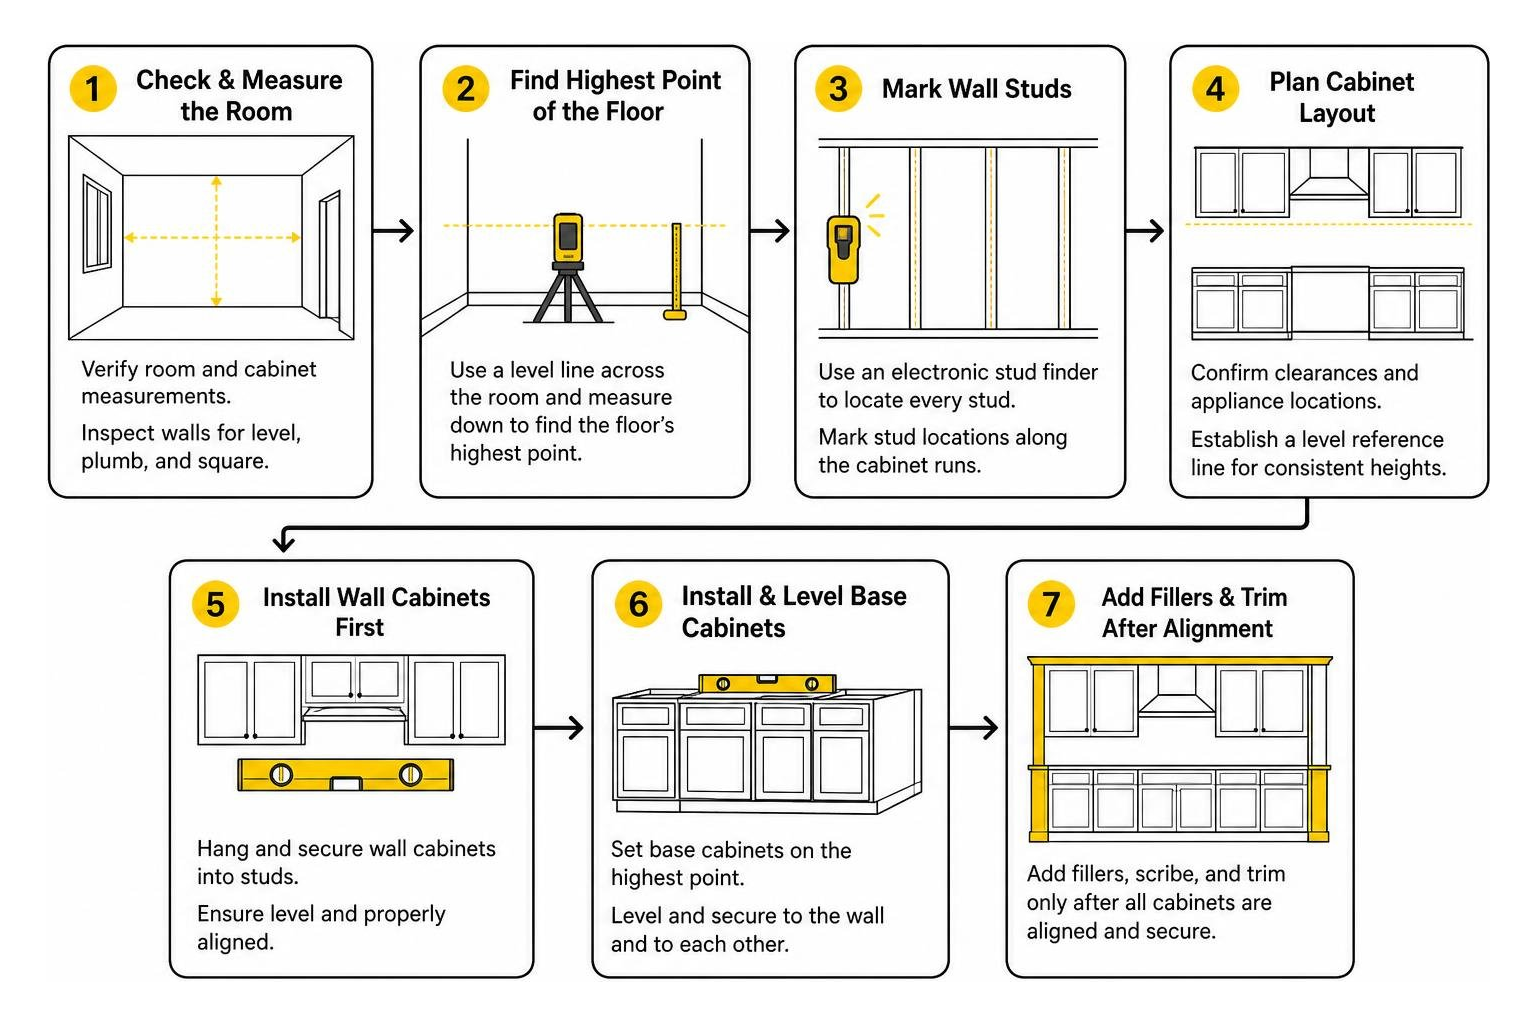
Finding the highest point of the floor is a key layout step. Floors are rarely perfectly flat. By measuring down from a level line across the room, identify the floor’s high point to establish your baseline height. Reviewing a kitchen renovation cost planning guide before starting helps prevent unexpected expenses during demolition and wall framing adjustments.
Preparing the Room for Kitchen Cabinet Installation
Before hanging cabinets, inspect the walls for humps, dips, or out-of-square corners. Place a long 48-inch spirit level or straightedge horizontally across the drywall. Any high spots should be marked and sanded down, while deep hollows will need shimming later to prevent cabinet face frames from racking.
Establish clean, visible benchmark lines directly on the wall:
- Floor Benchmark: Find the highest floor point along the run and measure up 34½ inches to establish the top edge of standard base cabinet boxes.
- Upper Reference Line: Measure up 54 inches from the floor high point to mark the bottom baseline for standard wall cabinets. This leaves the standard 18-inch backsplash gap between base countertops and upper units.
- Top Alignment Line: Depending on whether you have 30-inch, 36-inch, or 42-inch upper cabinets, strike your top reference line at 84, 90, or 96 inches above the finished floor high point.
Repair damaged drywall, patch large holes, and apply a fresh coat of primer or paint to the wall before mounting the cabinetry.
Essential Tools and Hardware Checklist
Having the right trade tools on hand keeps the workflow smooth and protects your materials from accidental damage:
- Measurement & Layout: 25-foot steel tape measure, 48-inch spirit level, torpedo level, laser level, framing square, and carpenter’s pencil.
- Fasteners & Hardware: Hardwood or composite wood shims, #10 x 2½-inch or #10 x 3-inch washer-head cabinet screws (never use drywall screws), and #8 x 2½-inch pan/trim head screws for face-frame joinery.
- Power Tools: Cordless drill/driver, 3/16-inch drill bit for wall pilot holes, 1/8-inch and 9/64-inch countersink bits, jigsaw, miter saw with an 80-tooth fine-finish blade, and circular saw.
- Hand Tools & Clamps: Multiple quick-grip bar clamps, face-frame clamps, stud finder, rubber mallet, pry bar, utility knife, and ANSI Z87.1 safety glasses.
Step-by-Step Guide to Kitchen Cabinet Installation
Working systematically ensures that cabinet boxes align evenly across long runs without twisting out of square.
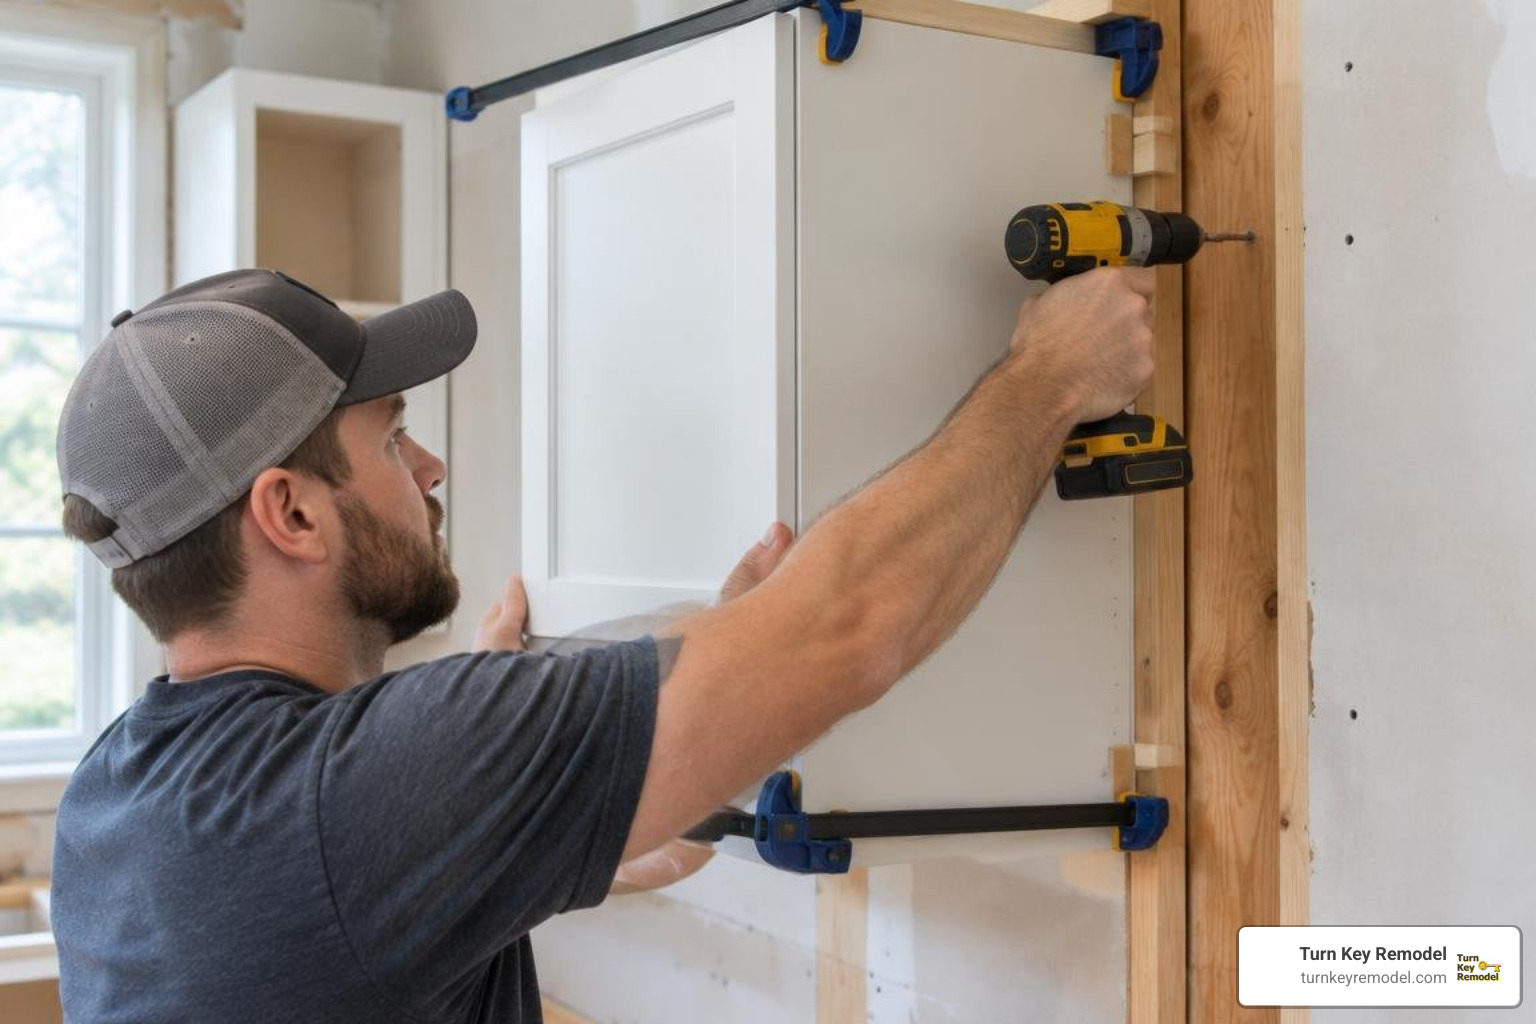
Follow the official Cabinet installation guide and your specific manufacturer’s engineering specifications throughout the process. Always start in the corner and work outward. Remove all cabinet doors, drawers, and adjustable interior shelving before lifting boxes into place; this makes the cabinets lighter, easier to clamp, and protects the finish from accidental dings.
Upper and Wall Cabinet Mounting
Mounting the upper wall cabinets first keeps the floor clear, allowing you to walk directly up to the wall without leaning over base cabinets.
- Install a Temporary Ledger: Screw a straight 1×4 timber support rail into the wall studs along your 54-inch bottom reference line. This temporary ledge bears the weight of the upper boxes while you position and fasten them. Alternatively, support the boxes using an adjustable T-brace or mechanical cabinet jack.
- Hang the Corner Cabinet: Place the corner cabinet on the ledger rail. Drill 3/16-inch pilot holes through the internal structural hanging rail located at the top and bottom of the cabinet back. Secure the cabinet to the wall studs using #10 x 2½-inch washer-head screws, leaving them slightly loose for fine adjustment.
- Clamp Adjacent Cabinets: Set the next upper cabinet onto the ledger. Align the front face frames so they are flush. Use protective face-frame clamps or bar clamps to squeeze the stiles together tightly.
- Join the Face Frames: Pre-drill pilot holes through the face frame edges using a countersink bit (1¾ inches from the top and bottom), then drive #8 x 2½-inch screws to secure the adjacent frames.
- Shim and Fasten: Check the cabinet for plumb and level. Insert shims behind the cabinet back wherever hollows exist in the wall to prevent pulling the box out of square. Drive the wall mounting screws securely into the studs, check for plumb once more, and remove the temporary ledger board.
If you are working with modular suspension rails—such as those detailed in the METOD Kitchen installation guide —mount the steel rails level across your studs first, ensuring proper height clearances before hanging each unit.
Base Cabinet Leveling and Securing
Base cabinets carry heavy countertop materials like quartz, granite, and solid surface slabs. They must be level, plumb, and structurally stable across the entire run.
Begin at the corner base unit or the cabinet resting directly on the highest point of your floor:
- Position the Corner Unit: Align the top edge of the base cabinet with your 34½-inch horizontal baseline.
- Level in Both Directions: Place a spirit level across the top edges from front-to-back and side-to-side. Slide composite shims underneath the cabinet base until the unit is level.
- Secure to Studs: Drive #10 x 3-inch washer-head screws through the upper back structural rail into the wall studs.
- Connect Adjacent Units: Move to the adjacent base cabinet, shim it to match the height of the first cabinet, clamp the front face frames together, and secure them with #8 frame screws.
- Anchor Freestanding Islands: For islands or peninsula runs, build an internal 2×4 floor-anchoring frame securely fastened to the subfloor (taking care to avoid in-floor heating pipes or plumbing), and attach the island cabinetry directly to that base framework.
Finishing Details: Fillers, Trim, and Seamless Integration
The difference between an average DIY project and professional cabinetry lies in the finishing details. Walls are rarely plumb, and corners are seldom true 90-degree angles.
To prevent cabinet doors and pull-out drawers from hitting adjacent walls or door casings, install custom filler strips between the cabinet end and the wall.
- Scribing Filler Strips: Hold the filler strip against the wall, set a carpenter’s compass or scribing block to the widest gap between the wall and the cabinet edge, and trace the contour of the wall down the length of the filler. Cut along the pencil line using a jigsaw or circular saw with the blade beveled back slightly (a 5-degree back-bevel) to ensure a clean, tight fit against the drywall.
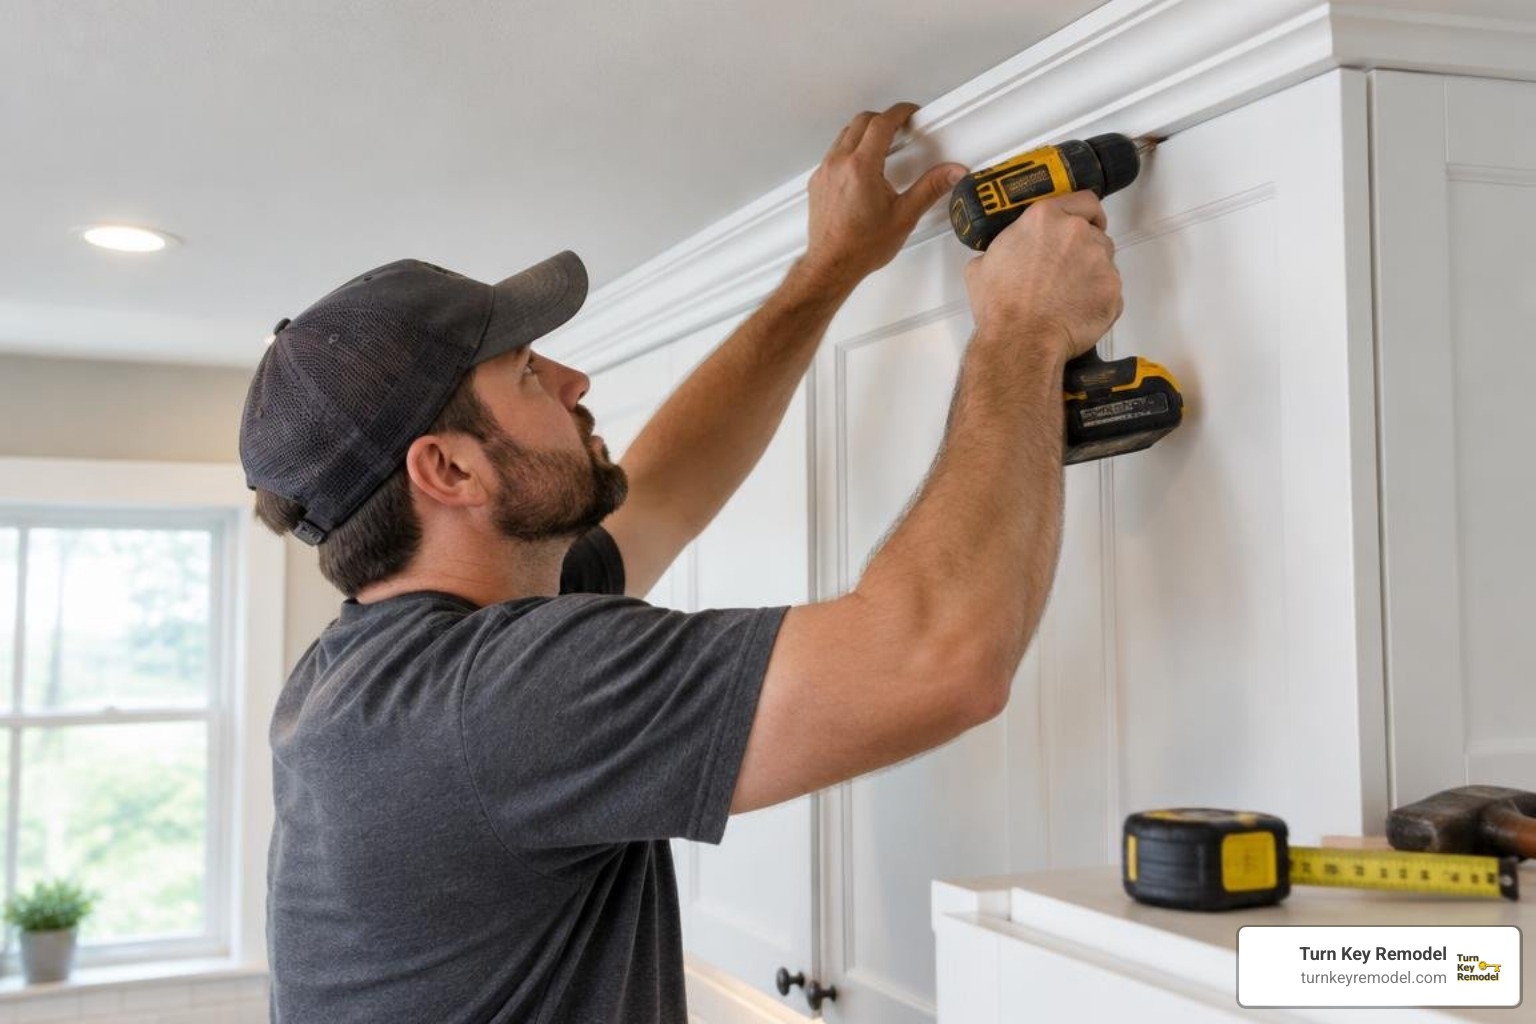
- Molding and Trim: Install built-in crown molding customization along the upper cabinet tops to close the ceiling gap. Fasten matched toe-kick skins across the bottom base recesses using 23-gauge pin nails to conceal all leveling shims.
Door, Drawer, and Hardware Adjustments
Once the cabinet frames are secured and level, re-install the doors, drawer boxes, and drawer faces:
- 3-Way Hinge Adjustments: Modern European concealed cup hinges offer three-way screw adjustments: horizontal (side-to-side alignment), vertical (height matching across adjacent doors), and depth (in-and-out spacing from the frame). Adjust the hinge screws until all door gaps (reveals) are uniform at roughly 1/8 inch.
- Drawer Slides: Adjust drawer runner clips up or down so drawer faces align parallel with surrounding frames.
- Quiet Closures: Apply clear silicone bumper pads to the interior corners of all doors and drawer heads to reduce noise and prevent finish wear.
- Hardware Installation: Use an acrylic drilling template to drill consistent pilot holes for cabinet pulls and knobs, preventing crooked or misaligned handles.
If your kitchen layout features specialty plumbing fixtures, review our guide on retrofitting farmhouse sinks to ensure proper internal timber bracing and sink base modifications before countertop templating.
Countertops, Sinks, and Appliance Coordination
Cabinet installation must be coordinated with mechanical rough-ins and heavy surface fixtures:
- Countertop Support: Solid stone countertops require continuous, unyielding support. Verify that the entire run of base cabinets is within 1/8-inch of level across a 10-foot span. Install corner angle brackets where required inside sink bases and corner blind cabinets.
- Appliance Clearances: Measure openings for dishwashers (standard 24-inch opening), slide-in ranges (typically 30 to 36 inches), and refrigerators. Ensure side panels are plumb so appliances slide into place without binding against cabinet finishes.
- Island Utilities: If installing a kitchen island with electrical outlets or prep sinks, follow our guide on kitchen island electrical placement to maintain required clearances from wet areas and satisfy regional building codes.
Budget Management and Cost Breakdown
Managing costs for a kitchen remodel requires balancing material quality, installation complexity, and labor.
| Installation Category | Typical Budget Range (Per Linear Foot) | Key Characteristics & Requirements | Best Suited For |
|---|---|---|---|
| DIY Stock Installation | $50 – $120 (materials & basic tools) | Requires personal carpentry tools, laser levels, helper assistance, and significant homeowner time | Experienced DIYers with standard room layouts |
| Semi-Custom Cabinetry (Pro Install) | $180 – $350 (labor & installation) | Precision scribing, custom filler cuts, integrated crown trim, appliance panel installations | Homeowners seeking durable, warrantied craftsmanship |
| Custom Built-In Cabinetry (Full Service) | $400 – $800+ (complete build & install) | In-house design, structural wall modifications, custom architectural moldings, integrated lighting | High-end, tailored kitchen remodels |
Consulting our kitchen remodel design budgeting guide will help you build a contingency reserve for structural or plumbing adjustments that may arise during installation.
Professional vs DIY Kitchen Cabinet Installation Costs
While installing cabinets yourself can reduce upfront labor costs, it also carries potential risks. Cabinet boxes are heavy and awkward to handle alone; an out-of-square installation can lead to cracked stone countertops, binding drawers, or uneven door gaps.
Hiring licensed trade specialists ensures:
- Speed and Efficiency: A professional crew can install an entire kitchen layout in 1 to 3 days, compared to several weekends for a DIY homeowner.
- Specialized Equipment: Professionals use commercial laser levels, track saws, specialized clamping systems, and heavy-duty fastening hardware to achieve a square, secure installation.
- Protection for Warranties: Many cabinet manufacturers require verified professional installation to keep their 15-year or lifetime structural warranties valid.
If you decide to work with local experts, review our advice on hiring professional cabinet installers to help select the right contractor for your project.
Long-Term Care and Value Preservation
Keep your cabinets looking their best over the long term with regular, gentle maintenance:
- Cleaning: Wipe down cabinet faces using a soft, clean cotton cloth dampened with warm water and mild dish soap. Never use abrasive scrubbers, harsh ammonia, chlorine bleach, or paste waxes, which can degrade protective clear coats.
- Moisture Management: Immediately dry spills and excess moisture around the sink base and dishwasher door to prevent the core wood or MDF from swelling.
- Heat Protection: When running high-heat appliance cleaning cycles or placing countertop appliances (like air fryers or toaster ovens) near cabinets, use heat shield strips or pull appliances out from beneath upper cabinets to protect the factory finish.
Frequently Asked Questions
Should wall cabinets be installed before base cabinets?
Yes. Installing upper wall cabinets first keeps the floor open so you can walk directly up to the wall, safely position ladders, and lift heavy boxes without leaning over base cabinets. This approach protects base cabinet frames from accidental impact and dropped tools.
How do you level cabinets on an uneven floor?
Locate the highest point of your floor along the cabinet run using a 48-inch spirit level or laser level. Set your 34½-inch base cabinet reference line from this high point. As you set cabinets over lower floor sections, insert composite shims underneath the cabinet base corners until the tops align with your horizontal reference line. Fasten matching toe-kick skins over the face of the base to conceal the shims.
What fasteners are safe for mounting cabinets to wall studs?
Always use dedicated #10 x 2½-inch or #10 x 3-inch washer-head or pan-head cabinet installation screws driven directly into the center of wood wall studs. Never use drywall or sheetrock screws for hanging cabinets. Drywall screws are brittle and can snap under the combined load of heavy cabinetry, dishware, and stone countertops.
Conclusion
A successful kitchen cabinet installation relies on methodical preparation, accurate layout lines, reliable stud anchoring, and careful leveling. Whether you are assembling modular flat-pack boxes or investing in full-scale architectural millwork, taking the time to square your framing, shim uneven walls, and align your reveals ensures your kitchen remains beautiful and functional for decades.
For homeowners throughout Orange County—including Yorba Linda, Placentia, Anaheim Hills, Tustin, and Brea—who want a seamless, stress-free renovation, Turn Key Remodel provides comprehensive design-build services. From spatial planning and 3D interior design to structural framing, plumbing, electrical, and precision trim carpentry, we deliver high-quality craftsmanship backed by clear communication.
Explore our custom kitchen cabinetry and installation services or contact our team to bring your kitchen vision to life.