A Practical Guide to Managing Your Bathroom Tub to Shower Remodel
Plan Your Tub-to-Shower Remodel Before You Choose the Tile
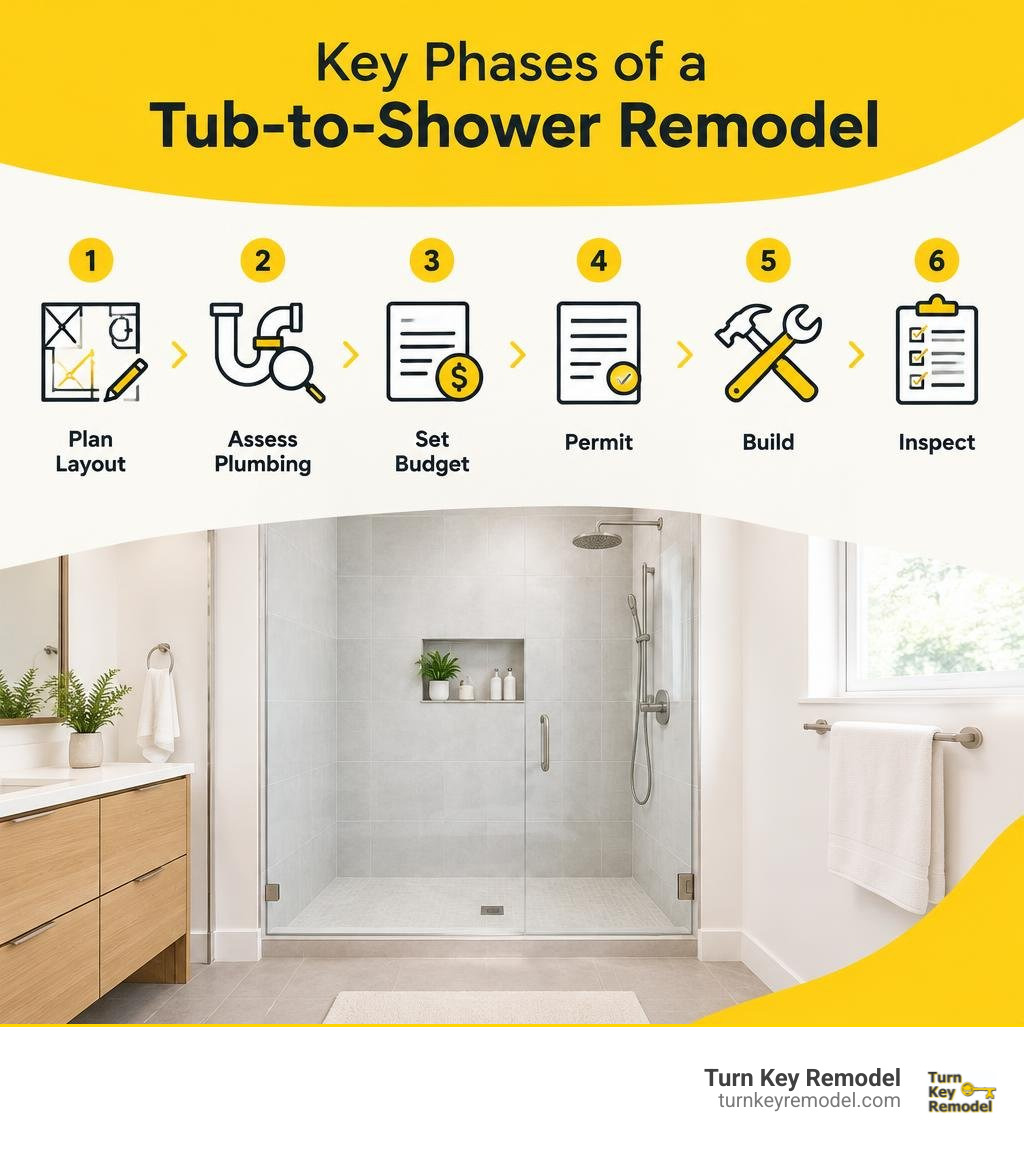
Start by deciding whether the new shower can use the tub’s existing footprint or needs a new layout. Then choose a curbed or curbless entry, have a contractor assess the drain and walls, and get a written scope that covers waterproofing, permits, materials, cost, and schedule. Keeping the layout simple can limit plumbing work; hidden water damage or a curbless floor can add work.
I’m Mark Apicella, owner and president of Turn Key Remodel, where I help Orange County homeowners plan a bathroom tub to shower remodel with design and project management in one place. With more than eight years in remodeling, I’ll guide you through the decisions that affect how your new shower looks, works, and lasts. For a broader look at the process, the National Association of the Remodeling Industry offers practical guidance on planning a bathroom remodel.
Why Convert: Top Motivators and Resale Value Considerations
For many homeowners, the standard bathtub becomes an obstacle rather than an oasis. Stepping over a 14-to-18-inch tub wall every single morning gets old quickly, especially when you take a shower 99% of the time. Deciding to replace that tub with a dedicated walk-in shower is one of the most practical upgrades you can make to your home. It optimizes floor space, dramatically reduces cleaning time, and transforms a cramped, dated bathroom into an open, spa-like retreat.
Before jumping into demolition, it helps to understand everything you should know about converting a tub to a shower. Homeowners generally choose this renovation for three core reasons: improving daily convenience, enhancing long-term safety, and updating aging fixtures before hidden leaks cause costly structural issues.
Aging-in-Place and Accessibility Benefits
Safety is often the primary driver for a shower conversion. Stepping into a slick bathtub creates an unnecessary slip-and-fall risk for seniors and individuals with limited mobility. By converting to a walk-in shower, you eliminate that high threshold.
When designing an accessible or aging-in-place bathroom, we focus on several key features:
- Zero-Threshold or Low-Curb Entry: Eliminates tripping hazards and allows seamless access, even for wheelchairs or walkers.
- Solid Wood In-Wall Blocking: Installing 2×6 or 2×8 wood backing behind the drywall during framing ensures that safety grab bars can be securely bolted into structural lumber rather than weak drywall anchors.
- Slip-Resistant Flooring: Small-format mosaic tiles (like 2×2 porcelain or hex tiles) provide multiple grout joints underfoot, dramatically boosting traction when wet.
- Comfort-Height Built-In Seating: A built-in bench or fold-down teak seat provides a safe, comfortable spot to rest.
- Adjustable Handheld Showerheads: Pairing a fixed showerhead with a slide-bar handheld wand allows users of any height or physical ability to bathe effortlessly while seated.
Resale Value: Master Bath vs. Single-Tub Homes
A common question we hear is whether removing a bathtub will hurt property value. The answer depends on which bathroom you are remodeling and your home’s overall layout.
In a primary or master bathroom, replacing an old combination tub-shower unit with an expansive, modern walk-in shower almost universally increases home appeal and resale value. Today’s buyers prioritize spacious master showers with modern tile and frameless glass over garden tubs they will rarely fill.
However, if your house only has one full bathroom, eliminating its sole bathtub can deter prospective buyers with young children or pets. Real estate appraisals generally favor keeping at least one functional tub in the home. If you have a secondary bathroom with a tub, converting your primary bath to a shower is a win-win upgrade.
Planning Your Bathroom Tub to Shower Remodel: Options, Scope, and Layouts
Every bathroom has unique framing, plumbing runs, and structural nuances. Deciding how to approach your remodel comes down to balancing your aesthetic goals with your budget. You can step into luxury with inspiring walk-in shower designs that completely reconfigure your space, or you can stick closely to the original footprint for maximum efficiency.
Direct Conversion vs. Full Waterproofing Rebuild
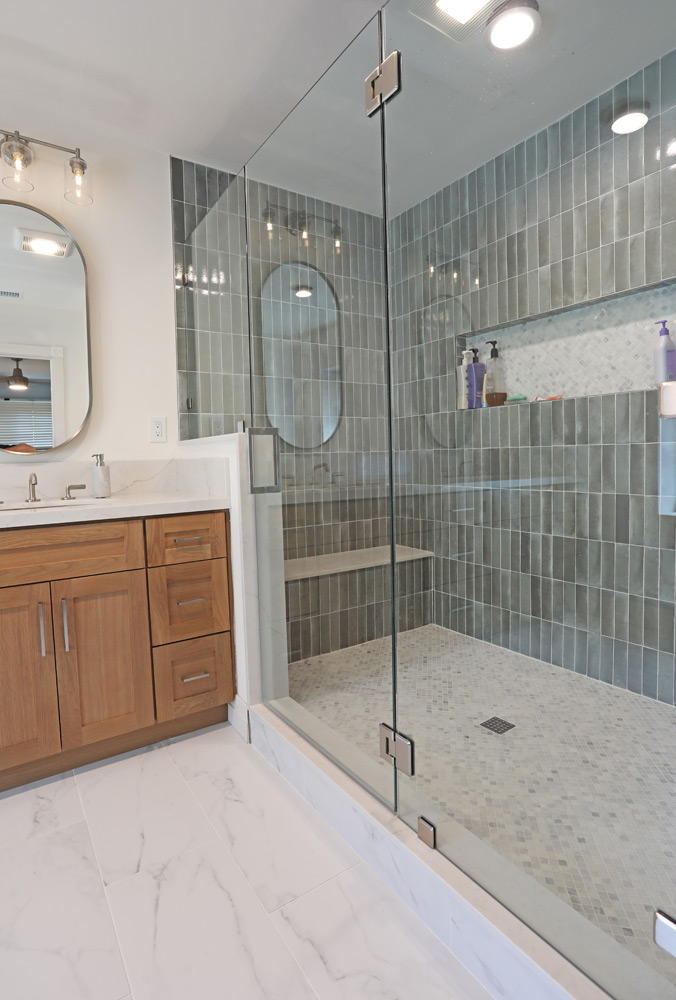
Understanding your scope starts with distinguishing between a direct footprint conversion and a full waterproofing rebuild:
- Direct Conversion Within Existing Footprint: The new shower takes over the exact 30×60-inch or 32×60-inch footprint of the old bathtub. The water supply and drain lines stay within their general rough-in locations. This is the fastest, most budget-friendly method because it avoids major framing modifications or extensive drywall replacement outside the wet zone.
- Full Waterproofing Rebuild: If your existing tub has leaked for years, hidden rot, mould, or damaged subflooring may lurk behind the tile. A full rebuild involves tearing the wet zone down to bare studs, replacing compromised framing, rebuilding the floor substrate, and installing a modern, continuous waterproofing system from subfloor to ceiling. While slightly more involved, it guarantees absolute structural durability and long-term peace of mind.
Curbless vs. Standard Curbed Shower Conversions
Choosing between a traditional curbed shower and a curbless (barrier-free) design shapes both the construction process and the finished aesthetic:
| Feature | Standard Curbed Shower | Curbless (Barrier-Free) Shower |
|---|---|---|
| Entry Profile | 2″ to 4″ raised threshold | Completely flush with bathroom floor |
| Accessibility | Requires stepping over a small curb | Full roll-in, ADA-aligned accessibility |
| Installation Complexity | Standard shower pan framing | Requires recessing the floor or ramping |
| Drainage System | Standard center or offset point drain | Often pairs best with linear trench drains |
| Water Containment | High containment via physical curb | Requires precise floor slope (1/4″ per foot) |
| Relative Cost | Moderate | Higher (due to structural floor prep) |
Tub-to-Shower Conversion vs. Custom Walk-In Shower
A standard tub-to-shower conversion stays confined to the bathtub’s original alcove. A custom walk-in shower, on the other hand, expands beyond those borders. Custom walk-ins may involve removing partition walls, expanding into adjacent closet space, installing dual thermostatic shower valves, or adding frameless glass return panels.
If you are curious about what different configurations look like in real homes, take a moment to look through our completed renovations in a bathroom gallery to spark your creativity.
Managing Budget, Timelines, and Plumbing Logistics
Meticulous planning keeps remodeling stress to a minimum. Knowing how to plan a successful home remodeling project means establishing realistic expectations for cost, technical hurdles, and construction schedules before the first hammer swings.
Cost Factors for a Bathroom Tub to Shower Remodel
The total investment required for a shower remodel depends heavily on the materials you choose, your home’s foundation type, and any necessary plumbing relocations. Reviewing what you should expect for bathroom conversion costs will help you allocate funds across materials and labor.
Key factors that influence overall project cost include:
- Conversion Scope: Direct alcove conversions generally run $6,500 to $14,000 turnkey, while standard curbed conversions range from $8,000 to $16,000. Curbless, ADA-aligned conversions typically land between $12,000 and $22,000 due to structural floor adjustments. Full waterproofing rebuilds with high-end finishes often range from $14,000 to $25,000+.
- Glass Enclosures: A custom frameless heavy glass enclosure typically costs between $2,500 and $5,000 installed, whereas standard framed or semi-frameless sliding glass runs $800 to $1,800.
- Tile and Finish Materials: Basic ceramic tiles cost $2 to $5 per square foot for material, while designer porcelain or natural marble ranges from $15 to $40+ per square foot.
- Plumbing Relocations: Moving water supply lines and drain stacks to an entirely new wall can add $3,000 to $8,000 to your total plumbing scope.
Slab Foundations and Drain Relocation Logistics
In homes built on concrete slab foundations—very common across Orange County neighborhoods like Yorba Linda, Placentia, Anaheim Hills, Tustin, and Brea—drain work requires specialized handling.
Bathtub drains are plumbed with 1.5-inch waste lines, but modern building and plumbing codes require showers to have a minimum 2-inch drain pipe to accommodate higher water flow rates and prevent pooling. Furthermore, bathtub drains sit near one end of the alcove, while shower pans typically center the drain.
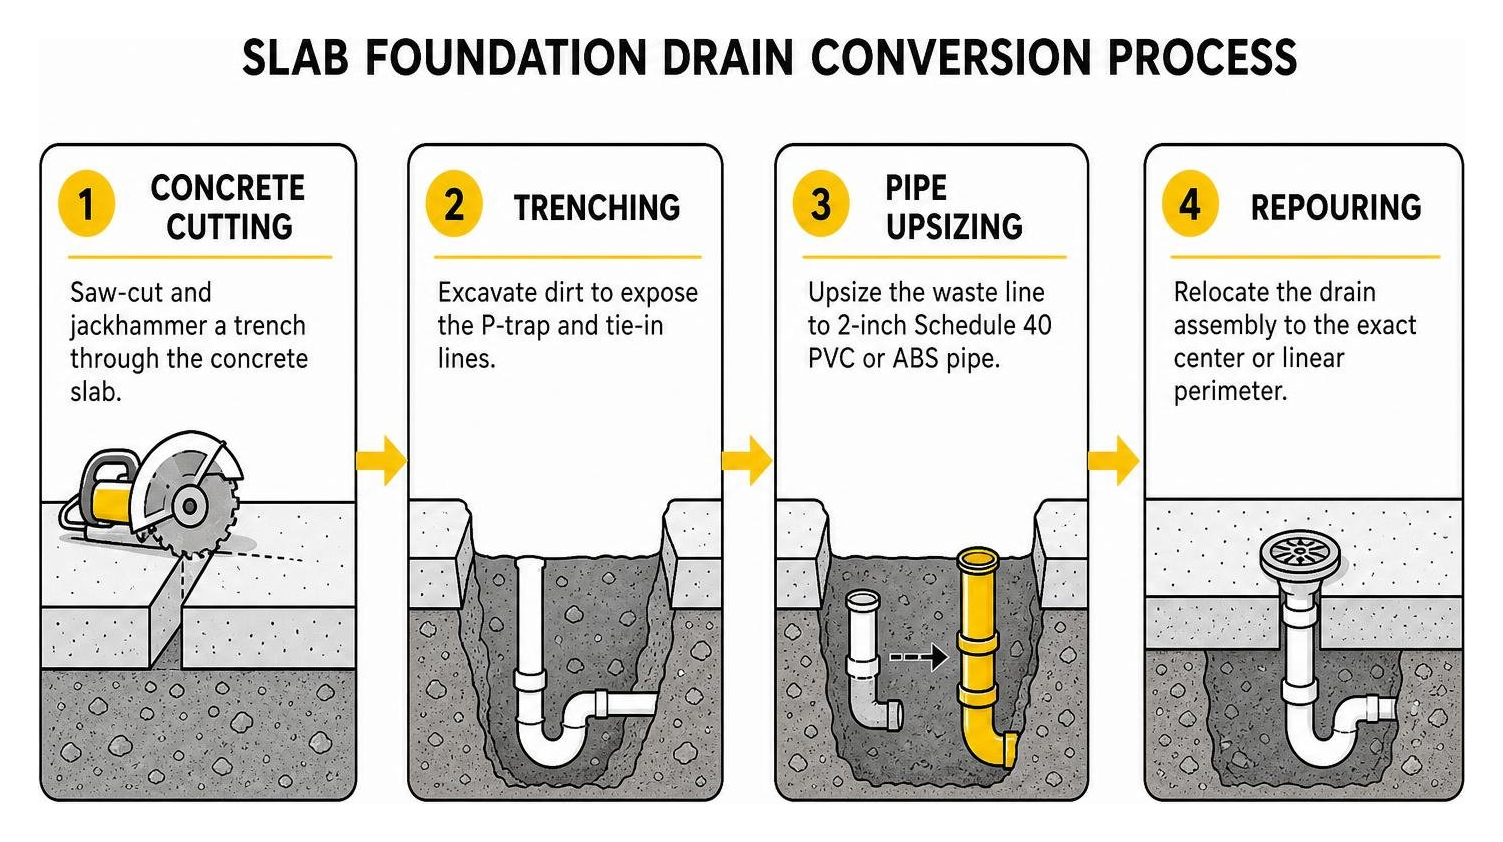
Relocating and upsizing a drain on a concrete slab involves:
- Saw-cutting and jackhammering a trench through the concrete foundation.
- Excavating dirt to expose the P-trap and tie-in lines.
- Upsizing the waste line to 2-inch schedule 40 PVC or ABS pipe.
- Relocating the drain assembly to the exact center or linear perimeter.
- Backfilling with gravel/sand and repouring structural concrete flush with the existing subfloor.
This slab trenching and drain relocation typically adds $800 to $2,500 to the project, but it is necessary to ensure proper drainage and pass local building inspections.
Permits, Building Codes, and Project Timelines
Permits are essential whenever you modify plumbing lines, alter framing, or adjust electrical circuits. Building departments require inspections for underground drain rough-ins, shower pan water tests (flood tests), and behind-the-wall framing/waterproofing before any tile is laid.
When it comes to construction timelines:
- Direct footprint conversions typically require 1 to 2 weeks of active construction.
- Curbless or full rebuild conversions usually take 2 to 3 weeks.
- Projects with major layout changes or complex slab plumbing can extend to 3 to 4 weeks.
Homes built before 1978 also require EPA Lead-Safe certified containment procedures during demolition to prevent lead dust contamination.
Essential Waterproofing, Tile Selection, and Installation Steps
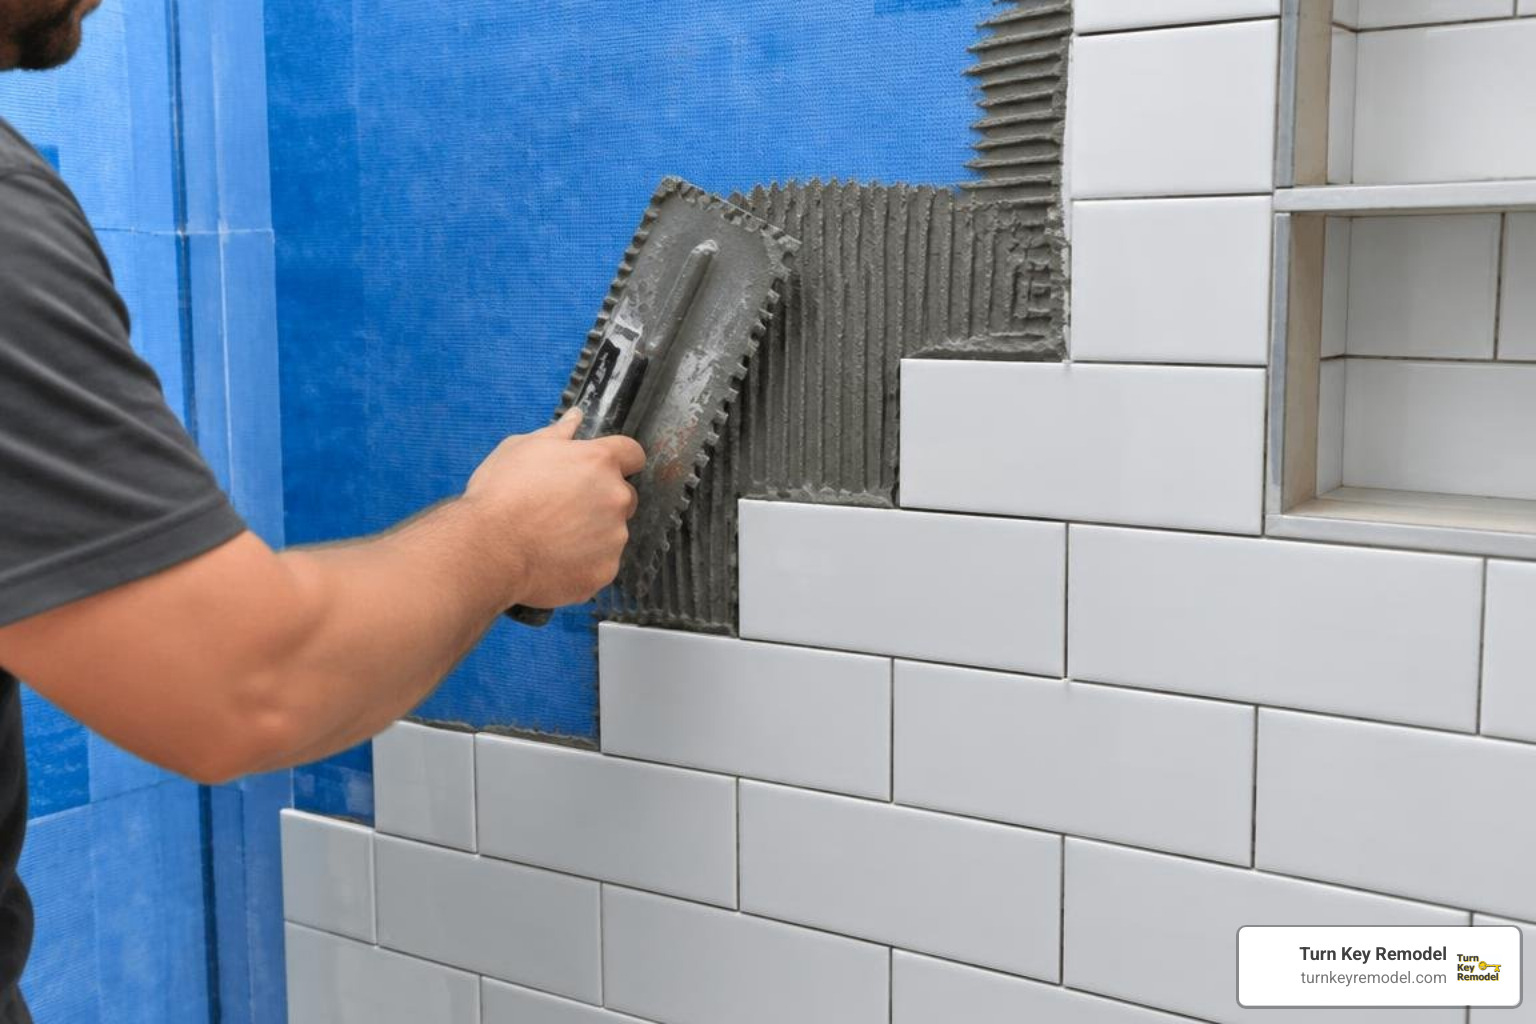
Tile and grout are decorative; they are not waterproof. Water naturally permeates grout joints and porous stone over time. The true barrier protecting your home’s structural framing is the waterproofing membrane hidden directly behind the tile.
Step-by-Step Bathroom Tub to Shower Remodel Process
A professional installation follows a strict, sequential workflow:
- Demolition and Disposal: Carefully removing the old tub surround, tub basin, drywall down to the studs, and clearing debris.
- Structural and Plumbing Rough-In: Inspecting wall studs, replacing rotted lumber, installing grab bar blocking, upsizing the drain line to 2 inches, and adjusting valve heights.
- Substrate and Pre-Slope Pan Installation: Hanging cementitious backer boards or high-density foam boards, and shaping the shower pan mortar bed with a crisp slope toward the drain.
- Waterproofing Application: Applying bonded sheet membranes (such as Schluter Kerdi) or seamless liquid membranes (like RedGard) across the entire pan, curb, and surrounding walls up to shower height.
- Flood Testing: Plugging the shower drain and filling the pan with water for 24 hours to verify absolute watertight integrity before setting a single tile.
- Tile Setting and Grouting: Precision-cutting tile, maintaining proper layout offsets, and locking everything in with mold-resistant, stain-resistant epoxy or high-performance modified grout.
- Glass Enclosure and Trim Fixtures: Measuring for custom tempered glass, installing shower valves, slide bars, and applying 100% silicone sealant along all transition joints.
Waterproofing Systems and Pan Construction
Modern waterproofing utilizes advanced bonded sheet membranes (like Schluter-KERDI) or high-build liquid elastomeric membranes (such as RedGard). These continuous barriers prevent water from reaching the framing, eliminating moisture issues before they start.
The shower pan itself must have a consistent slope—a minimum of 1/4 inch of fall per linear foot from the perimeter wall to the drain. This ensures that gravity continuously pulls every drop of water straight into the waste pipe without leaving standing puddles that invite mildew.
Tile Selection and Lippage Prevention
Choosing tile is the fun part, but technical installation rules still apply:
- Subway Tile Patterns: Standard 3×6 or modern 4×16 subway tiles look clean and timeless. Stacking them horizontally creates a modern profile, while traditional running bond adds classic charm.
- Large-Format Tiles & Offset Rules: Tiles larger than 18 inches reduce grout lines and create a sleek aesthetic. However, large tiles often have slight natural bowing. To prevent “lippage” (uneven edges catching your fingers or toes), manufacturers and tile industry standards mandate keeping pattern offsets at or below 33% (or 25% for extra-large formats) rather than a standard 50% brick-joint stagger.
- Trim and Edges: Always specify factory bullnose edge tiles or sleek metal profile edges (such as Schluter Jolly) for exposed transitions rather than raw cut edges.
- Floor Mosaics: Use 2×2 matte porcelain tiles, hexagons, or pebble mosaics inside the shower pan to ensure adequate traction and easily accommodate multi-directional slopes toward the central drain.
Frequently Asked Questions About Tub to Shower Conversions
How long does a tub to shower conversion take from start to finish?
A straightforward alcove conversion using existing plumbing locations typically takes 7 to 10 working days on site. If your project involves concrete trenching on a slab foundation, curbless floor recessing, or custom glass manufacturing (which requires precise post-tile laser measurements), total construction time usually spans 2 to 3 weeks.
Do I need a permit to convert a tub to a walk-in shower?
Yes. Converting a bathtub to a shower requires upsizing your waste drain from 1.5 inches to 2 inches to meet plumbing code standards. Because this involves modifications to your drainage system and water supply lines, your local municipal building department requires a plumbing permit and formal inspections.
How do I choose a qualified contractor for my shower remodel?
Look for a fully licensed, bonded, and insured general contractor or design-build specialist with documented wet-zone waterproofing expertise. Make sure they perform 24-hour flood tests, pull all required municipal permits, provide a comprehensive written scope of work, and offer a written workmanship warranty. You can learn more about finding the right partner by reviewing our guide on vetting reliable local bathroom remodeling contractors.
Conclusion
A well-executed shower remodel transforms your daily routine, elevates your home’s interior design, and ensures lasting accessibility and safety. Success comes down to meticulous early planning: confirming your plumbing layout, choosing high-performance waterproofing systems, and working with experienced trade professionals.
At Turn Key Remodel, our full-service design-build team handles every phase of your renovation across Orange County—from initial floor plan architecture and City permitting to precise tile setting and custom glass installation.
When you’re ready to explore your options, schedule your consultation to understand the average cost of a tub to shower conversion and let us bring your dream bathroom to life.