Take Your Kitchen to the Ceiling by Adding Cabinets on Top of Existing Cabinets
How to Add Cabinets Above Existing Cabinets
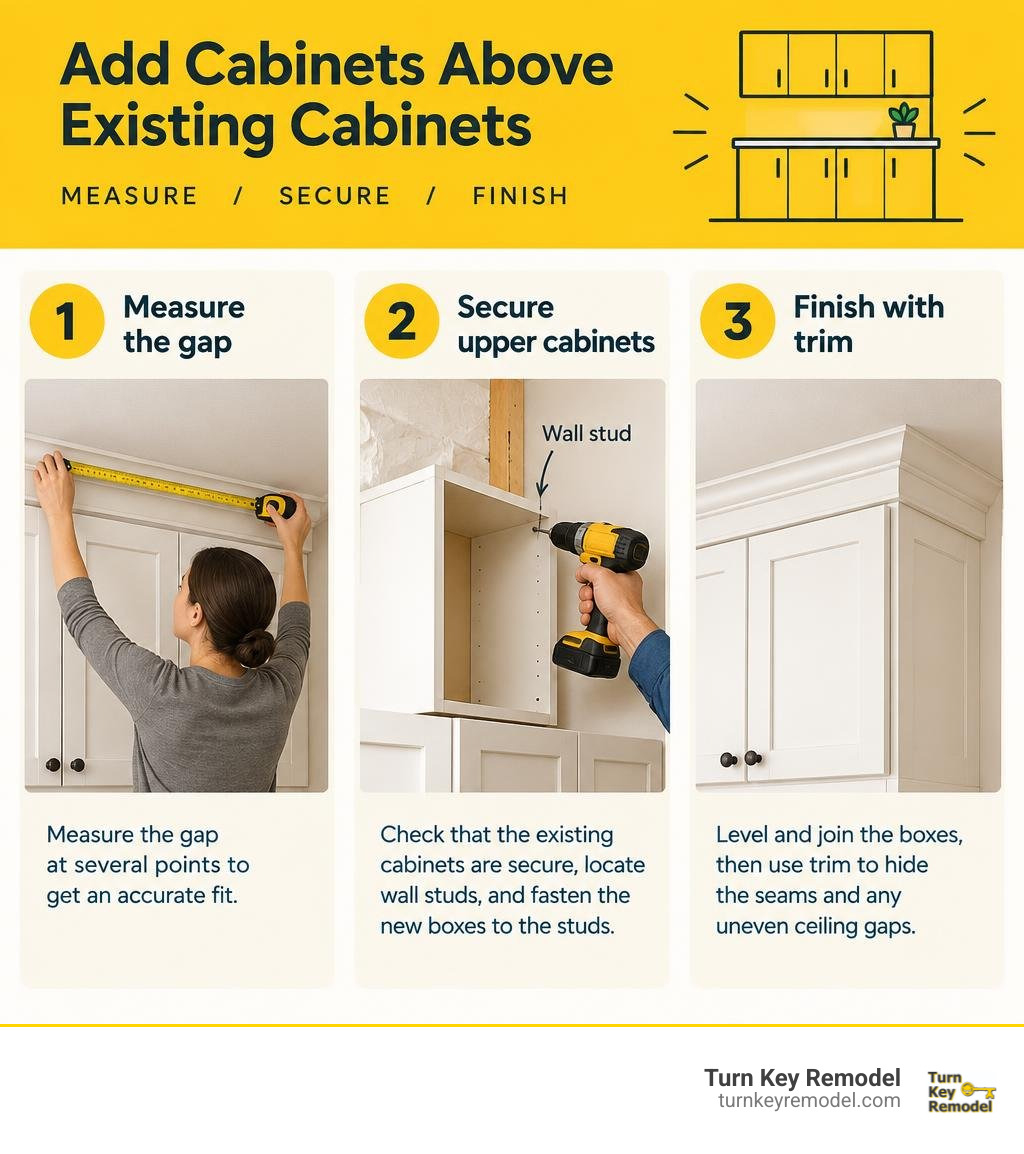
To add cabinets on top of existing cabinets, measure the gap at several points, then choose boxes that leave room for crown molding. Check that the existing cabinets are secure, locate wall studs, and fasten the new boxes to the studs. Level and join the boxes, then use trim to hide the seams and any uneven ceiling gaps. If you want the built-in look without extra storage, a framed riser and matching panels can fill the space instead.
I’m Mark Apicella, owner of Turn Key Remodel. With more than eight years in remodeling, I help homeowners plan how to add cabinets on top of existing cabinets as part of a kitchen design that looks right and stays secure.
Add cabinets on top of existing cabinets basics:
- adding crown molding to cabinets
- building a kitchen island with ikea cabinets
- farmhouse sink in existing cabinet
Choosing the Best Method to Extend Cabinets to the Ceiling
When deciding to close that awkward gap above your upper cabinets, you have three primary construction methods: building custom upper boxes, purchasing prefabricated stock cabinets, or installing a decorative riser fascia. Choosing the right path depends on your budget, whether you need functional storage, and how closely you want to match your existing cabinet architecture.
| Extension Method | Average Material Cost | Usable Storage Gain | Typical Install Time | Best Suited For |
|---|---|---|---|---|
| Custom Upper Boxes | ~$125 per 2-door box | High (100% functional depth) | ~2 hours per box | Exact profile matches & custom heights |
| Prefabricated Cabinets | $150 – $350 per unit | High (standard dimensions) | 1–2 hours per unit | Standard ceiling heights & quick installs |
| Decorative Riser Fascia | $500 – $1,500 total | None (aesthetic only) | 1–2 days full project | Gaps under 8 inches & budget upgrades |
If you decide that a complete redesign is a better fit for your layout, our kitchen services provide full-scale renovations tailored to your space.
Custom Upper Boxes vs. Prefabricated Units
Building custom boxes provides complete control over your dimensions, allowing you to maximize every fraction of an inch between your upper face frames and ceiling drywall. Frameless cabinets offer 10 to 15 percent more storage than framed cabinets because they eliminate the interior face frame lip, making them ideal for high-reach storage. You can reference this comprehensive building cabinets up to the ceiling tutorial or our guide on DIY built-in cabinets with doors from planning to final trim to see how box joinery comes together.
Prefabricated cabinets save considerable fabrication time. However, stock wall cabinets come in standardized heights (such as 12, 15, or 18 inches) and a fixed standard depth of 12 inches. If your ceiling height does not match these stock dimensions, you may have to compensate with oversized filler strips or large crown moldings.
Material Selection: Plywood vs. MDF vs. Dimensional Lumber
Selecting the proper substrate determines both the structural integrity and surface finish of your cabinet extensions:
- Cabinet-Grade Plywood (3/4-inch): The gold standard for cabinet box construction. Plywood holds screws securely across face grains and resists sagging under load. Use pre-finished or hardwood-veneered plywood if you plan to stain your cabinetry.
- Medium-Density Fiberboard (3/4-inch MDF): The preferred option for painted cabinets. MDF provides a smooth, grain-free surface that will not expand or contract with humidity shifts, preventing hairline paint cracks along joints.
- Dimensional Lumber (e.g., 2×2 or 2×4 blocking): Best reserved for interior structural framing, riser backing, and ceiling anchoring cleats rather than exposed cabinet boxes.
For edge finishing, apply heat-activated veneer edge banding to exposed plywood edges to create a smooth, paintable surface and seal the core against kitchen moisture. If you prefer factory-grade joinery and bespoke door profiles, partnering with experienced custom cabinet makers ensures an exact architectural match.
Step-by-Step Guide to Add Cabinets on Top of Existing Cabinets
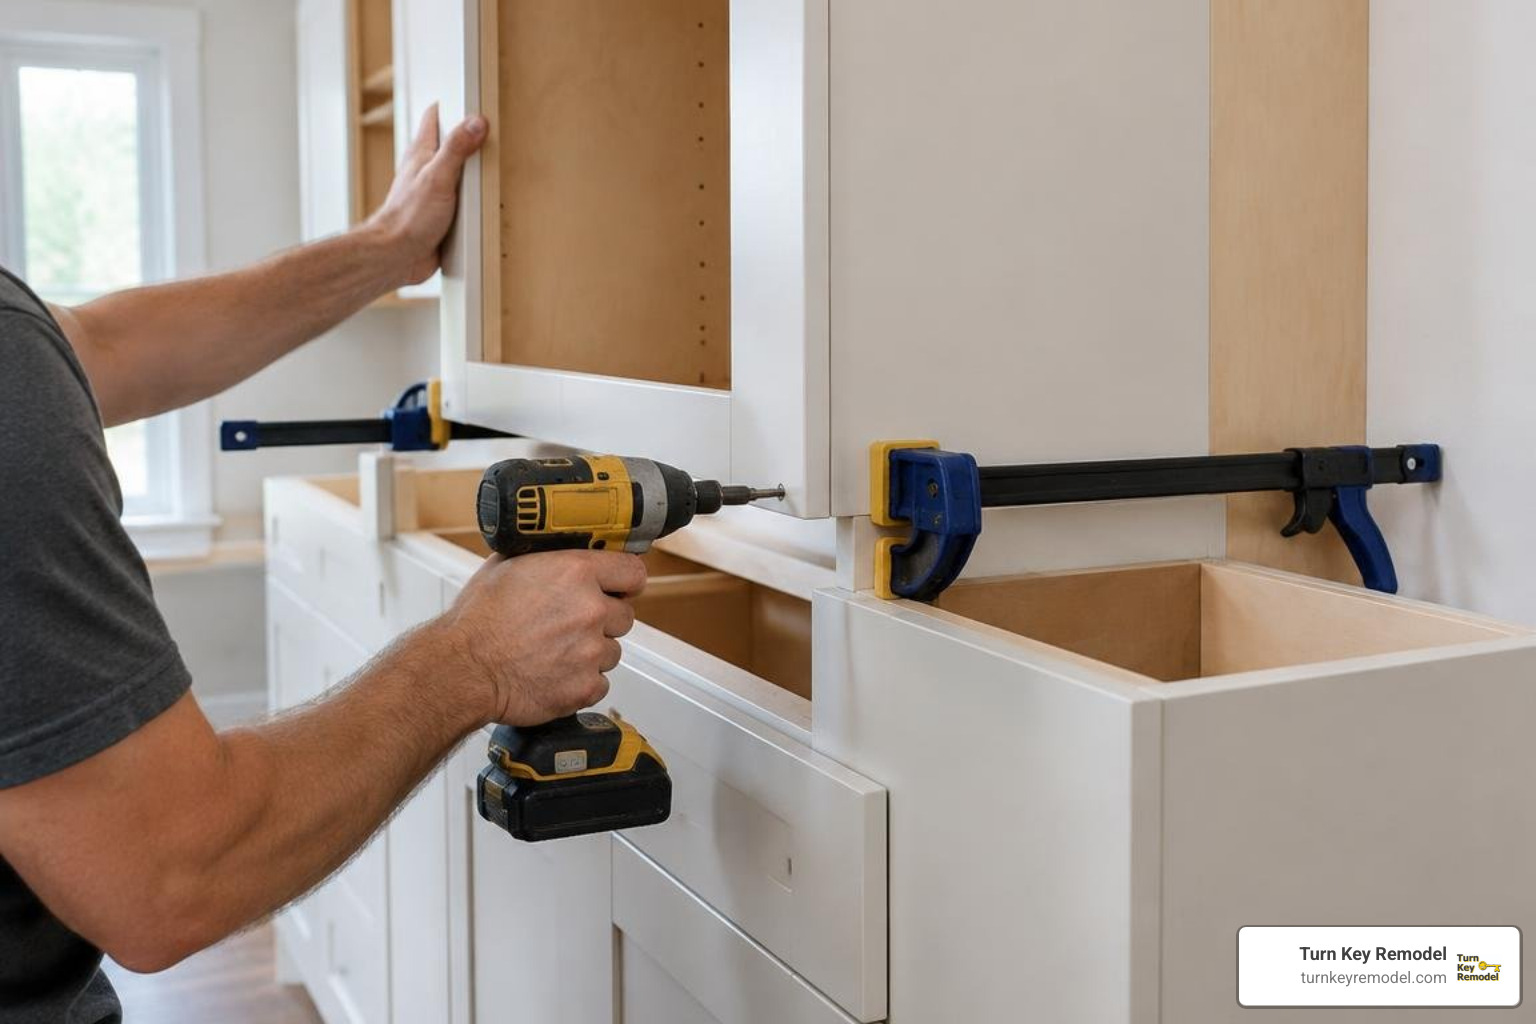
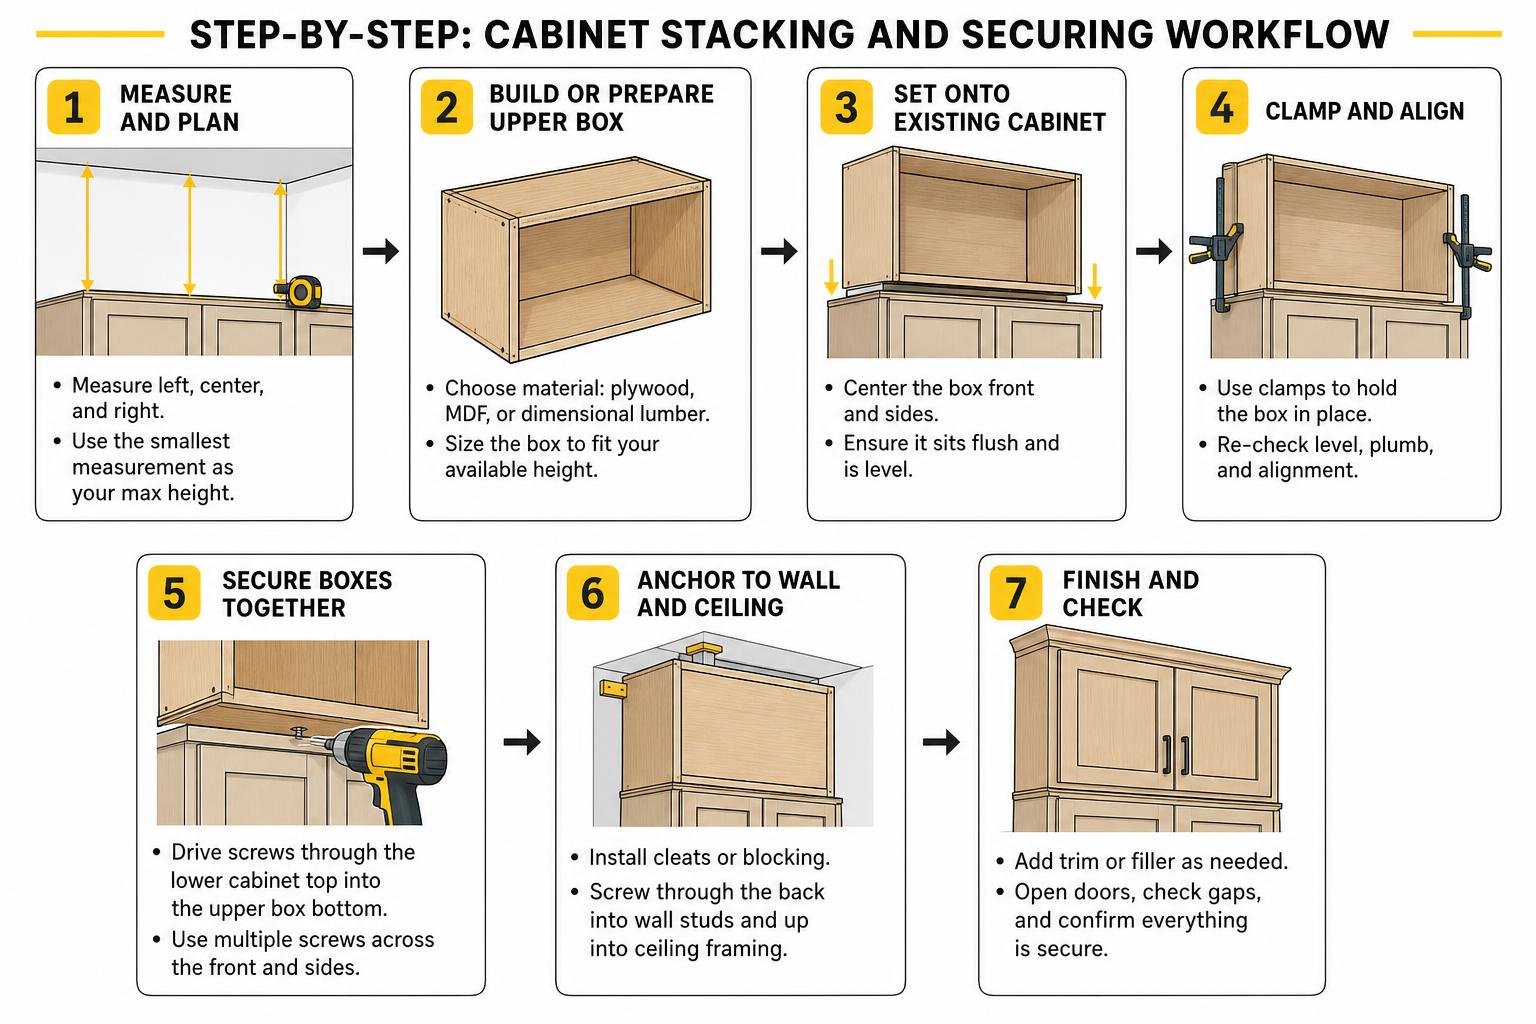
Stacking cabinetry requires precision alignment and solid anchoring. Follow this workflow to ensure your new upper boxes remain plumb, level, and structurally integrated with your existing kitchen casework.
Planning and Measuring Before You Add Cabinets on Top of Existing Cabinets
Accurate measurement prevents alignment errors when you add cabinets on top of existing cabinets. Standard base cabinets sit at 34 1/2 inches high, and upper wall cabinets are typically installed 18 inches above the countertop.
- Calculate Usable Vertical Space: Measure from the top of the existing cabinet face frame to the ceiling at three points: the left corner, center, and right corner. Take the smallest measurement as your maximum height baseline.
- Deduct for Trim: Subtract the vertical drop of your crown molding profile (typically 2 to 6 inches) to determine the finished height of your new cabinet boxes. Follow this step-by-step cabinet extension guide for additional clearance calculations.
- Locate Wall Studs: Use a magnetic or digital stud finder to locate every wall stud behind the upper clearance zone. Mark stud centers clearly with painter’s tape below and above your work line. If stud locations do not align with the structural rails of your new boxes, plan to install horizontal 2×4 wood blocking between the studs inside the wall cavity.
Anchoring to Wall Studs and Ceiling Joists
Never rely on drywall anchors to hold upper cabinetry. Upper boxes must anchor directly into the structural framing of your home.
- Set Reference Lines: Project a horizontal beam across your workspace using a self-leveling laser level. Establish the top alignment line for your new boxes.
- Mount Support Cleats: If working alone, screw a temporary ledger board or 2×2 cleat to the wall studs directly along the top edge of the existing cabinets to support the weight of the boxes during fastening.
- Drive Structural Fasteners: Lift the new upper cabinet onto the support cleat. Drive 2-1/2-inch or 3-inch heavy-duty structural cabinet screws (such as GRK washer-head cabinet screws) through the cabinet’s top and bottom rear mounting rails directly into the wall studs. For ceiling-mounted island configurations, locate ceiling joists and anchor through the top cabinet panel with heavy-duty lag fasteners.
Fastening and Aligning Upper Boxes to Existing Frames
Once the boxes are mounted to the wall framing, unify the stacked units:
- Clamp the Face Frames: Use face-frame clamps to align the front edge of the new upper box flush with the existing cabinet frame below. Maintain a 1/4-inch reveal or make them flush based on your door overlay design.
- Shim the Gaps: Insert tapered wood shims beneath low spots between the stacked boxes to correct for any deflection in the lower cabinet tops.
- Pre-Drill and Fasten: Pre-drill countersunk pilot holes through the top rail of the lower cabinet into the bottom rail of the upper box. Fasten the units together using 2-1/2-inch trim-head screws, checking that the face frames remain aligned.
Seamless Finishing: Scribing, Trim, and Crown Molding

The transition between your new cabinet boxes and the ceiling dictates the overall aesthetic quality of the project. Trim conceals structural fasteners, bridges uneven drywall, and gives stacked cabinetry a bespoke, architectural presence.
How to Add Cabinets on Top of Existing Cabinets with Uneven Ceilings
Ceilings are rarely level, especially in older homes. If your ceiling slopes across the cabinet run, do not tilt the cabinet boxes to follow the slope; the boxes must remain level for the doors to operate properly.
- Scribing Technique: Hold a filler strip or top fascia board against the ceiling, keeping it level. Set a compass or scribing tool to the widest gap between the board and the drywall. Drag the compass point along the ceiling contour while the pencil transfers that exact line onto your board.
- Cutting the Scribe: Cut along the scribed line with a jigsaw or track saw beveled at a slight back-angle (5 degrees) for a tight fit against the drywall.
- Shadow Lines: If the ceiling has severe dips, consider setting the top trim back 1/8 inch to create a shadow line that visually masks ceiling imperfections.
Installing Crown Molding and Concealing Seams
Crown molding bridges the gap between your upper riser framework and the ceiling, providing a traditional, built-in appearance.
- Install Backer Blocking: Nail a continuous 1×2 or 2×2 nailer strip along the top edge of your new cabinet boxes to provide a solid nailing surface for your molding.
- Cut Outside Corners: Miter outside corners at 45 degrees, dry-fitting each piece to verify the seam before applying wood glue and pinning with 18-gauge brad nails.
- Cope Inside Corners: Rather than standard miters, cope inside corners with a coping saw. Coped joints remain tight during seasonal humidity fluctuations. To explore molding styles, learn how to give your kitchen cabinets a built-in look with crown molding.
Paint Matching and Caulking for a Built-In Look
A factory-grade paint finish ensures that your additions blend seamlessly with your existing cabinetry.
- Caulking Seams: Apply a smooth bead of high-quality paintable acrylic-silicone caulk along all trim seams, corners, and ceiling junctions. Smooth the bead with a damp sponge or gloved finger to eliminate excess.
- Filling Fasteners: Fill all countersunk screw and brad nail holes with wood filler. Once cured, sand flush using 220-grit sandpaper.
- Spectrophotometer Paint Matching: Remove one of your existing cabinet doors and bring it to a professional paint retailer for a spectrophotometer color scan. This technology analyzes color and sheen under controlled lighting to provide a precise match.
- Application: Prime raw wood or MDF edges with a stain-blocking shellac or oil-based primer. Finish with two coats of cabinet-grade enamel or lacquer using a high-density foam roller or HVLP sprayer for a smooth, brush-mark-free surface.
Weight Capacity, Safety, and Structural Considerations
Upper cabinet additions must be structurally engineered to hold heavy kitchen items safely over time.
- Safe Load Limits: Keep upper cabinet loading within 25 to 30 lbs per linear foot to prevent shelf deflection and strain on wall anchors. Reserve high-reach upper cabinets for lightweight or seasonal items, such as serving platters, holiday dishware, and specialty cookware.
- Structural Integrity of Existing Boxes: Before adding weight to the top of existing cabinets, inspect the original mounting rails. If the original installers used drywall screws instead of rated cabinet screws, drive 3-inch structural screws through the existing cabinet hanging rails into the studs before stacking new units.
- Mechanical Clearances: Ensure your upper cabinet boxes do not block HVAC return vents, exhaust ducts, or ceiling light fixtures. Maintain at least a 3-inch clearance from recessed can lights unless they are rated for insulation contact (IC-rated) and utilize cool-burning LED fixtures.
Frequently Asked Questions About Upper Cabinet Extensions
Is it cheaper to add cabinets on top of existing cabinets or buy new full-height units?
Adding upper cabinet boxes or decorative riser framing onto existing cabinetry is significantly more affordable than ordering new full-height cabinets. A DIY upper box or riser extension typically costs between $500 and $1,500 in materials, whereas replacing an entire kitchen suite with 42-inch or 48-inch custom cabinets often exceeds $10,000 to $25,000 when factoring in demolition, fabrication, and installation labor.
Can you add cabinets directly to drywall without hitting studs?
No. You should never anchor upper kitchen cabinets solely to drywall or plaster using toggle bolts or hollow-wall anchors. Upper cabinetry experiences continuous downward shear weight and rotational leverage when doors open and shelves are loaded. Fasteners must bite at least 1-1/2 inches into solid 2×4 wall studs or structural horizontal blocking.
How do you match the finish of older existing cabinets?
Matching factory finishes on older cabinets requires accounting for natural wood aging and UV exposure. If your cabinets are painted, have an existing cabinet door scanned with a spectrophotometer for an accurate color match, and apply low-VOC cabinet enamel. If your cabinets feature stained natural wood, wipe test stains on scrap cuts of the same wood species, adjusting toners and clear topcoats until the sample matches the aged patina of your kitchen.
Elevate Your Kitchen Casework
Extending your cabinetry to the ceiling eliminates dust-collecting dead space, expands functional storage, and gives your kitchen a custom, cohesive aesthetic. Whether you build custom upper boxes or install a decorative riser with crown molding, accurate planning and solid framing ensure lasting results.
Turn Key Remodel provides comprehensive design-build services across Orange County, including Yorba Linda, Placentia, Anaheim Hills, Tustin, and Brea. With more than 20 years of craftsmanship, our team handles whole-home renovations, custom cabinetry, and kitchen makeovers from initial concept through final installation. If you are ready to expand your kitchen storage and elevate your home’s interior, explore our full suite of cabinetry services to get started.