
Install Cabinet Crown Trim Easily for a High-End Look
How to Attach Crown Molding to Cabinets
To attach crown molding to cabinets, measure the cabinet run, then fasten wood cleats to the cabinet tops to give the trim a solid nailing surface. Cut and test-fit each corner before securing the molding to the cleats with glue and brad nails. Fill the nail holes, caulk small gaps, and paint or stain to match.
The cleats matter most on frameless cabinets, which have no face frame to nail into. Check that the molding clears the doors before you fasten it.
I’m Mark Apicella, owner of Turn Key Remodel in Orange County, with more than eight years of remodeling experience. In this guide, I’ll show you how to attach crown molding to cabinets and handle the details that make the finish look seamless.
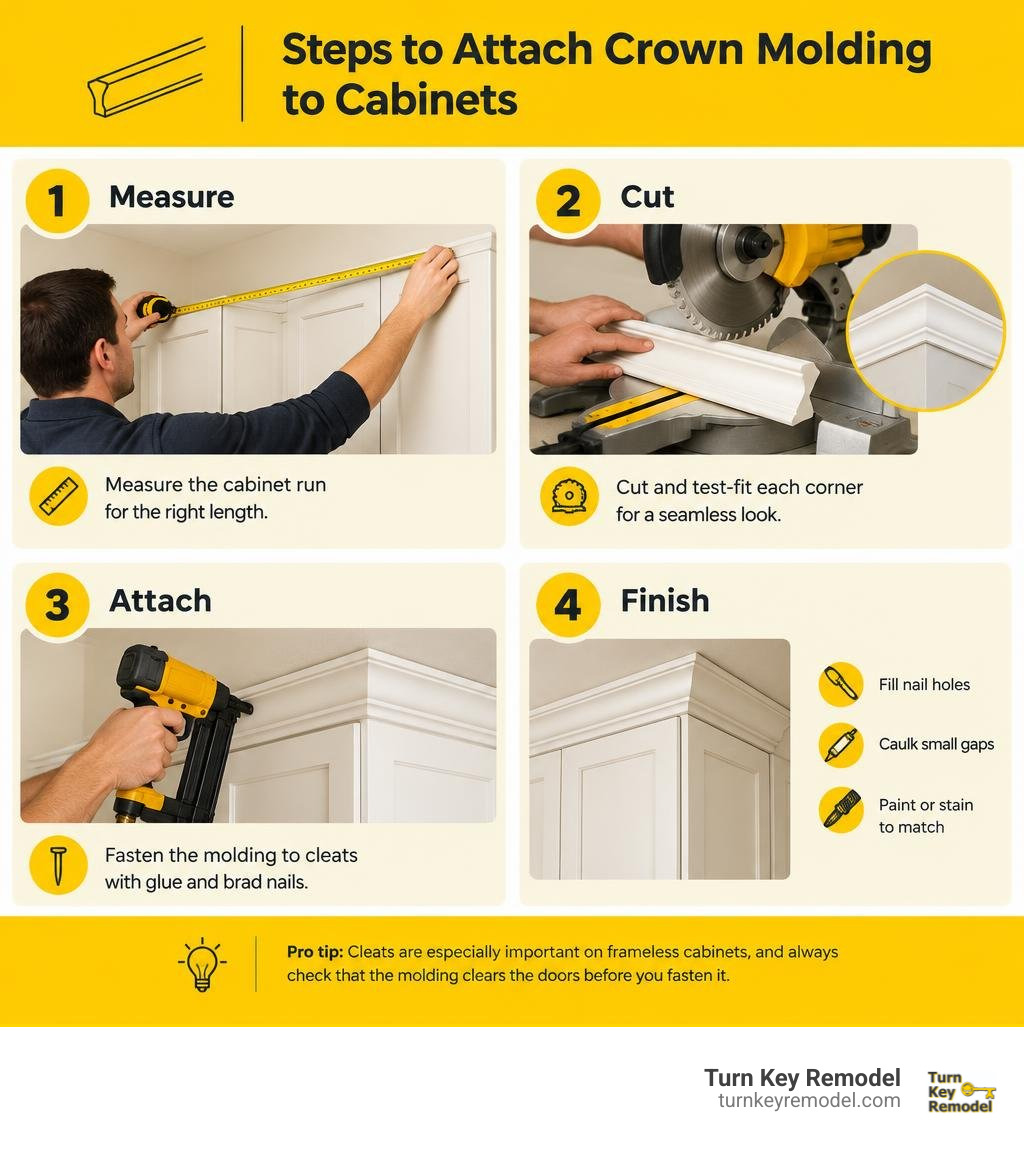
Attach crown molding to cabinets terms to learn:
- adding crown molding to cabinets
- add cabinets on top of existing cabinets
- kitchen cabinet installation
Essential Tools, Materials, and Angle Calculations
Installing upper cabinet trim is one of the most cost-effective ways to upgrade your kitchen. In fact, a straightforward installation can take as little as 3 to 6 hours for a standard kitchen layout, with material costs often starting around $35 to $100 depending on your choice of wood or pre-primed composite.
Before making your first cut, gather the correct toolkit:
- 10-inch or 12-inch compound miter saw
- 18-gauge cordless or pneumatic brad nailer (with 1-1/4 inch and 1-3/4 inch brads)
- Tape measure and combination square
- Coping saw (for inside corner joints)
- Safety goggles and ear protection
- Quality wood glue (such as a no-drip molding adhesive)
- 1×2 pine boards or scrap hardwood for backing cleats
- Fast-acting CA glue with activator (optional, for rapid miter bonding)
- Paintable acrylic latex caulk and wood filler
- 220-grit sandpaper
You can choose from several material profiles. Pre-primed MDF is an affordable choice that resists temperature-related warping and paints cleanly. Solid hardwood (maple, oak, or cherry) is ideal when matching stained cabinetry. High-density polyurethane foam moldings offer a lightweight alternative that cuts easily.
Understanding crown angles is crucial. Crown molding sits on the cabinet at a slope called the spring angle (the angle between the back of the molding and the flat cabinet face). The table below lists standard compound miter saw settings for cutting molding flat on the saw table:
| Spring Angle | Miter Saw Angle Setting | Bevel Saw Angle Setting | Best Cabinet Match |
|---|---|---|---|
| 38° | 31.6° | 33.9° | Traditional ornate profiles |
| 45° | 35.3° | 30.0° | Standard contemporary cove profiles |
| 52° | 38.4° | 26.6° | High-profile, steep-slope classic moldings |
Preparing Support Cleats to Attach Crown Molding to Cabinets
Cabinet tops rarely present a wide, flat lip for direct nailing. If you attempt to nail molding straight into thin cabinet top rails, you risk splitting the face frame or interfering with top door hinges.
To create a sturdy foundation, secure 1×2 pine nailing blocks (cleats) along the top perimeter of your cabinet boxes.
When building out your framework, learn how to give your kitchen cabinets a built-in look with crown molding by matching the cleat setback to your door style:
- Partial Overlay Cabinets: Mount the cleat flush or slightly set back from the front face frame edge.
- Full Overlay Cabinets: Set the cleat flush with the top of the box and extend it forward by the exact thickness of your doors (usually 3/4 inch). This prevents the molding from blocking the top swing of the doors.
- Corner Gussets: Fasten triangular wood gussets inside the upper corners of open-top cabinet boxes to reinforce the nailer strips without driving screws through finished exterior surfaces.
Step-by-Step Guide to Attach Crown Molding to Cabinets
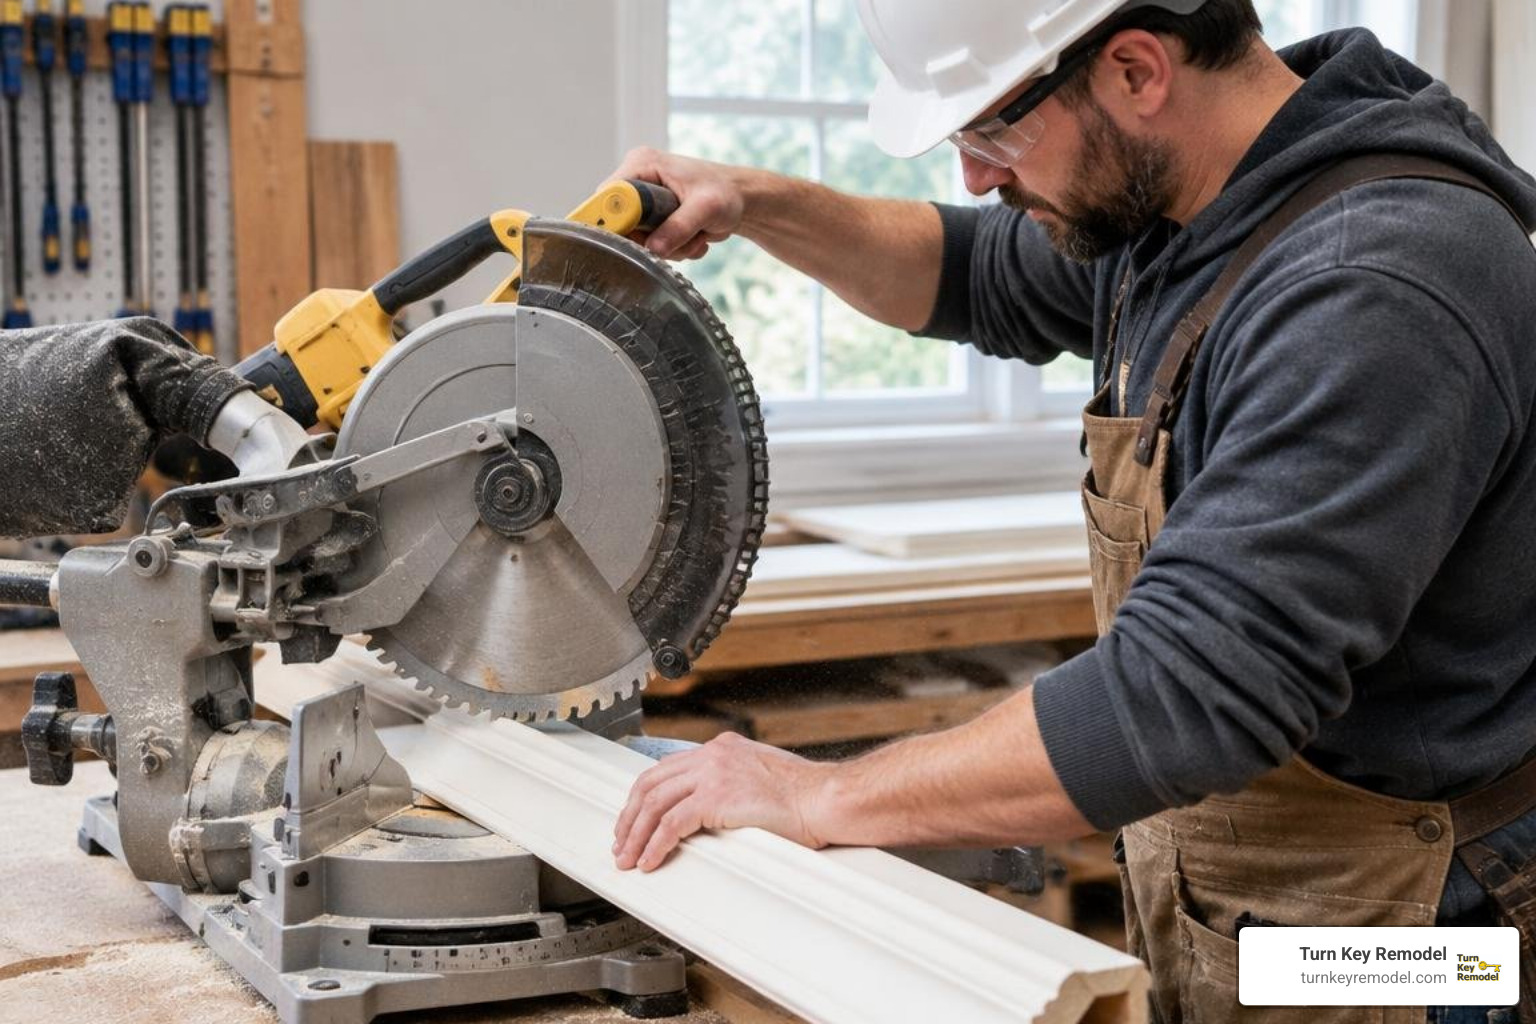
Follow this proven sequence to ensure accurate cuts, tight seams, and a stable installation across your entire cabinet run. For additional background on step-by-step prep, check out How to Put Up Crown Molding On Kitchen Cabinets: Step-by-Step.
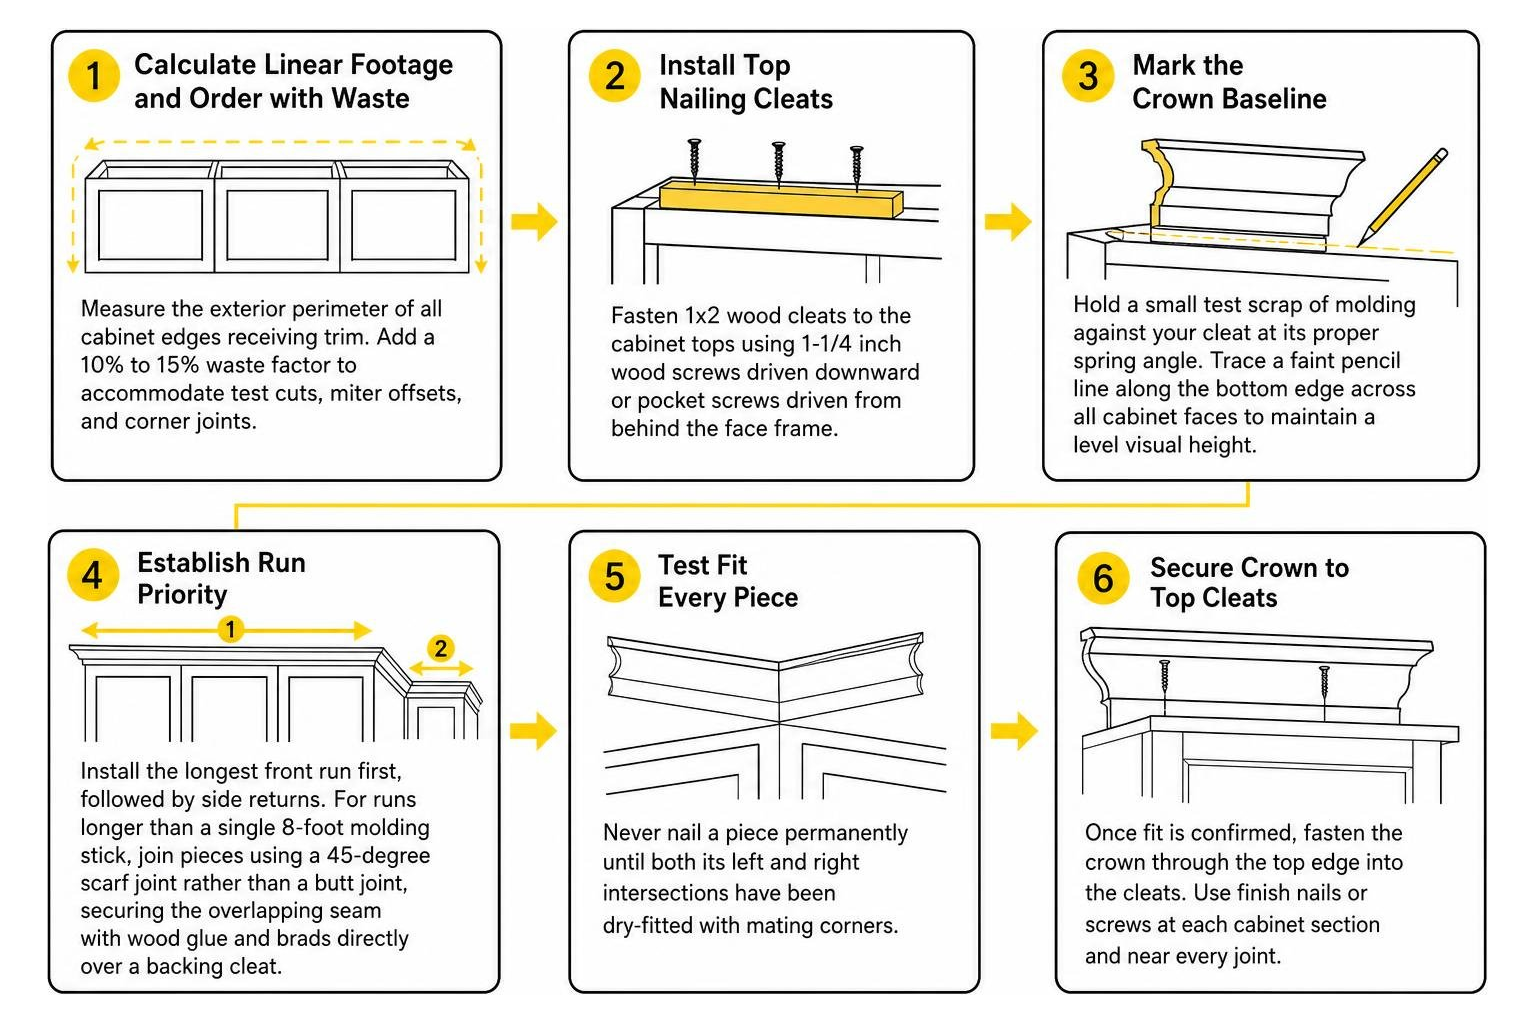
- Calculate Linear Footage and Order with Waste: Measure the exterior perimeter of all cabinet edges receiving trim. Add a 10% to 15% waste factor to accommodate test cuts, miter offsets, and corner joints.
- Install Top Nailing Cleats: Fasten 1×2 wood cleats to the cabinet tops using 1-1/4 inch wood screws driven downward or pocket screws driven from behind the face frame.
- Mark the Crown Baseline: Hold a small test scrap of molding against your cleat at its proper spring angle. Trace a faint pencil line along the bottom edge across all cabinet faces to maintain a level visual height.
- Establish Run Priority: Install the longest front run first, followed by side returns. For runs longer than a single 8-foot molding stick, join pieces using a 45-degree scarf joint rather than a butt joint, securing the overlapping seam with wood glue and brads directly over a backing cleat.
- Test Fit Every Piece: Never nail a piece permanently until both its left and right intersections have been dry-fitted with mating corners.
Cutting Mitered and Coped Corner Joints
There are two primary methods for cutting crown molding corners:
- Upside-Down and Backwards (Nested Method): Place the molding upside down on your miter saw deck so the ceiling edge rests against the saw table and the cabinet edge rests against the vertical fence. Set the saw miter angle to 45° (left or right) with the bevel at 0°. This is often the simplest method when using a crown molding stop jig.
- Flat on Saw Table (Compound Miter Method): Lay the molding face up flat on the table, setting both the miter and bevel angles according to your molding’s spring angle table (for example, 35.3° miter and 30.0° bevel for standard 45° spring angle trim).
For a visual demonstration of simplified layout techniques, see this beginner cabinet crown tutorial.
Inside corners fit together best when coped rather than simple mitered. Cut the first piece square to butt directly into the corner. Cut the mating piece at an inside 45-degree angle, then use a handheld coping saw to cut away the back-beveled wood along the exposed contour line. Coped joints stay tight even if cabinet corners are slightly out of square.
How to Attach Crown Molding to Cabinets with Frameless Construction
Frameless (European-style) cabinets have doors that cover the entire face of the cabinet box, leaving no exposed face frame for mounting trim. If you nail trim directly to the top edge, the cabinet doors will bind against the molding.
To resolve this, build an L-shaped mounting sub-frame:
- Fasten a horizontal pine strip flat along the top edge of the cabinet box.
- Secure a vertical drop-fascia board to the front of this horizontal strip using pocket screws spaced every 8 to 10 inches.
- Bring the vertical fascia forward until it sits flush with the front surface of the cabinet doors.
- Attach your decorative crown molding directly to this extended fascia board.
If you are building your own storage units, review our guide to DIY built-in cabinets trim planning for tips on integrating top mounting flanges before hanging your boxes.
Fastening Methods: Nails, Blocking, and Fast-Drying Adhesives
Secure attachments require both mechanical fasteners and modern adhesives:
- Brad Nailing Pattern: Drive 18-gauge brad nails every 12 inches along the molding run, placing nails within 1 to 2 inches of all corner joints and scarf splices. Angle nails slightly in alternating directions (cross-nailing) to maximize grip into the wood cleats.
- Glue Reinforcement: Apply a bead of no-run wood glue along the cleat contact surface before positioning the trim.
- Outside Corner Bonding: Use fast-acting cyanoacrylate adhesive (CA glue with an aerosol activator) on outside corner miters. Apply CA glue to one mitered face and spray activator on the opposite face; join the pieces firmly for 10 seconds to create an instant bond that prevents corners from opening up later. For professional adhesive techniques, read about fast-acting adhesives and trim glue.
- Painter’s Tape Clamping: Place strips of blue painter’s tape across outside corners under tension while the primary wood glue cures fully over 24 hours.
Handling Uneven Ceilings and Cabinets Short of the Ceiling
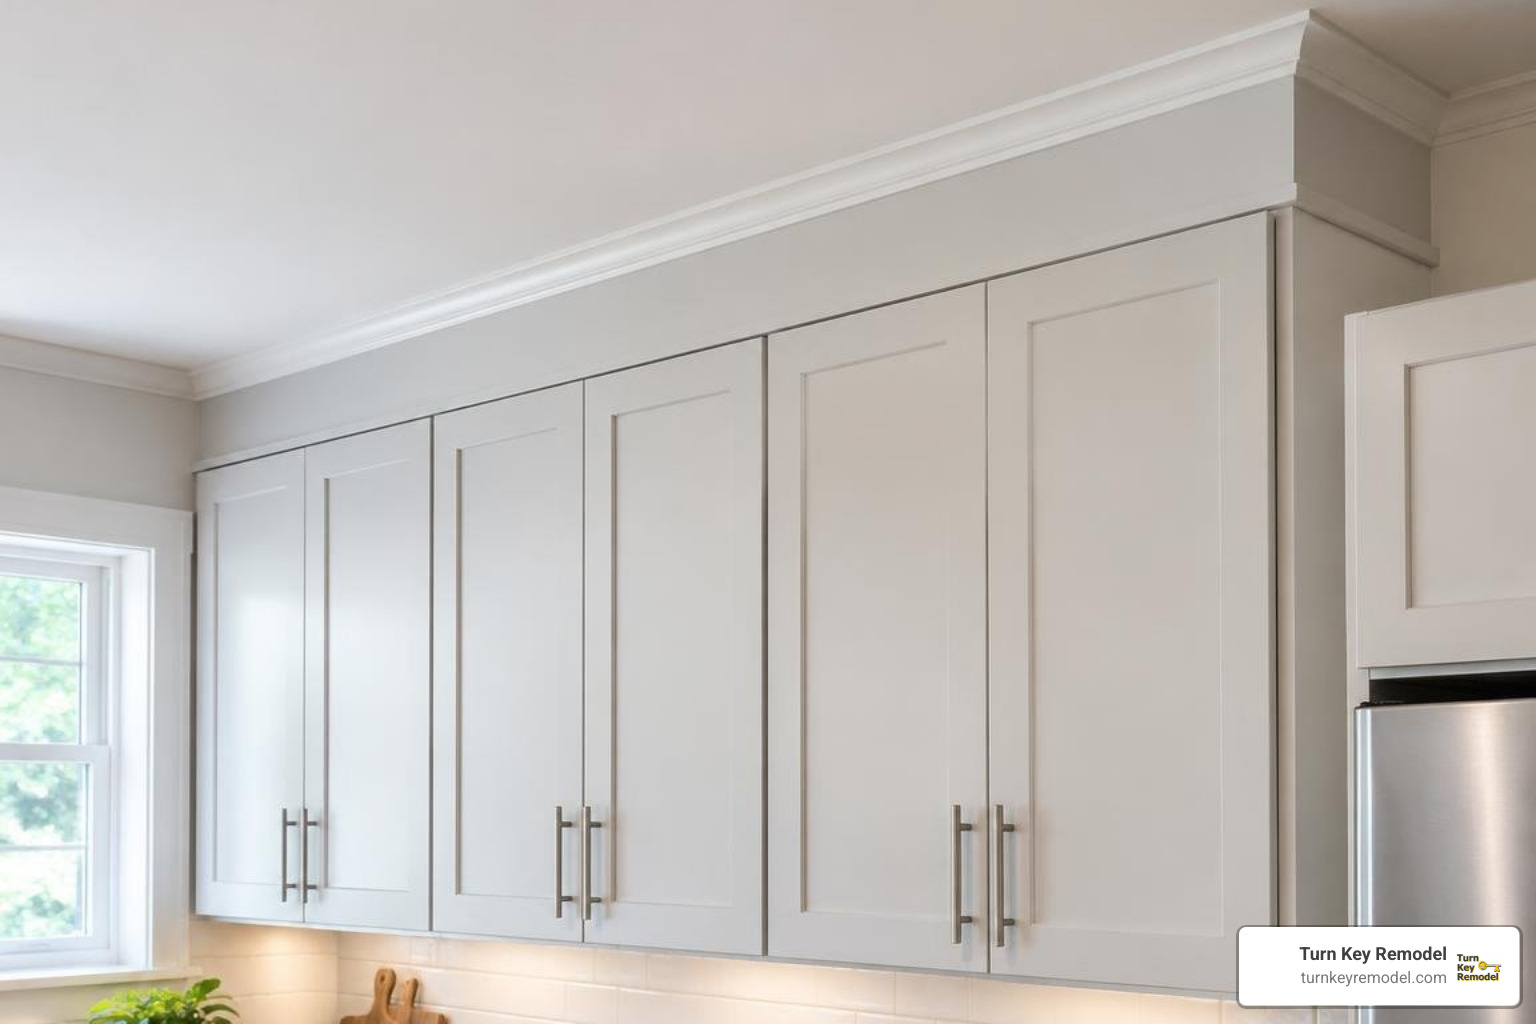
When upper cabinets do not extend all the way to the ceiling, you have two primary options: finish the cabinets as a freestanding architectural run or span the gap to the ceiling with a two-piece riser system.
If leaving a gap above the cabinets, maintain at least 9 inches of clearance between the top of the crown molding and the ceiling drywall. Gaps smaller than 9 inches create dark, cramped shadow pockets that are difficult to dust.
For kitchens where cabinets sit 3 to 8 inches below the ceiling, bridge the opening by installing a vertical riser (fascia) board on top of the cabinet cleats, then mount your crown molding at the top of the riser so it meets the ceiling seamlessly. For larger gaps, explore our guide on adding cabinets on top of existing cabinets to expand your functional storage.
Troubleshooting Sloped Ceilings and Uneven Cabinet Tops
Ceilings and cabinet boxes are rarely perfectly level, especially in older homes across Orange County, Tustin, and Brea. Here is how to correct common alignment issues:
- Establish a Level Baseline: Run a laser level across the top edge of your cabinet installation to find the lowest dip or highest hump. Align your backing cleats to the true level line rather than following minor box variations.
- Use Leveling Shims: Slide tapered cedar shims beneath the support cleats to bring low cabinet tops into horizontal alignment before fastening. Trim excess shim material flush with a utility knife.
- The Toe-Kick Riser Method: If cabinet tops vary by more than 1/4 inch, fasten a vertical 1×4 flat board (similar to toe-kick stock) along the top edge of the boxes to establish a clean, uniform plane, then mount your crown to the front of this board.
- Scribe the Top Edge: When crown molding meets an uneven ceiling, hold the molding against the ceiling line, run a compass along the drywall contours to transfer the wave to your trim, and shave away high spots using a hand plane or belt sander.
Seamless Finishing Touches and Common Mistakes to Avoid
A professional finish relies on proper surface prep after all carpentry is complete:
- Fill Fastener Indentations: Apply wood filler or color-matched putty to all brad nail holes. Overfill holes slightly, let dry completely, then sand smooth with 220-grit sandpaper.
- Caulk Joints and Wall Transitions: Run a thin bead of flexible, paintable acrylic latex caulk along the bottom seam where the crown meets the cabinet box and along the top ceiling interface. Smooth the bead immediately using a damp sponge or finger. Flexible caulk accommodates natural seasonal settling without cracking.
- Paint or Stain Application: For painted cabinetry, apply two coats of matching cabinet-grade paint (typically a satin or semi-gloss finish). Satin paints hide subtle joint seams better than high-gloss coatings.
Common Installation Mistakes to Avoid:
- Pinched Door Clearances: Failing to check door swing clearance before permanently nailing down cleats.
- Direct Nailing into Thin Tops: Driving nails into 1/2-inch cabinet roof panels without installing solid backing cleats.
- Skipping Test Miters: Cutting expensive hardwood trim without verifying miter saw stop angles on scrap wood first.
- Improper Spring Angle Alignment: Letting molding roll forward or backward against the saw fence during nested cuts, resulting in uneven corner heights.
If you are planning a full kitchen remodel or would like expert assistance, read our guide to hiring professional cabinet installers.
Frequently Asked Questions about Cabinet Crown Molding
Does crown molding have to touch the ceiling?
No. Crown molding looks balanced either touching the ceiling (often using a two-piece riser assembly) or terminating open with at least 9 inches of overhead clearance. Avoid leaving narrow 2-to-4-inch gaps, as they collect dust and make ceilings feel lower.
What is the easiest way to cut cabinet crown molding corners?
The simplest method for beginners is using an adjustable crown molding jig on your miter saw. The jig holds the molding firmly at its exact spring angle (upside down and backwards) against the fence, allowing you to make standard 45-degree cuts without adjusting compound bevel dials.
How do you secure crown molding without damaging cabinet faces?
To protect pre-finished cabinet faces, attach 1×2 wood mounting cleats to the top exterior of the cabinet boxes with screws driven from inside the box or into top frame rails. Then nail and glue the molding into these sacrificial cleats rather than through the front faces of your cabinetry.
Conclusion
Installing cabinet crown molding adds architectural depth and value to your home. By taking accurate measurements, adding solid backing cleats, and cutting your corner joints with precision, you can achieve a custom, built-in look in just a few hours.
At Turn Key Remodel, our team delivers high-quality craftsmanship, in-house interior design, and end-to-end project management across Orange County, Yorba Linda, Placentia, Anaheim Hills, Tustin, and Brea. Whether you are updating existing trim or planning a complete kitchen transformation, explore our custom cabinetry and professional installation services to bring your vision to life.