
Changing Your Shower Valve Can Be a Breeze with These DIY Steps
How to Change a Shower Valve Without Missing the Key Steps
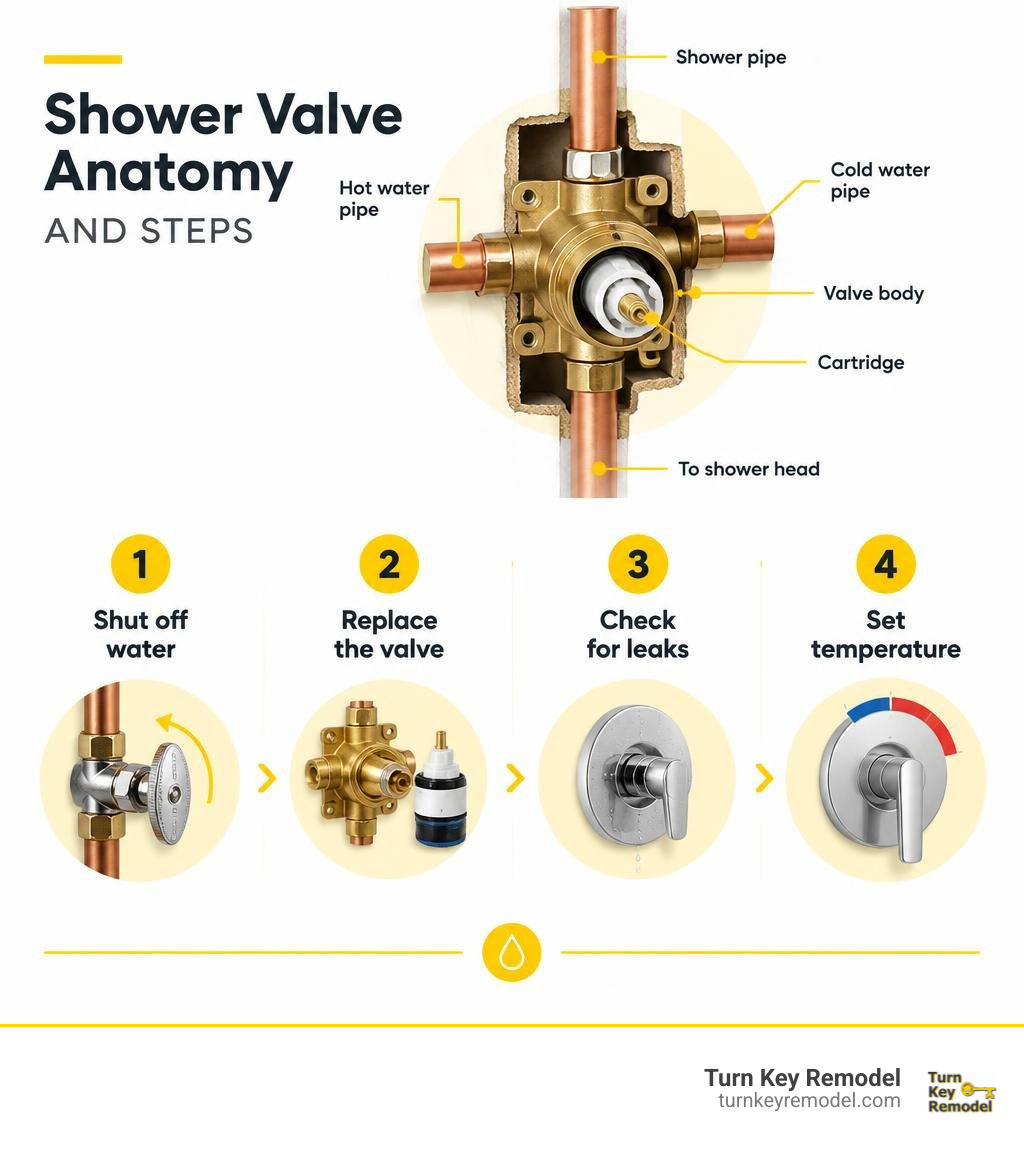
To change a shower valve, shut off the water first. Remove the handle and trim, then check whether you need a new cartridge or the entire valve body. If the body is damaged, access it through the wall, disconnect the pipes, and secure a compatible replacement. Turn the water back on slowly, check for leaks, and set the temperature limit before closing the wall.
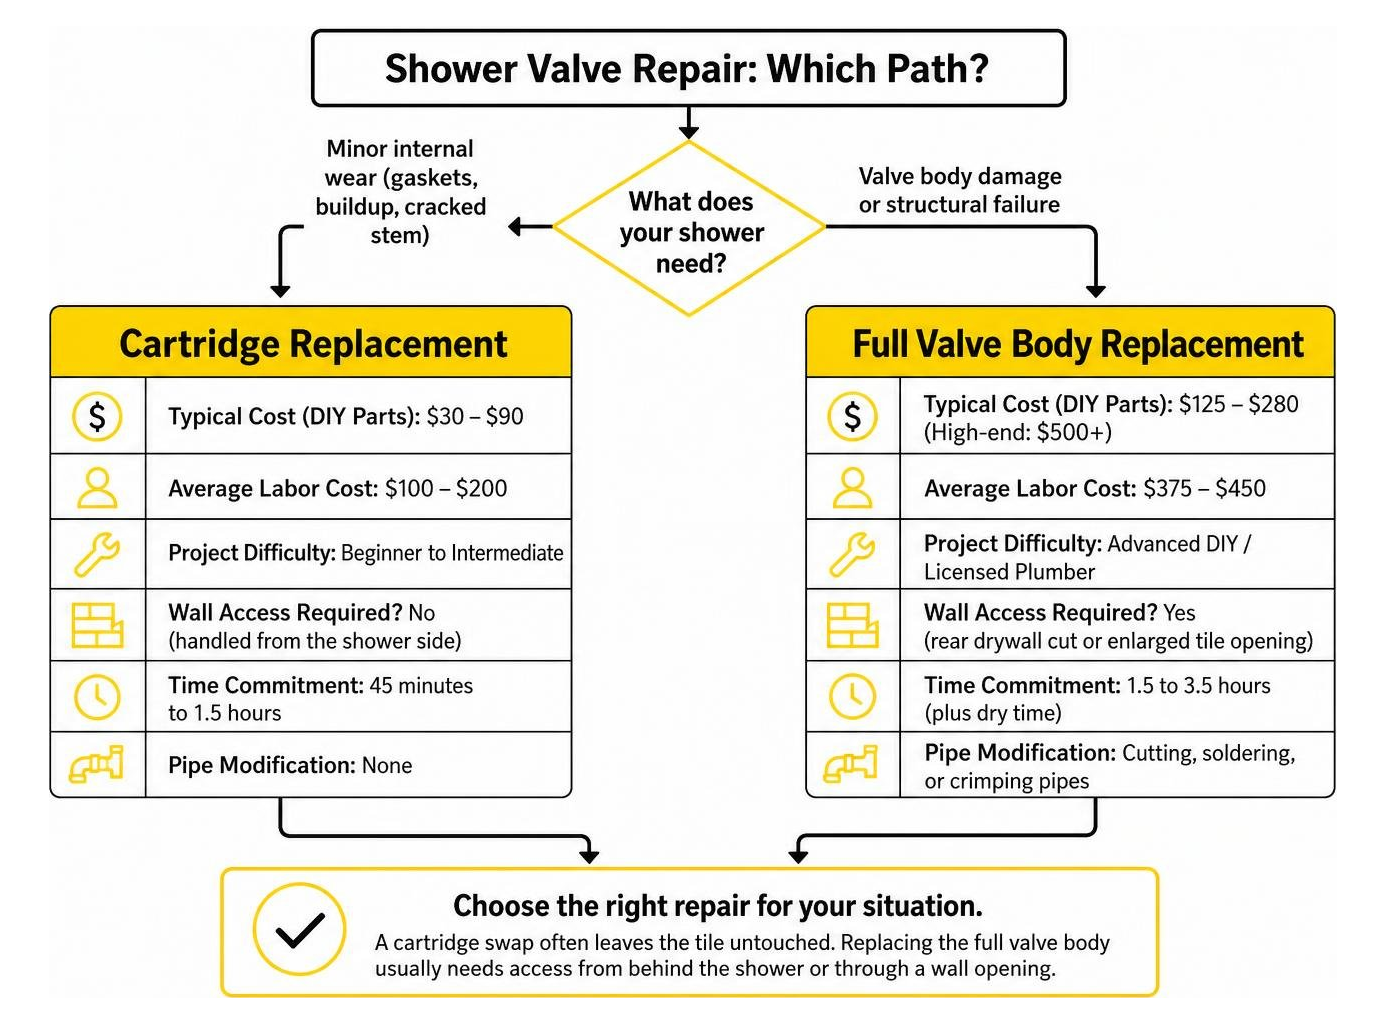
A cartridge swap often leaves the tile untouched. Replacing the full valve body usually needs access from behind the shower or through a wall opening.
I’m Mark Apicella, owner and president of Turn Key Remodel in Orange County. For more than eight years, I’ve led bathroom remodels involving changing shower valve bodies and planning access to plumbing behind the wall.
Related content about changing shower valve:
Evaluating Your Setup: Cartridge Replacement vs. Full Valve Assembly
When your shower starts dripping incessantly or suddenly shocks you with freezing water whenever a toilet flushes elsewhere in the house, something inside your wall is calling for help. But before you tear into your drywall or remove pristine tile, you need to determine the scope of the problem. Are you simply replacing an internal cartridge, or do you need to change out the entire brass rough-in valve body?
Understanding the difference between these two repairs will save you significant time, money, and wall demolition. A cartridge replacement focuses on the moving mechanical parts inside the valve that control flow and temperature mixing. A full valve replacement, on the other hand, involves cutting the water supply pipes and securing an entirely new solid brass casting inside the wall stud cavity.
| Feature | Cartridge Replacement | Full Valve Body Replacement |
|---|---|---|
| Typical Cost (DIY Parts) | $30 – $90 | $125 – $280 (High-end: $500+) |
| Average Labor Cost | $100 – $200 | $375 – $450 |
| Project Difficulty | Beginner to Intermediate | Advanced DIY / Licensed Plumber |
| Wall Access Required? | No (handled from the shower side) | Yes (rear drywall cut or enlarged tile opening) |
| Time Commitment | 45 minutes to 1.5 hours | 1.5 to 3.5 hours (plus dry time) |
| Pipe Modification | None | Cutting, soldering, or crimping pipes |
If your shower system suffers from minor internal wear, such as degraded rubber gaskets, mineral buildup, or a cracked plastic stem, you can usually follow a step-by-step Delta Monitor replacement cartridge installation without disturbing the plumbing behind your finished wall.
Full Assembly vs. Cartridge: When Is Changing Shower Valve Bodies Necessary?
A simple cartridge swap solves roughly 80% of routine shower malfunctions. However, changing shower valve bodies becomes essential when the structural integrity of the valve itself fails.
You must replace the complete assembly under these specific conditions:
- Cracked or Corroded Brass Casting: If the brass housing has developed hairline cracks from freezing temperatures or extensive mineral corrosion, water will leak inside the wall cavity regardless of how many new cartridges you install.
- Deeply Scored Internal Valve Seats: In older valves without replaceable seats, hard water minerals can score the internal bronze walls. Once these metal channels wear down, new O-rings cannot create a watertight seal.
- Upgrading Valve Technology: If you have an obsolete two-handle or three-handle mixing valve that lacks modern anti-scald technology, building codes require updating to an ASSE 1016 certified pressure-balancing or thermostatic valve.
- Switching Brands or Modernizing Trim: Shower valve trim kits are proprietary. A modern Kohler or Moen trim plate will not bolt onto an old Price Pfister or Delta rough-in valve. If you want a completely new aesthetic, you must swap the rough-in valve body.
- Tub-to-Shower Reconfigurations: When converting a tub/shower combination to a standalone walk-in shower or updating your layout, the piping layout must be reworked. If you are also refreshing the bath fixtures, pairing this with a bathtub water spout replacement guide ensures complete system reliability.
Identifying Valve Types and Navigating Tile Access
Before buying replacement parts, identify the type of valve installed in your wall:
- Pressure-Balancing Valves: The most common residential valves. They use an internal sliding spool or diaphragm that constantly balances hot and cold water pressures. If someone flushes a toilet, the valve restricts hot water flow to prevent sudden scalding.
- Thermostatic Valves: These premium units feature two separate controls: one handle adjusts water volume, while the other sets precise temperature. An internal wax element expands and contracts to maintain a constant output temperature within 1°F to 2°F.
- Traditional Mixing Valves: Found in older homes, these valves simply blend hot and cold streams without pressure regulation. They pose a burn hazard and should be modernized during any bathroom renovation.
- Diverter and Transfer Valves: Diverter valves redirect water between a tub spout and a showerhead. Transfer valves allow simultaneous water flow to multiple fixtures, such as a rain head and a handheld wand.
To determine your valve model, remove the handle and look for stamped numbers on the cartridge or faceplate. If you are planning a full bathroom overhaul, our in-depth tub-to-shower conversion guide covers how to integrate premium multi-function valve systems seamlessly into new wall framing.
Essential Tools, Materials, and Pipe Compatibility
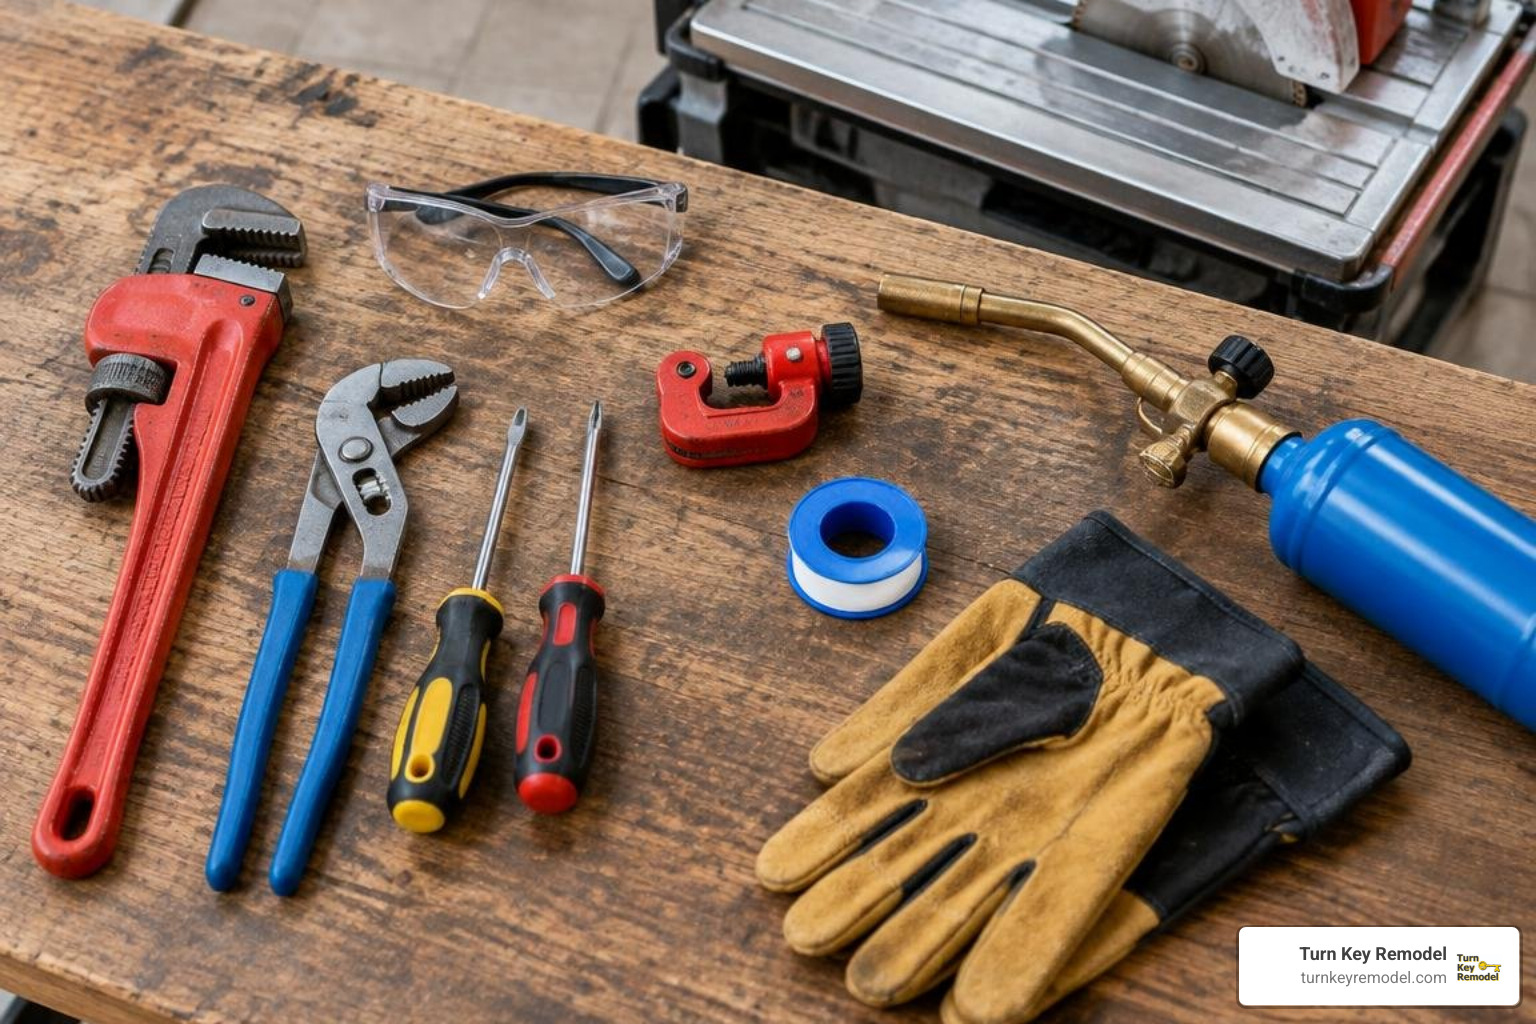
Taking on a shower valve replacement requires having the right plumbing tools on hand before you shut off the water to your home. Preparation prevents stripped screws, damaged copper lines, and emergency trips to the hardware store mid-job.
Review the trusted wikiHow shower valve guide for basic assembly perspectives, and gather the specialized tools outlined below.
Required Tools and Safety Equipment Checklist
Keep these essential tools arranged neatly in your work area:
- Safety Gear: Safety glasses, heat-resistant work gloves, and a flame-retardant heat shield cloth.
- Hand Tools: Phillips and flathead screwdrivers, set of hex keys (Allen wrenches, particularly 3/32″ and 1/8″), needle-nose pliers, adjustable wrench (10-inch or 12-inch), and a channel-lock pipe wrench.
- Specialized Plumbing Tools: Cartridge puller tool (brand-specific for Moen or Delta), mini copper pipe tubing cutter, deburring/reaming tool, and a magnetic parts tray to keep small screws from disappearing down the drain.
- Plumbing Supplies: 100% pure silicone plumber’s grease, PTFE thread seal tape (plumber’s tape), lead-free pipe thread sealant (pipe dope), and emery cloth or wire fitting brushes.
- Soldering / Pipe Joining Materials: Propane or MAPP gas torch, lead-free silver solder, water-soluble flux, or a PEX crimping/expansion tool with matching copper crimp rings.
- Clean-up: Five-gallon bucket, clean shop towels, and a thick washcloth to block the shower drain.
Preparing Pipes and Connections for Changing Shower Valve Units
Your installation method depends directly on the pipe material behind your bathroom wall:
- Copper Tubing: The traditional plumbing standard. Connecting a new valve to copper typically requires sweat soldering with a torch or using transition adapters. Always clean pipe ends with an emery cloth until the copper shines like a new penny, apply flux evenly, and remove all plastic and rubber components from the valve body before applying heat.
- PEX (Cross-linked Polyethylene): Modern and flexible. PEX connects directly to valve bodies equipped with PEX crimp or expansion barbs. Never use PEX tubing between the bottom outlet of the shower valve and a tub spout, as the smaller inside diameter creates backpressure that forces water out of the showerhead while the tub is filling.
- CPVC (Chlorinated Polyvinyl Chloride): Rigid plastic tubing joined with solvent cement. Ensure pipe cuts are perfectly square, deburred, and primed before gluing. Allow full manufacturer cure times before pressurizing the lines.
- Push-to-Connect Fittings: Useful in tight, fire-sensitive spaces where torches cannot be used safely. Ensure the pipe exterior is free of scratches or burrs before seating the fitting fully against the stop collar.
If you are expanding your plumbing skills across multiple fixtures, you can review standard faucet replacement steps to master water line preparation and sealing techniques.
Step-by-Step Guide to Changing a Shower Valve
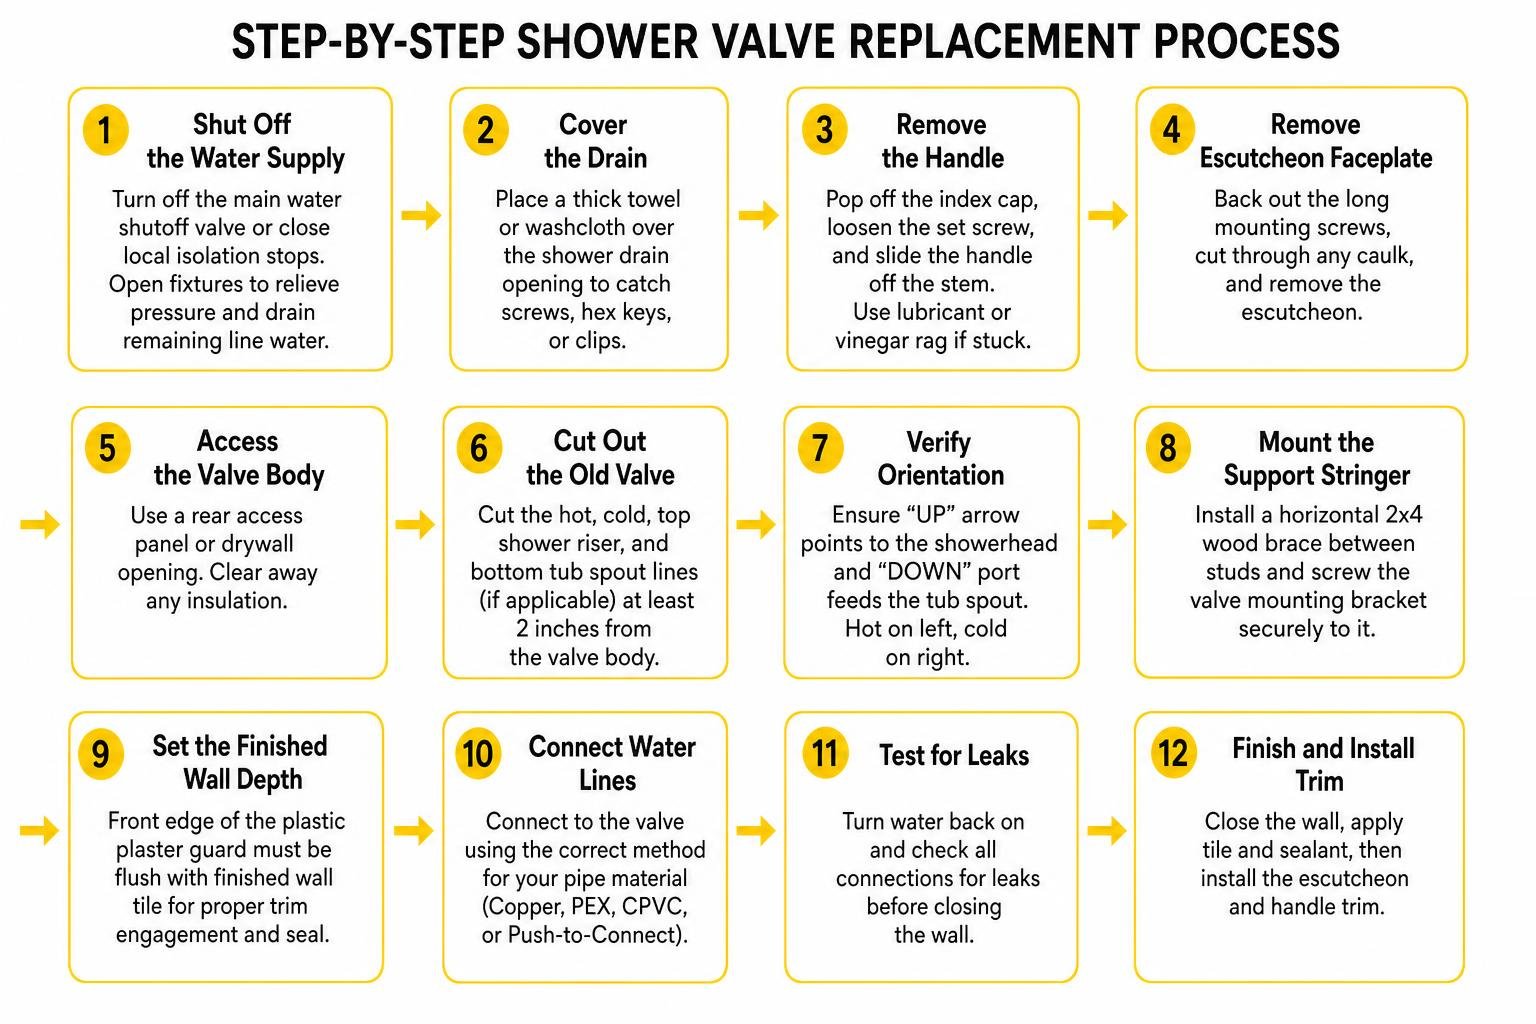
Follow this detailed, step-by-step walkthrough to remove your old shower valve and install a dependable, code-compliant replacement. For a clear visual demonstration of cutting and mounting rough-in plumbing, check out the This Old House video walkthrough on replacing shower mixing valves.
Removing the Trim, Escutcheon, and Old Valve Assembly
- Shut Off the Water Supply: Turn off the main water shutoff valve to your house or close the local isolation stops located inside the shower wall cavity. Open the shower valve and lower fixtures in the home to relieve pressure and drain remaining line water.
- Cover the Drain: Place a thick towel or washcloth over the shower drain opening to catch screws, hex keys, or clips.
- Remove the Handle: Locate the index cap on the handle, pop it off with a flathead screwdriver, and loosen the internal set screw using the correct hex key. Slide the handle off the stem. If mineral deposits make it stick, spray with penetrating lubricant or wrap it in a warm, vinegar-soaked rag.
- Remove Escutcheon Faceplate: Back out the long mounting screws securing the large decorative trim plate to the wall. Carefully slice through any perimeter silicone caulk with a utility knife and remove the escutcheon.
- Access the Valve Body: If working through a rear access panel in an adjacent closet or drywall opening, clear away any insulation. If working from the front, you must have an opening of at least 12 inches to safely cut and solder piping.
- Cut Out the Old Valve: Use a mini tubing cutter to sever the hot and cold inlet pipes, the top shower riser pipe, and the bottom tub spout line (if applicable). Make straight, clean cuts at least 2 inches away from the valve body to leave adequate pipe for new couplings.
Securing the New Valve Body and Connecting Water Lines
- Verify Orientation: Inspect the new valve body markings. Ensure the “UP” arrow points toward the showerhead and the “DOWN” port feeds the tub spout. Ensure the hot water supply is on the left and cold is on the right.
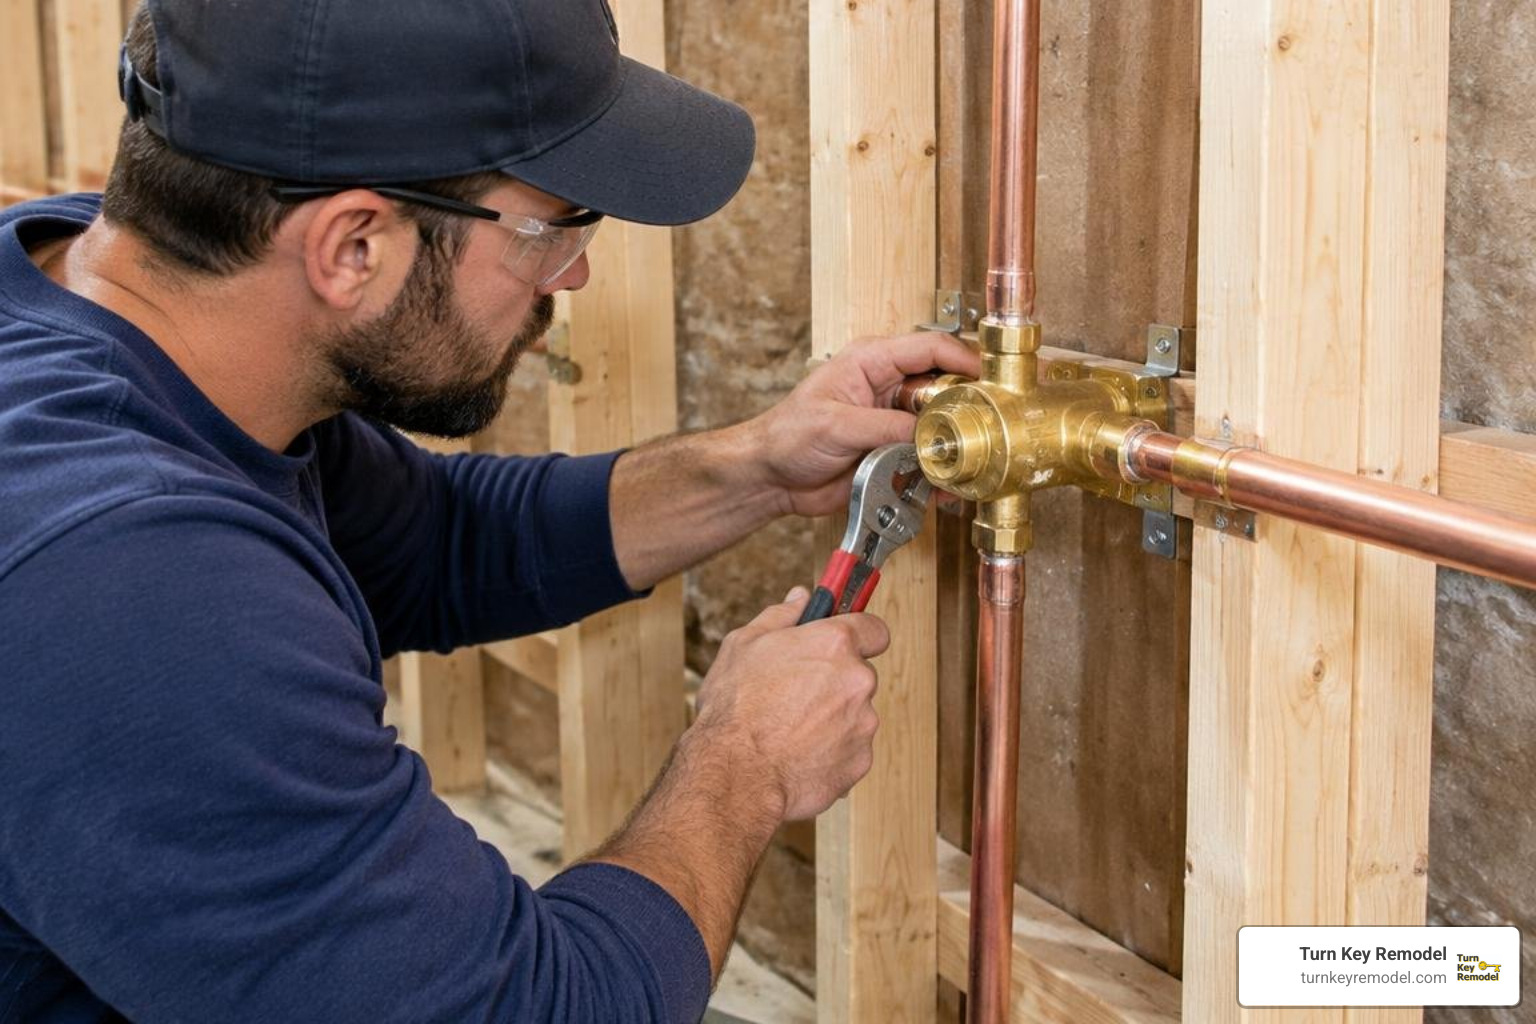
- Mount the Support Stringer: Position a horizontal 2×4 wood brace (stringer) between the wall studs behind the valve. Screw the mounting bracket of the brass valve body securely to this wood block.
- Set the Finished Wall Depth: The front edge of the plastic plaster guard attached to the valve must sit completely flush with the plane of your finished wall tile. If the valve is set too deep, your handle trim will not engage; if set too shallow, the trim plate will not seal against the tile. Consult the Kohler pressure-balancing valve installation and care manual for precise rough-in depth tolerances (typically 2-3/4 inches to 3-1/2 inches from the center of the pipe to the finished wall).
- Remove Internal Cartridges Before Soldering: If sweat soldering copper lines, unthread the bonnet nut and pull the cartridge, pressure-balancing unit, and rubber O-rings completely out of the brass casting. Intense torch heat will melt internal plastic mechanisms and ruin rubber seals instantly.
- Join the Piping: Solder your copper pipe connections or crimp your PEX lines to the hot inlet, cold inlet, shower riser, and tub drop. Use lead-free silver solder and ensure thorough penetration around each joint. Allow all soldered joints to air-cool naturally; never douse hot brass in cold water, as thermal shock can crack the casting.
- Reinstall Cartridge with Silicone Grease: Once the brass valve body cools completely, lubricate all rubber O-rings generously with 100% silicone plumber’s grease. Slide the pressure-balancing unit and cartridge into the valve body, aligning the guide notches precisely with the casting grooves. Re-secure the retaining bonnet nut or clip.
Setting the Rotational Limit Stop and Testing for Leaks
Every modern pressure-balancing valve includes an adjustable rotational limit stop (a notched plastic cam or gear on the front of the cartridge stem) to prevent scalding injuries:
- Perform the Initial Pressure Test: Before closing the wall or reinstalling trim, leave the wall open. Turn on the main water supply slowly. Check every soldered joint, threaded fitting, and the cartridge face for moisture or weeping. Let the system hold full line pressure for at least 15 minutes.
- Flush the Lines: Turn the valve stem to run hot and cold water through the showerhead pipe for two full minutes to clear any residual solder flux or debris from the supply pipes.
- Adjust the Temperature Limit Stop: Turn the valve stem counterclockwise to the full hot position. Let the water run for two minutes until it reaches maximum domestic water heater temperature. Place a digital thermometer in the running water stream.
- Calibrate the Stop Collar: Plumbing codes mandate that residential shower water must not exceed 120°F (49°C) to protect children and elderly family members from sudden burns. A comfortable shower range is between 100°F and 108°F. If the water exceeds 120°F, pull the notched plastic gear outward, rotate it clockwise one or two teeth, push it back into the locking splines, and re-test. Each tooth adjustment changes water temperature between 2°F and 8°F depending on seasonal cold-water inlet conditions.
- Reinstall Trim and Seal: Reattach the finished escutcheon plate with its mounting screws. Run a neat bead of waterproof 100% silicone caulk around the top and side perimeters of the plate where it meets the tile, leaving a small 1/2-inch weep gap at the bottom edge so any trapped condensation can drain out freely. Reattach the handle and tighten the set screw.
Critical Mistakes to Avoid and Professional Cost Breakdown
Even seasoned home improvement enthusiasts run into trouble when replacing in-wall plumbing. Being aware of these pitfalls will keep your project running smoothly without hidden structural leaks:
Preventing Common Installation Pitfalls
- Using Petroleum-Based Lubricants: Never use petroleum jelly (Vaseline) or WD-40 on shower valve O-rings, rubber seats, or plastic cartridges. Petroleum degrades rubber compounds rapidly, resulting in catastrophic leaks behind your walls within months. Use only 100% pure silicone plumber’s grease.
- Inverted Valve Orientation: Installing a rough-in valve upside down is surprisingly easy to do if the casting marks are overlooked. An inverted valve will cause the hot and cold controls to operate in reverse and prevent the diverter mechanism from functioning.
- Soldering with the Cartridge Installed: Leaving the plastic cartridge inside the valve body while applying a torch to the copper inlets will destroy the internal check valves, requiring you to buy a replacement cartridge before taking your first shower.
- Neglecting to Anchor the Valve Body: A valve body floating loose on copper or PEX tubing will flex and rattle every time someone operates the handle. Secure the valve rigidly to a wood backing stringer with heavy-duty brass or galvanized brackets.
- PEX on the Tub Spout Port: As noted earlier, running PEX between the bottom valve port and the tub spout restricts gravity discharge, causing unwanted dripping from the showerhead while running a bath. Always use rigid copper or threaded brass pipe for the tub drop line.
Project Budget and Cost Breakdown
When planning your bathroom budget, comparing DIY material costs against full-service professional installation helps set realistic expectations. For a complete look at remodeling expenses, review our bathroom remodel cost checklist.
| Expense Category | DIY Cost | Professional Installation |
|---|---|---|
| Rough-In Shower Valve | $125 – $280 | Included in contractor quote |
| Designer Trim Kit & Handle | $75 – $300 | $75 – $300 (or custom packages) |
| Pipes, Fittings, & Solder | $20 – $100 | Included in service fee |
| Plumbing Specialty Tools | $40 – $90 | Contractor provides |
| Plumbing Labor Rate | $0 (Self-performed) | $375 – $450 (Standard swap) |
| Drywall Access & Tile Repair | $30 – $75 (Materials) | $150 – $400 (Trade specialist) |
| Total Estimated Investment | $290 – $845 | $725 – $1,450+ |
Homeowners in Orange County, Yorba Linda, Placentia, Anaheim Hills, Tustin, and Brea facing complicated in-wall rerouting or outdated galvanized piping often find that working with a licensed contractor eliminates the risk of hidden water damage.
Frequently Asked Questions About Shower Valves
Can I replace a shower valve without cutting into tile?
Yes, provided you are performing a cartridge swap or replacing the internal components of an existing, undamaged valve body. If the full brass valve body must be replaced, you can avoid cutting your shower tile by opening an access panel in the drywall of the room or closet directly behind the shower wall. If rear access is impossible and you must cut from the front, contractors use oversized “remodel escutcheon plates” (also called conversion cover plates) that conceal an enlarged wall opening without requiring complete wall re-tiling.
How much does it cost to replace a shower valve?
A standard DIY shower valve replacement generally costs between $125 and $300 for basic hardware, tools, and pipe fittings. If you hire a licensed professional plumber, average labor ranges from $375 to $450 for a standard replacement, bringing the total project cost to roughly $500 to $850. Complex installations involving luxury thermostatic systems, drywall repairs, or difficult tile work can reach $1,200 to $1,800.
Why is my shower water still lukewarm after installing a new valve?
If your water heater is working properly but the shower never reaches full heat, the rotational limit stop on your new valve cartridge is set too conservatively. Remove the handle and escutcheon, locate the plastic rotational stop collar on the front of the cartridge stem, pull it forward, rotate it counterclockwise to allow greater hot-water handle travel, and snap it back into place. Additionally, verify that the pressure-balancing spool inside the cartridge is not stuck by gently tapping it or re-flushing the supply lines.
Conclusion
Upgrading your shower valve restores steady water pressure, protects your family from sudden temperature shifts, and prevents costly structural leaks behind your bathroom walls. Whether you tackle a straightforward cartridge replacement over the weekend or complete a full rough-in valve conversion, following precise installation steps and safety standards guarantees long-lasting performance.
For homeowners in Orange County, Yorba Linda, Placentia, Anaheim Hills, Tustin, and Brea seeking comprehensive bathroom renovations, Turn Key Remodel provides expert design-build solutions, end-to-end project management, and flawless craftsmanship. To evaluate your project budget and see how professional trade services compare to home improvement projects, explore our detailed guide on plumbing labor rates and DIY faucet replacement costs. Reach out to our team today to bring elegance, luxury, and reliability to your dream bathroom space!