
How to Replace a Faucet in 5 Easy Steps
Faucet Replacement in 5 Steps
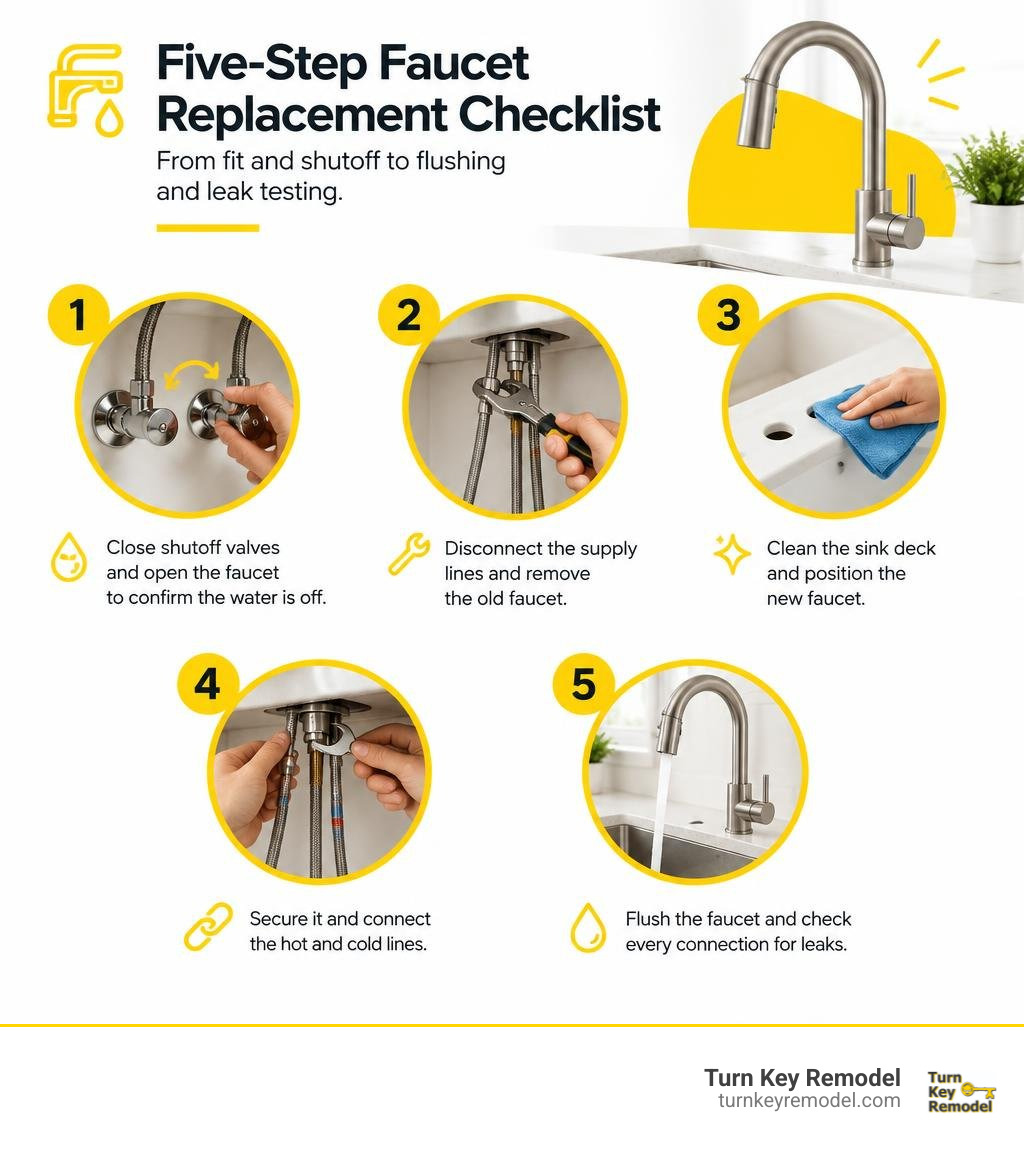
To replace a faucet, first check that the new one fits your sink’s holes and that you can reach the plumbing below. Then:
- Close both shutoff valves and open the faucet to confirm the water is off.
- Disconnect the supply lines and remove the old faucet.
- Clean the sink deck and position the new faucet.
- Secure it and connect the hot and cold lines.
- Flush the faucet and check every connection for leaks.
A like-for-like swap often takes 1–2 hours. If a shutoff valve will not stop the water or a fitting is badly corroded, pause and call a plumber rather than risk a leak.
I’m Mark Apicella, owner and president of Turn Key Remodel. With more than eight years leading kitchen and bath remodels in Orange County, I know how faucet replacement fits into a smooth fixture upgrade.
Planning Your Faucet Replacement: Sink Compatibility and Tools
Before taking a wrench to any plumbing fixture, a little prep work prevents unexpected trips to the hardware store. Faucet replacement is one of the most cost-effective home upgrades, but ensuring sink deck compatibility and having the right tools on hand makes the difference between an easy afternoon project and a frustrating ordeal.
Assessing Sink Hole Configurations and Faucet Types
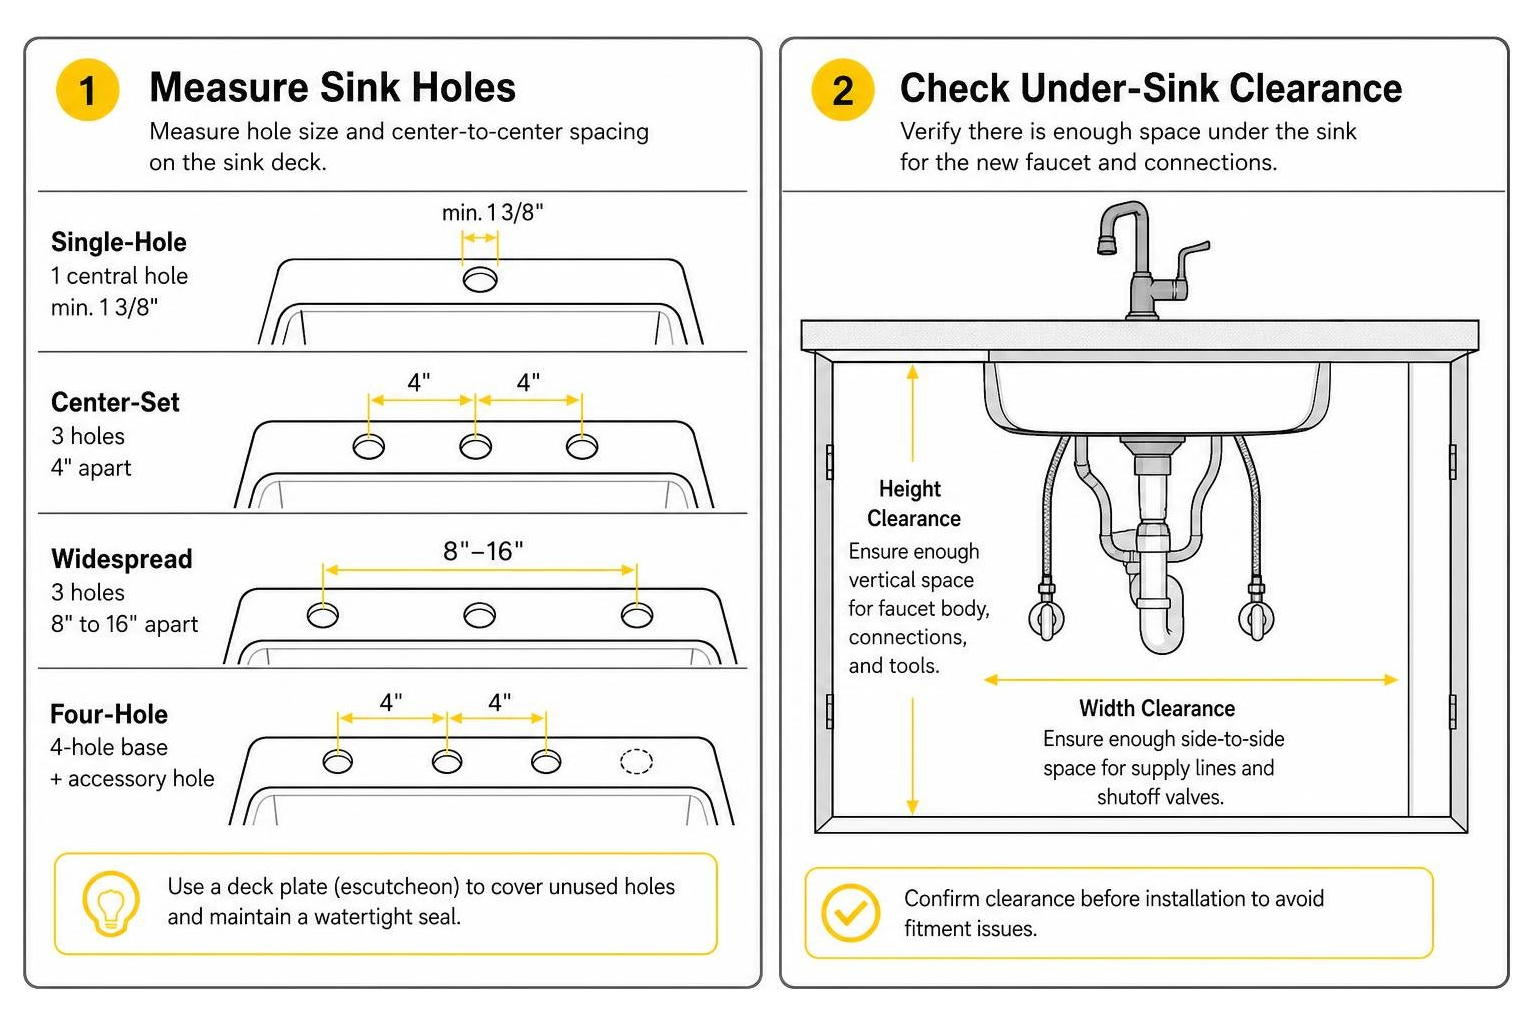
Sinks generally feature one, two, three, or four pre-drilled holes. Knowing your sink’s layout dictates which replacement fixtures will work out of the box or whether you will need an escutcheon (deck plate) to cover unused openings.
- Single-Hole Sinks: Designed for modern single-handle fixtures, often featuring integrated pull-down sprayers.
- Three-Hole Sinks (Center-Set): Common in bathrooms and standard kitchens, these feature holes spaced 4 inches apart (measured from center to center).
- Three-Hole Sinks (Widespread): Common in luxury bathrooms, these fixtures have separate hot, cold, and spout components spaced 8 to 16 inches apart.
- Four-Hole Sinks: Typically accommodate a three-hole faucet configuration alongside a separate side sprayer, soap dispenser, or filtration tap.
| Configuration | Hole Spacing (Center-to-Center) | Typical Application | Deck Plate Needed? |
|---|---|---|---|
| Single-Hole | N/A (1 central hole, min. 1 3/8″) | Modern pull-down kitchen & vessel sinks | No |
| Center-Set | 4 inches | Standard bathroom vanities & compact kitchens | Built-in deck plate |
| Widespread | 8 to 16 inches | Master bathrooms & luxury vanities | No (individual components) |
| Four-Hole | 4-inch base + accessory hole | Traditional kitchen sinks with side spray | Optional (covers 2–3 holes) |
If you fall in love with a sleek single-handle pull-down faucet but have a three-hole sink deck, an optional deck plate neatly conceals the extra holes while maintaining a watertight seal.
Essential Tools and Supplies for Faucet Replacement
Gather your equipment before opening the cabinet doors. Having everything within reach keeps the workspace organized.
- Telescoping Basin Wrench: The ultimate secret weapon for reaching high behind the sink basin to loosen mounting nuts.
- Adjustable Wrench & Channel-Lock Pliers: For securing supply line nuts without marring the finish.
- Penetrating Oil (e.g., PB Blaster): Essential for breaking loose rusted mounting hardware.
- Braided Stainless Steel Supply Lines: Upgrading to new 3/8-inch compression lines prevents future burst hazards.
- Putty Knife & Non-Abrasive Cleaner: For removing old plumber’s putty and mineral buildup from the sink deck.
- Bucket, Microfiber Towels, and a Headlamp: Hands-free lighting and water containment make under-sink work far more manageable.
Always review manufacturer specifications for single-control faucets or specialized valves before unboxing to confirm exact fitting sizes.
5-Step Guide to Seamless Faucet Installation
With parts and tools ready, follow these five steps to complete your installation safely. If you are installing specific brand models, referring to an American Standard faucet installation guide or similar manufacturer documentation provides brand-specific nuances.
Step 1: Shut Off Water Supplies and Relieve Pressure
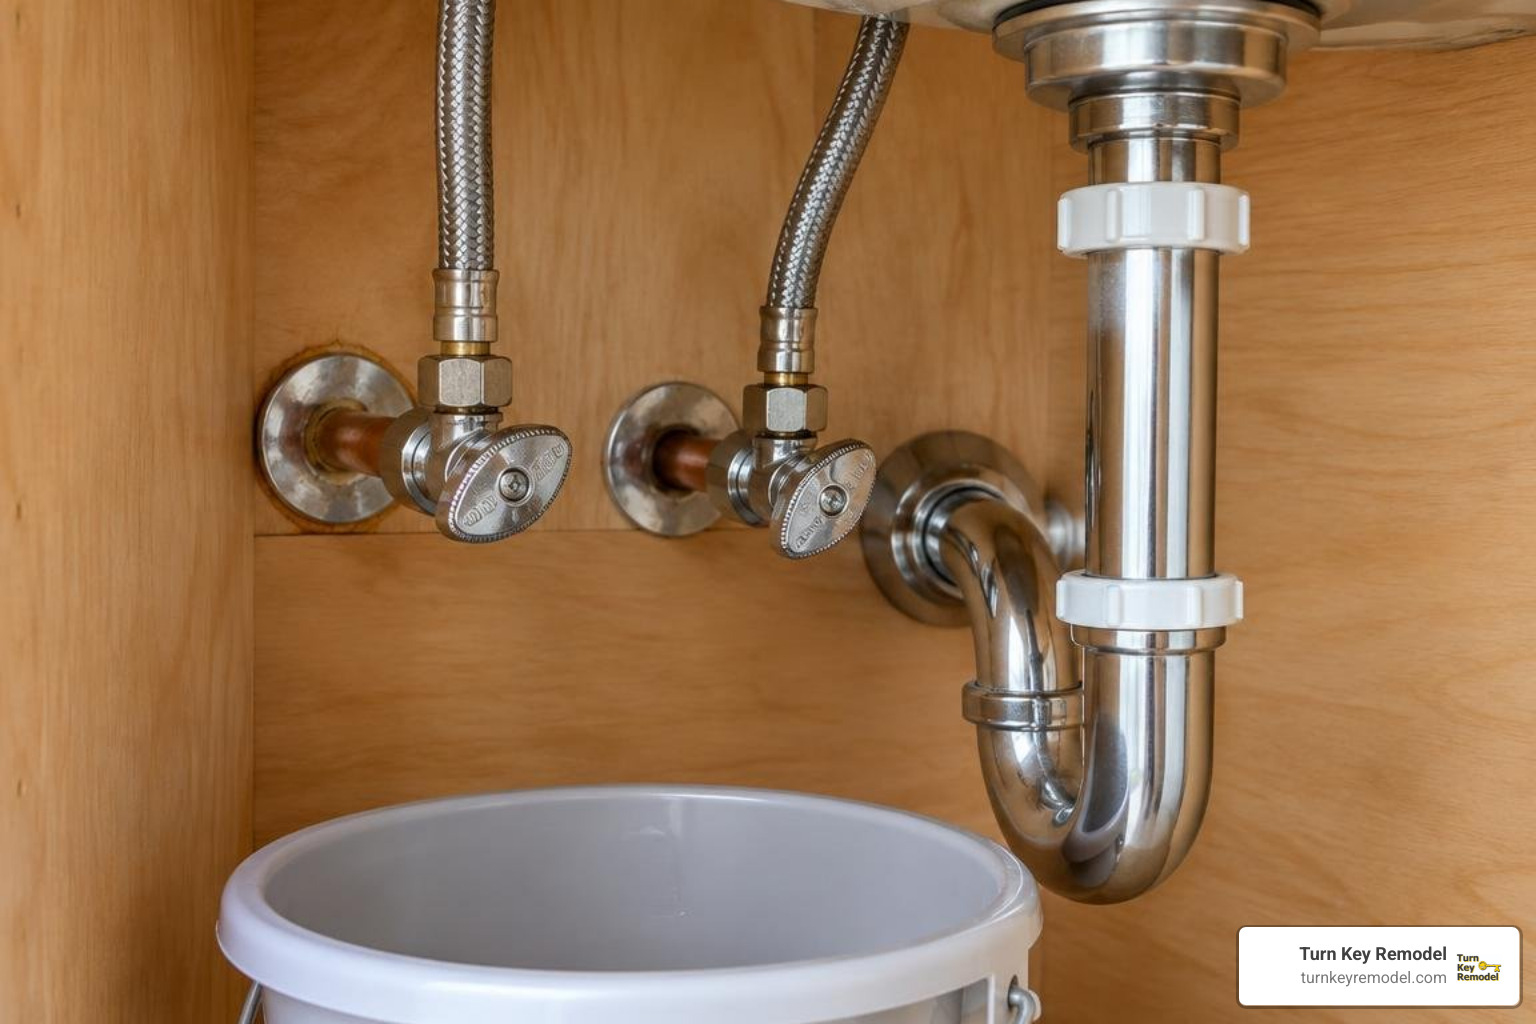
Locate the hot and cold angle stop valves on the wall beneath the sink. Turn both oval handles clockwise until fully closed.
Open the current faucet handles fully to relieve residual water pressure and drain remaining water from the spout. Place a shallow bucket and dry towels directly underneath the shutoff valves to catch residual drainage when loosening lines.
Safety Check: If water continues dripping from the faucet spout after turning the shutoff valves completely, your shutoff valves have failed. You must close your home’s main water supply valve before proceeding.
Step 2: Disconnect Supply Lines and Remove the Old Faucet
Using an adjustable wrench, disconnect the flexible water supply lines from the top of the angle stop valves. Allow trapped water to drain into your bucket.
Next comes the trickiest part of the removal: taking off the mounting nuts holding the faucet body against the underside of the sink. Because these nuts sit in a cramped space behind the sink basin, an adjustable wrench often cannot reach them. Attach the pivoting jaws of your telescoping basin wrench to the mounting nuts, turning counterclockwise to back them off. If the nuts are seized with mineral scale or rust, spray them generously with penetrating oil and let them soak for 10 minutes before applying torque.
Once the nuts and retaining washers are off, lift the old faucet straight up through the top of the sink deck.
Step 3: Clean the Sink Deck and Position the New Fixture
Years of use inevitably leave behind hard water scale, mildew, and degraded plumber’s putty around the mounting holes. Use a plastic putty knife and a mild cleaner to scrape the sink deck smooth. Avoid metallic scrapers on stainless steel, porcelain, or solid surface counters to prevent permanent scratches.
Place the rubber or silicone base gasket onto the bottom of your new faucet (or beneath the optional deck plate). The gasket creates a watertight seal without needing messy putty in most modern installations. Feed the new braided supply lines and mounting shank down through the sink deck opening, ensuring the faucet body faces forward toward the basin.
Step 4: Secure Mounting Hardware and Attach Water Lines
From underneath the sink, slide the mounting bracket, friction washer, and mounting nut over the faucet lines and onto the threaded shank. Hand-tighten the nut until snug against the sink underside.
Before final tightening, verify from above that the faucet is centered and aligned. Tighten the mounting nut securely with your basin wrench or the manufacturer-supplied installation socket. Do not over-torque, which can crack porcelain sinks or distort plastic mounting rings.
Connect the hot and cold supply lines to the corresponding shutoff valves (the red-tagged hose connects to the hot supply on the left). Hand-tighten the compression nuts onto the valves, then use an adjustable wrench to add a firm 1/4-to-1/2 turn.
Step 5: Flush the System, Check Aerator Flow, and Leak-Test
Before turning the water on full blast, unscrew the aerator from the tip of the new spout using your fingers or the included removal tool.
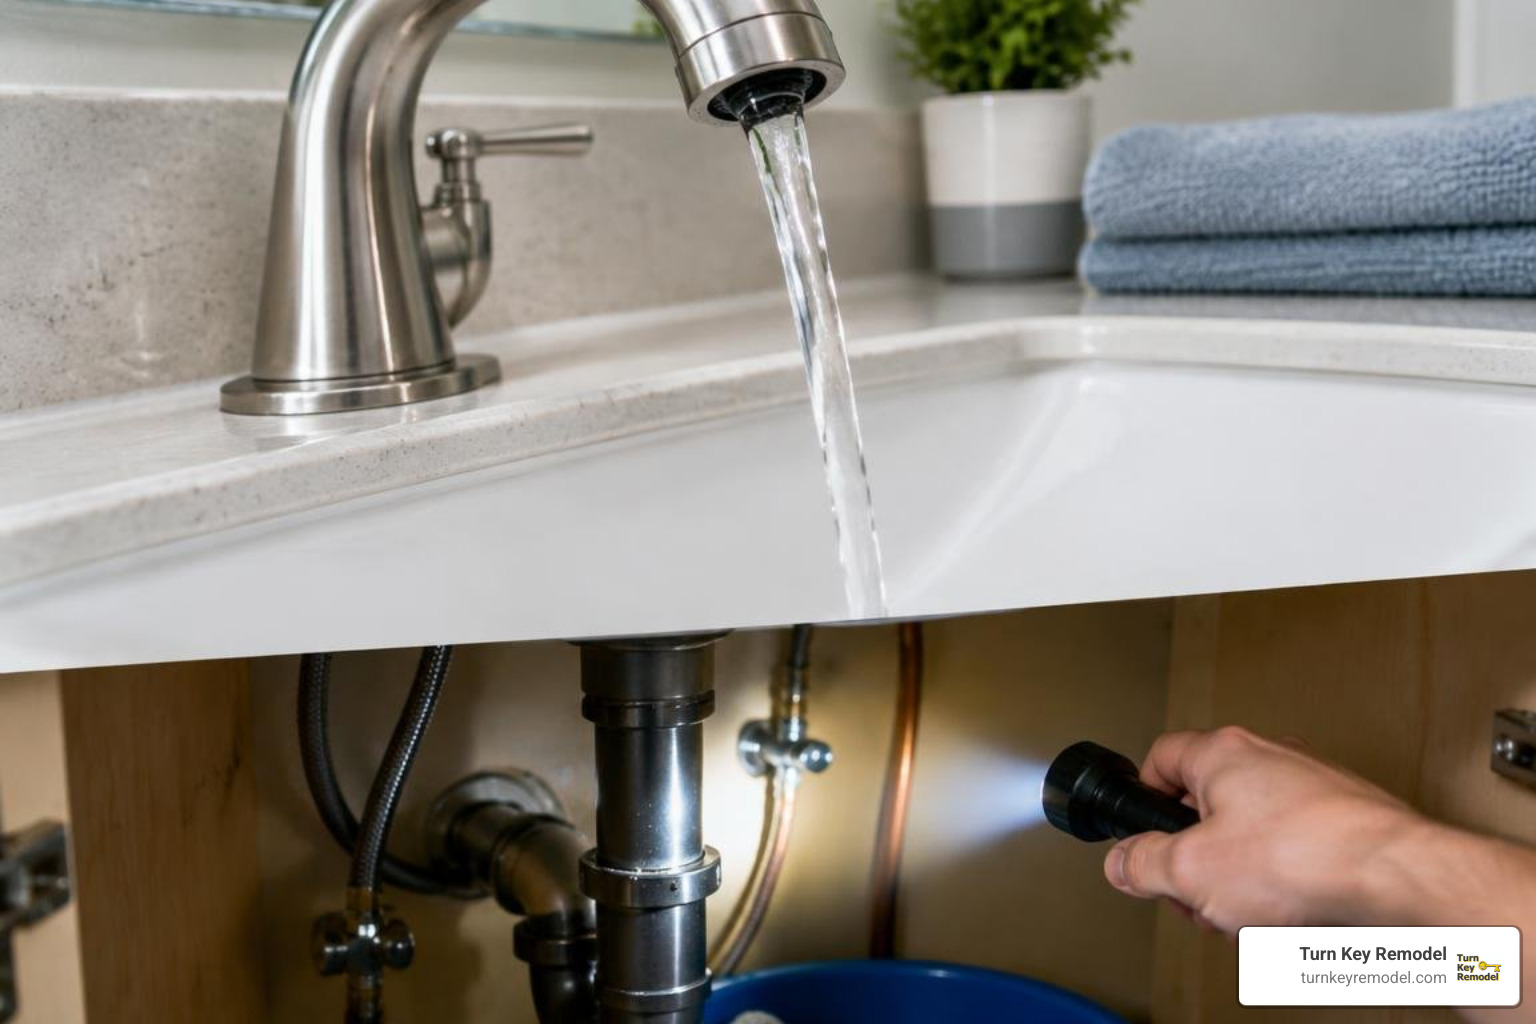
- Slowly open the under-sink shutoff valves fully.
- Turn the faucet handle on to run both hot and cold lines for 60 seconds.
- This flushes out manufacturing debris, sediment, and loose mineral chips that would otherwise clog the aerator cartridge.
- Inspect every joint under the sink with a flashlight and dry tissue. If you spot moisture, tighten the leaking fitting by another 1/8 turn.
- Thread the aerator back into the spout.
Comparing DIY Costs and Professional Plumbing Services
Upgrading your fixtures yourself delivers immediate financial savings, provided the existing plumbing is in sound structural condition.
| Service Option | Material Cost | Professional Labor | Special Tools Needed | Total Average Investment |
|---|---|---|---|---|
| DIY Installation | $150 – $350 | $0 | $30 (Basin Wrench) | $180 – $380 |
| Professional Plumber | $150 – $350 | $162 – $364 | None (Provided) | $312 – $714 |
If you are expanding beyond a simple swap into comprehensive cabinetry upgrades or layout adjustments, explore our Kitchen Remodeling Services for full-scale design-build solutions.
Cost Breakdown: DIY Savings vs. Hiring a Plumber
A quality single-handle or pull-down kitchen faucet generally runs between $150 and $350, while standard bathroom faucets range from $80 to $200. Professional installation labor typically adds $162 to $364 based on 2026 industry standards, with local plumbers charging hourly rates from $45 to $200 (often with minimum trip charges).
By tackling the job yourself, your only supplemental expense is roughly $30 for a dedicated basin wrench and $15 to $25 for fresh supply lines if needed. That leaves an average of $130 to $330 in direct savings in your pocket. If you are updating multiple fixtures throughout your home, pairing fixture upgrades with our dedicated Bathroom Remodeling Services can streamline labor across full-room renovations.
When to Hire a Professional for Faucet Replacement
While the mechanical steps are straightforward, certain home conditions make calling a professional the smarter choice:
- Corroded Galvanized or Fragile Polybutylene Pipes: Older homes throughout Orange County, including areas like Placentia and Anaheim Hills, may still have rigid galvanized supply lines that can snap inside the wall when torque is applied.
- Frozen Angle Stop Valves: If shutoff valves won’t budge or leak from the stem when turned, replacing the stops requires shutting down the main line and soldering or crimping new valves.
- Obstructed Access: Large commercial garbage disposals, complex under-sink reverse osmosis tanks, or deep fireclay aprons can make physical access nearly impossible without specialized disassembly.
Homeowners tackling smaller projects can also learn how to replace your bathtub water spout without calling a plumber using basic hand tools.
Troubleshooting Common Installation Mistakes and Sprayer Issues
Minor hiccups during installation are easy to solve with standard troubleshooting adjustments.
Resolving Retraction Issues with Pull-Down Sprayers
The most frequent complaint with new kitchen faucets is a pull-down sprayer head that dangles loosely or fails to retract completely into the neck.
- Incorrect Weight Placement: The lead-free counterweight clamped to the spray hose under the sink must be positioned correctly. If placed too high, it hits the bottom of the sink before the head retracts; if placed too low, it lacks adequate pull length. Position the weight roughly 2 inches above the lowest point of the hose loop.
- Under-Sink Snags: Drain pipes, shutoff valve handles, and stored cleaning supplies under the vanity can catch the moving hose. Clear a dedicated path for the hose loop to travel freely up and down.
Preventing Under-Sink Leaks and Overtightened Connections
Compression fittings use brass rings or rubber gaskets that seat into place under light tension. A common DIY mistake is cranking down on nuts with excessive force, which crushes rubber washers or deforms brass compression sleeves, causing immediate leaks.
Always follow the quarter-turn rule: thread compression nuts by hand until they seat firmly, then apply an adjustable wrench for an additional 1/4 to 1/2 turn. Avoid wrapping Teflon tape around standard compression threads unless specified by the manufacturer, as the threads themselves do not form the seal—the compression gasket does.
Frequently Asked Questions
How do I know which faucet will fit my sink?
Look under your sink deck to count the existing mounting holes and measure the distance between the center points of the outer holes. A single-hole faucet fits a single opening or a three-hole sink when installed with an escutcheon deck plate. Sinks with 4-inch spacing require center-set models, while spacing of 8 inches or greater requires widespread fixture designs.
What is the hardest part of removing an old faucet?
The most difficult step is almost always breaking loose the corroded mounting nuts situated behind the sink basin. Decades of moisture and hard water create scale that locks metal threads together. Applying penetrating oil, letting it sit for 10 minutes, and using a telescoping basin wrench provide the leverage needed to turn stubborn fasteners.
Why won’t my pull-down sprayer hose retract properly?
Sprayer retraction problems are typically caused by an incorrectly installed counterweight or obstructions underneath the sink. Ensure the weight is installed on the upward run of the hose loop approximately 2 to 3 inches from the bottom bend, and verify that the hose does not catch on shutoff valves or drain pipes when extended.
Conclusion
Upgrading your fixtures refreshes your space, eliminates annoying drips, and improves daily functionality. By taking the time to verify sink deck spacing, shutting off water supplies safely, and using the right tools like a basin wrench, most homeowners can complete a clean swap in just a couple of hours.
When dealing with frozen valves, aged piping, or full kitchen and bathroom renovations, our team at Turn Key Remodel brings over two decades of design-build expertise to homeowners across Yorba Linda, Placentia, Anaheim Hills, Tustin, Brea, and throughout Orange County. To see how professional installation balances against independent projects, review our guide on plumber rates vs DIY: the true cost of faucet replacement to determine the best path for your home.