
Step-by-Step Delta Kitchen Faucet Spout Replacement for Beginners
Delta Kitchen Faucet Spout Replacement: Start With the Right Part
For a Delta kitchen faucet spout replacement, first find your faucet’s model number and match the new spout to its parts diagram. Then shut off the water, open the faucet to release pressure, and remove the old spout using the fastener or retaining ring shown for your model. Replace any worn O-rings, seat the new spout, secure it, and turn the water back on to check for leaks. Do not order by appearance alone: Delta spouts and removal methods vary by model.
I’m Mark Apicella, owner and president of Turn Key Remodel in Orange County. My experience leading kitchen remodels helps me explain how to approach a delta kitchen faucet spout replacement without skipping the checks that matter.

Introduction
A dripping or damaged faucet can quickly turn food prep into an exercise in frustration. Over years of daily use, hard water minerals, mechanical friction, and internal water pressure take their toll on your plumbing fixtures. While many minor drips originate from a worn valve cartridge or loose bonnet nut, issues involving the spout body itself demand a dedicated fix.
Whether you are dealing with a hairline fracture along the neck, severe internal corrosion, or a connection collar that refuses to swivel smoothly, replacing the entire spout assembly restores clean water delivery and smooth articulation without the expense of pulling out the entire fixture below the deck.
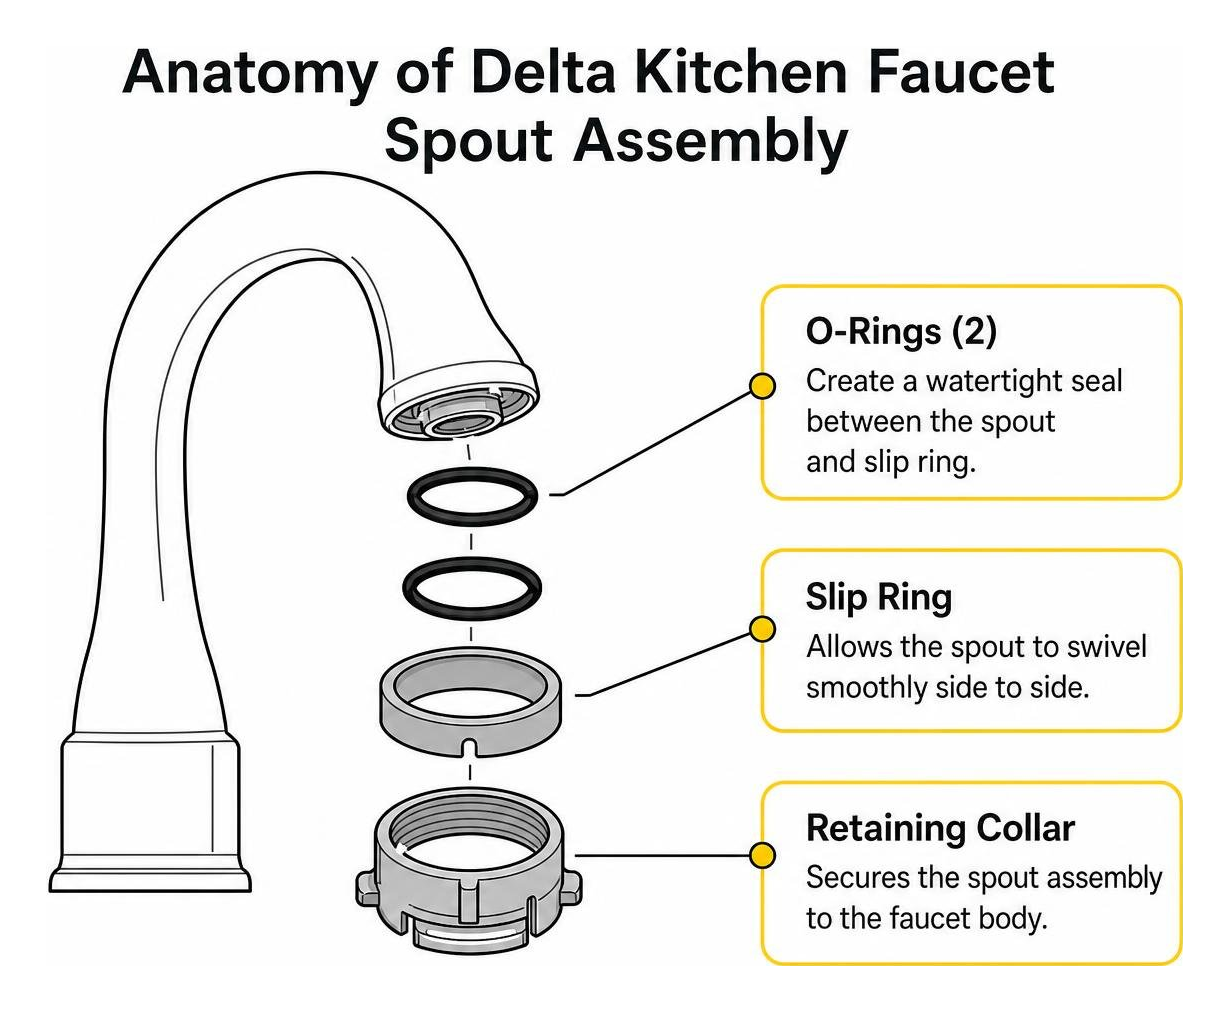
When and Why You Need a Delta Kitchen Faucet Spout Replacement
Kitchen spouts are subjected to rotational stress every time you push them between sink basins. Over time, internal seals degrade, but metal fatigue and water chemistry can also degrade the physical spout casing.
One of the most common structural failures in older brass fixtures is dezincification. This process occurs when acidic or highly mineralized municipal water leaches zinc molecules out of brass alloys. As zinc departs, porous copper deposits remain behind, creating microscopic pinhole leaks across the curved neck of your faucet. Once these pinholes appear, patching the metal is impossible; you must install a fresh spout assembly.
Other common failure triggers include:
- Severe Scale Seizure: Calcium deposits weld the swivel joint to the valve body, causing the spout to stick or rock the entire deck plate when forced.
- Physical Cracks: Stress fractures around the base collar from accidental downward pressure or heavy pots.
- Internal Diverter Chamber Failure: Damaged internal pathways that prevent water from diverting cleanly between the aerator and an integrated side spray.
To help you decide between a quick seal swap and a full component replacement, consider the following diagnostic breakdown:
| Issue / Symptom | Likely Culprit | Recommended Action | Typical Difficulty |
|---|---|---|---|
| Water pooling at the spout base during use | Worn rubber O-rings or cracked slip ring | Replace O-rings (RP25 kit) & clean hub | Easy |
| Fine mist spraying from the spout body curve | Dezincification pinhole corrosion | Complete spout assembly replacement | Moderate |
| Spout wobbles or lifts off the deck hub | Broken retaining ring (e.g., RP73391) | Replace retainer ring or full assembly | Easy to Moderate |
| Deep gouging / flaking chrome or stainless finish | Mechanical damage or abrasive chemical wear | Complete spout assembly replacement | Moderate |
| Grinding noise when rotating the spout | Calcified debris or unlubricated seals | Disassemble, descale, replace seals | Easy |
For technical reference on parts breakdown, review the official Delta Faucet 2497LF documentation to inspect typical exploded schematics.
Identifying the Right Part for Your Delta Kitchen Faucet Spout Replacement
Delta designs its spouts to fit specific internal hubs, valve housings, and retaining mechanisms. Ordering a replacement based solely on how it looks in a catalog picture often leads to thread mismatches or incorrect base diameters.
To identify your exact model:
- Check Under the Sink: Modern Delta fixtures often feature a rigid tag on the PEX water supply lines showing the model number and series code.
- Review Your Manual or Receipt: Locate the original specification sheet from your kitchen build or renovation.
- Examine Key Design Elements: Note the height of the arc (low-arc vs. high-arc gooseneck), the number of sink deck holes, and whether the fixture uses a single lever or independent hot and cold handles.
Common Delta spout assemblies include:
- RP34089: A classic low-arc 9-inch spout assembly in chrome, commonly seen on single-handle traditional series.
- RP63131: A standard 8-inch tubular spout replacement engineered for high-durability two-handle configurations.
- RP72748: The high-arc decorative spout assembly designed for the popular Cassidy kitchen faucet collection.
Always verify that your replacement choice matches your faucet’s original finish—such as Chrome, Arctic Stainless, or Champagne Bronze—to prevent unsightly color mismatches against your handle trim and escutcheon plate.
Required Tools and Replacement Components
Before turning off your water lines, gather your tools so you are not left running between the kitchen and garage mid-repair. If you are also weighing whether to tackle larger fixture upgrades, learning how to replace a faucet in 5 easy steps will give you a clear baseline of the overall plumbing scope.
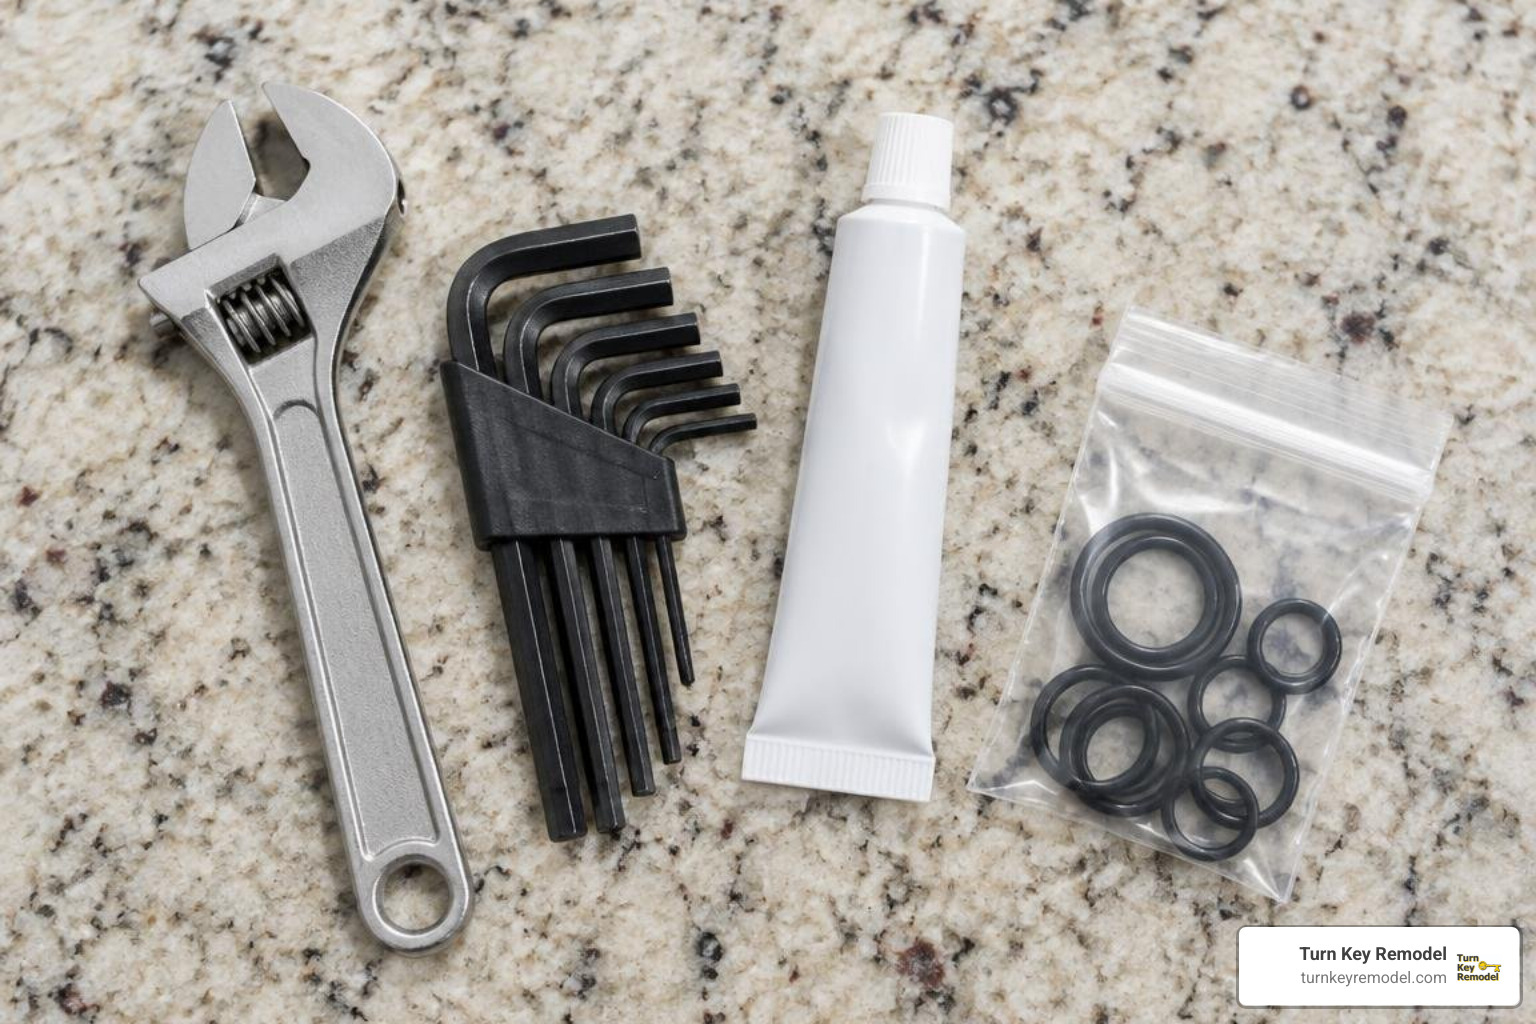
You will need:
- Hex (Allen) Keys: Typically 1/8-inch, 3/32-inch, or 5/32-inch sizes to release concealed set screws.
- Adjustable Wrench or Channel-Lock Pliers: Needed for threaded spout collars (wrap jaws in painter’s tape to protect fine metal finishes).
- Delta Aerator Wrench (e.g., RP46858): Required for recessed cache aerators.
- Replacement O-Ring Kit (RP25): Fresh nitrile rubber O-rings.
- Food-Grade Silicone Plumber’s Grease: Ensures smooth rotation and prevents torn seals.
- Plastic Pick or Dull Stylus: For extracting degraded rubber seals without scratching brass valve walls.
- White Distilled Vinegar & Nylon Brush: To clean hard water mineral buildup off the mounting post.
Step-by-Step Removal and Installation Process
Working on your kitchen sink requires care and methodical steps. Take your time during disassembly to avoid stripping set screws or cross-threading delicate brass collars.
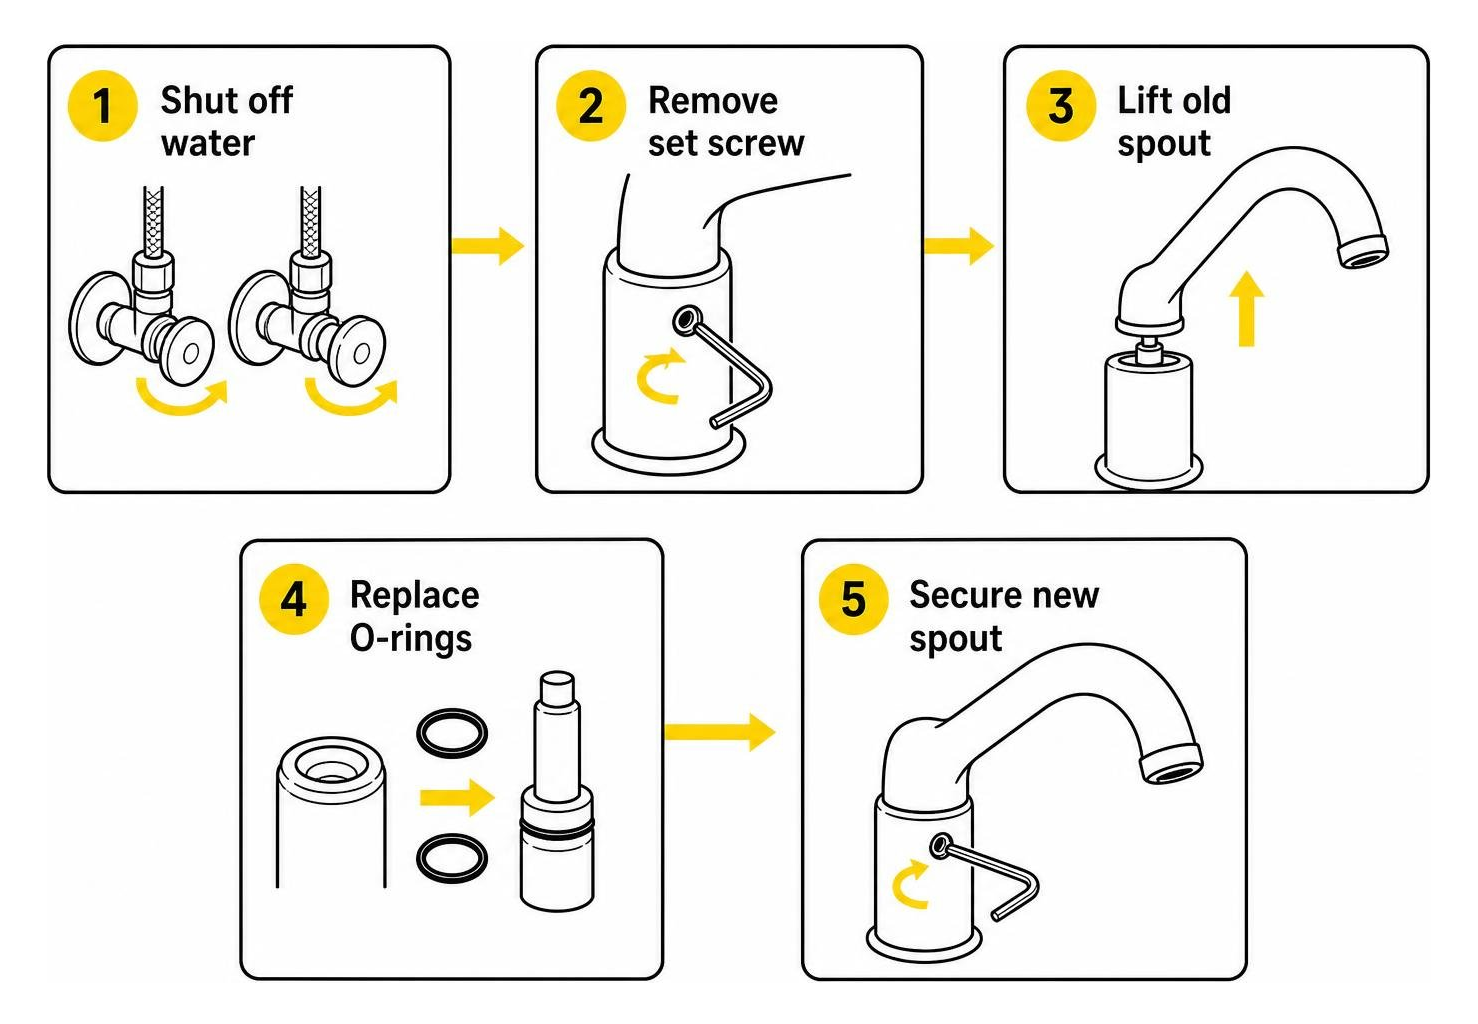
Removing the Old Spout and O-Rings
- Isolate the Water Supply: Close both hot and cold shutoff valves underneath the sink cabinet. Turn the handles fully clockwise. Open the kitchen faucet lever completely to bleed residual line pressure and verify that the water is completely off.
- Plug the Sink Drain: Place a rubber stopper or clean washcloth over the sink drain openings. This simple step prevents tiny set screws, clips, or aerators from tumbling down the plumbing trap.
- Locate and Loosen Fasteners:
- For set-screw models: Use a small utility pick to pop off any decorative plastic or metal indicator buttons on the rear or side of the spout collar. Insert your Allen wrench and turn counterclockwise until the screw is loose. You do not need to back the screw out completely.
- For threaded collar models: Grip the knurled or smooth retaining collar at the base of the spout. Turn it counterclockwise by hand or with padded pliers.
- Lift the Old Spout: Grasp the spout firmly near its base. Gently twist it back and forth while pulling upward. If mineral scale binds the connection, apply steady upward force without rocking the faucet so hard that you bend the sink deck.
- Strip Degraded Seals: Locate the exposed O-rings on the center valve body. Insert a plastic pick or the tip of a dull pencil under each rubber ring and slide it upward off the brass hub. Never use a sharp utility knife or metal screwdriver tip, as deep scratches on the brass sealing surface create permanent leak paths.
- Descale the Hub: Spray the exposed brass valve body with white vinegar and scrub away chalky calcium deposits with a nylon brush. Wipe the area dry with a microfiber cloth.
Installing the New Spout Assembly and Replacing Seals
- Install Fresh O-Rings: Slide the new Delta RP25 O-rings into their designated grooves on the valve hub. Ensure they sit flat without twisting or bunching along the circumference. If you have tackled other fixtures, such as completing a step-by-step Delta cartridge installation, you will recognize how crucial clean, unkinked rubber seating is for preventing pressurized leaks.
- Apply Plumber’s Silicone Grease: Smear a thin, uniform coating of food-grade silicone grease across both O-rings and along the plastic split ring (slip ring). This prevents friction tears when pushing the new spout over the seals.
- Seat the New Spout: Align the new spout assembly over the valve hub. Press downward with smooth, firm pressure while rotating the neck slightly. You will feel the spout slide past both O-rings and drop down onto the base shoulder.
- Fasten the Collar or Set Screw: Tighten the base retaining nut or re-engage the set screw with your Allen wrench. Tighten until snug, but avoid excessive torque that could crack plastic split rings or bind the swivel motion.
- Flush and Test: Unscrew the aerator from the tip of the new spout using your fingers or the RP46858 wrench. Turn on the hot and cold water supplies under the sink. Open the faucet fully for 60 seconds to flush out trapped air, debris, or excess lubricant. Reinstall the aerator and inspect the entire base for leaks.
Key Differences Across Delta Faucet Configurations
Delta manufactures faucets spanning multiple operating mechanisms, deck profiles, and internal valve designs. Understanding your unit’s internal engineering ensures you handle its specific connection points properly.
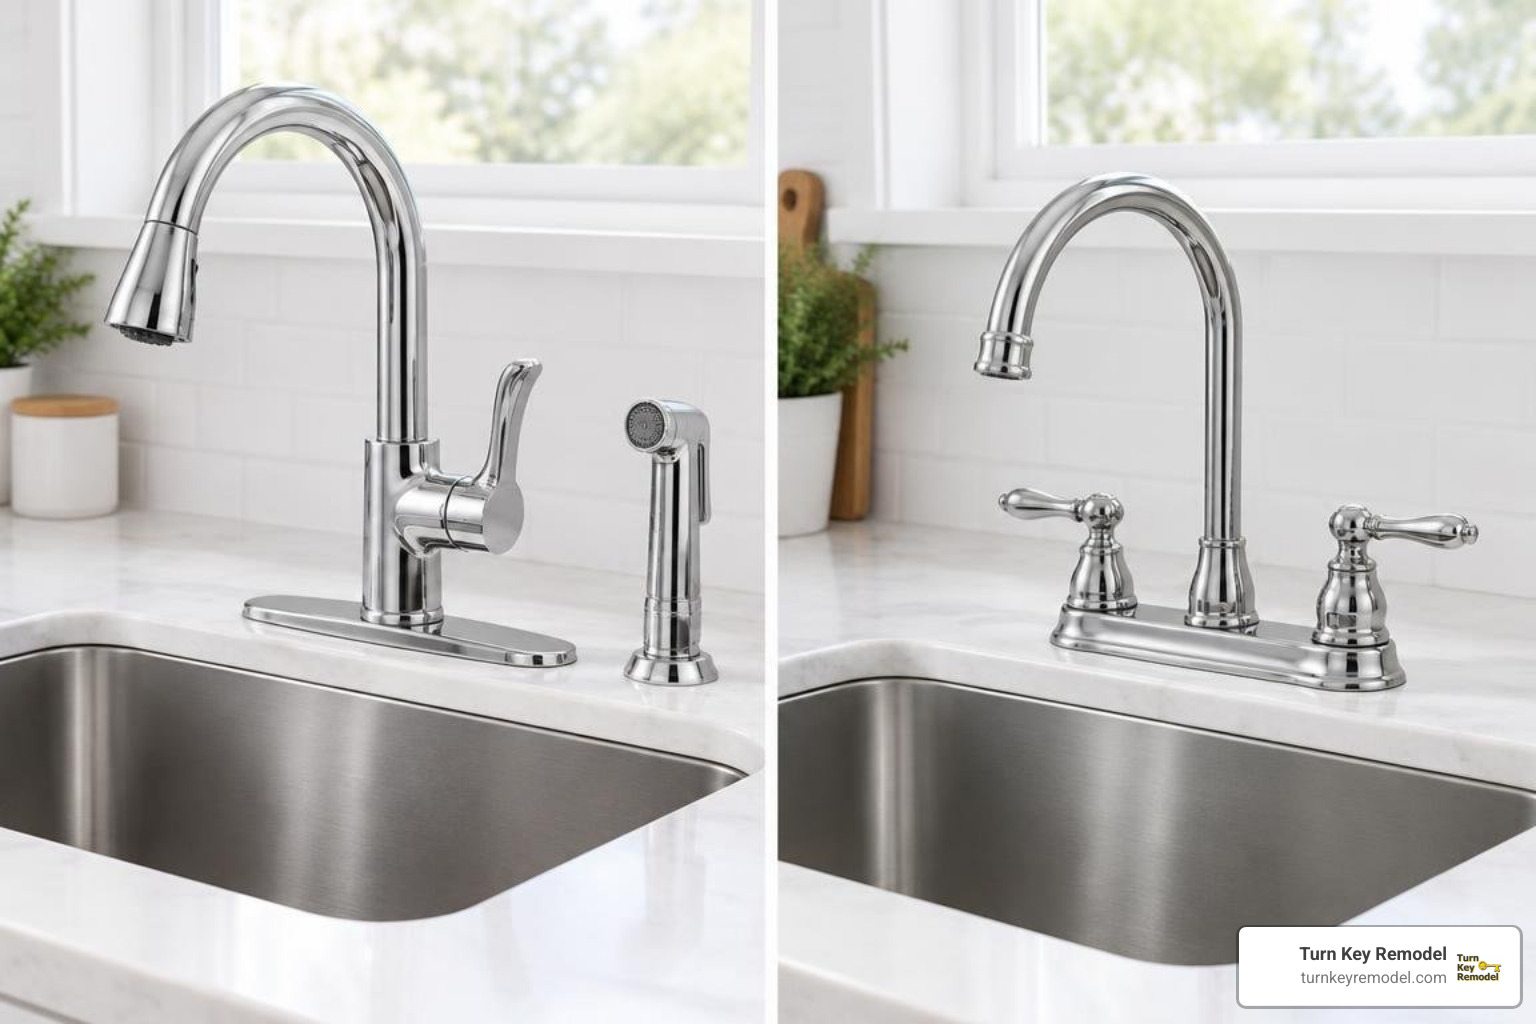
Single-Handle vs. Two-Handle Delta Kitchen Faucet Spout Replacement
Single-handle Delta kitchen faucets often incorporate a central ball valve or an advanced DIAMOND Seal Technology cartridge inside the main housing. In these configurations, the spout body frequently acts as an outer shell that envelops the cartridge mechanism, or it docks directly into a central diverter hub.
When replacing spouts on single-handle fixtures with side sprays, you may need to service the internal diverter assembly (such as part RP63135). If this diverter sticks, water will split unevenly between the spout tip and the sprayer, or pulse violently during operation.
On single-handle pull-down models, the “spout” functions primarily as an open high-arc guide neck, while the active water delivery occurs through a detachable wand assembly (like the RP60977SS) secured via a magnetic MagnaTite docking ring.
In contrast, two-handle Delta faucets (such as the classic 2100 or 2400 series) use a fixed center hub flanked by independent hot and cold valve stems. On these units, the spout mounts onto an independent central riser tube. This makes two-handle spout replacements straightforward, as you can replace the spout and its dedicated base seals without disturbing either handle stem cartridge or water supply connection.
Commercial and Gooseneck Spout Variations
Delta’s commercial-grade fixtures, such as the heavy-duty 54T2402 series, feature substantial 10-1/2-inch gooseneck spouts built for deep commercial sink basins and high-volume wash stations. These models feature heavy brass wall construction, rigid deck-mounting hardware, and full 360-degree rotation.
Commercial units often incorporate antimicrobial surface treatments and vandal-resistant retaining rings that require specific spanner wrenches rather than standard hex keys. When working across different plumbing fixtures in your home, the mechanical principles remain quite similar; for instance, learning how to replace your bathtub water spout without calling a plumber utilizes comparable thread-engagement and seal-compression concepts.
Troubleshooting Post-Installation Leaks and Issues
If your new spout does not operate smoothly after you turn the water back on, run through these targeted diagnostic checks:
- Base Leaks: If water pools around the bottom trim plate only when the faucet is running, water is escaping past the spout hub seals. Shut off the supply, pull the spout off, and examine the rubber O-rings. A flattened, twisted, or nicked ring must be replaced. Ensure the brass hub beneath the rings is completely free of scale.
- Restricted Flow: Loose sediment from old galvanized pipes or copper fittings often dislodges when water is turned off and on. Always unscrew the aerator nozzle to clear trapped grit if the stream pattern is broken or weak.
- Loose Swivel Action: If tapping the spout causes it to swing freely without resistance, the internal split retainer ring (such as Delta RP73391) is worn or was omitted during assembly. Installing a fresh retainer ring creates the calibrated friction required for controlled movement.
Frequently Asked Questions About Delta Spout Replacement
Can I use universal spout parts on my Delta kitchen faucet?
While aftermarket universal pull-down spray heads and aerators with multi-adapter kits can fit standard 1/2-inch threaded hose terminations, the main structural spout body should always be a genuine OEM Delta part. Delta utilizes proprietary base hub diameters, retaining clip grooves, and O-ring spacing. Generic spouts rarely seat at the correct depth, leading to base leaks or loose operation that can void your fixture’s lifetime limited warranty.
Why is water leaking from the base of my new spout?
Base leaks on a brand-new spout assembly almost always point to damaged or improperly seated O-rings. If the spout was pressed down dry without food-grade silicone lubricant, the tight metal edge of the spout collar can slice or roll the rubber ring out of its groove. Always lubricate the seals and verify that the internal diverter is free of debris.
How do I remove a stubborn or stuck Delta spout?
In areas with high hard water content, calcium and lime can bind the brass spout to the internal hub. To free a seized spout:
- Saturate a rag in warm distilled white vinegar and wrap it snugly around the base collar for 1 to 2 hours to dissolve mineral deposits.
- If it remains stuck, apply a plumbing-safe penetrating lubricant to the seam.
- Use a rubber strap wrench to provide rotational leverage without marring the decorative finish. Never strike the spout with a metal hammer.
Conclusion
Carrying out a Delta kitchen faucet spout replacement is an achievable DIY task that restores peak functionality and clean aesthetics to your sink. By matching your fixture’s exact model number, prepping the hub with fresh O-rings, and lubricating the assembly properly, you can eliminate leaks and restore smooth 360-degree rotation in under an hour.
If you are evaluating whether to repair individual sink components or update your entire kitchen layout, comparing plumber rates vs DIY cost breakdown helps you budget effectively for long-term home value. When your project expands into a comprehensive kitchen remodel, cabinet upgrade, or whole-home renovation across Orange County, Yorba Linda, Placentia, Anaheim Hills, Tustin, or Brea, our team at Turn Key Remodel provides end-to-end design-build expertise to bring your vision to life.