
Step into Luxury with Inspiring Walk-In Shower Bathroom Remodels
Walk-In Shower Ideas That Fit Your Bathroom
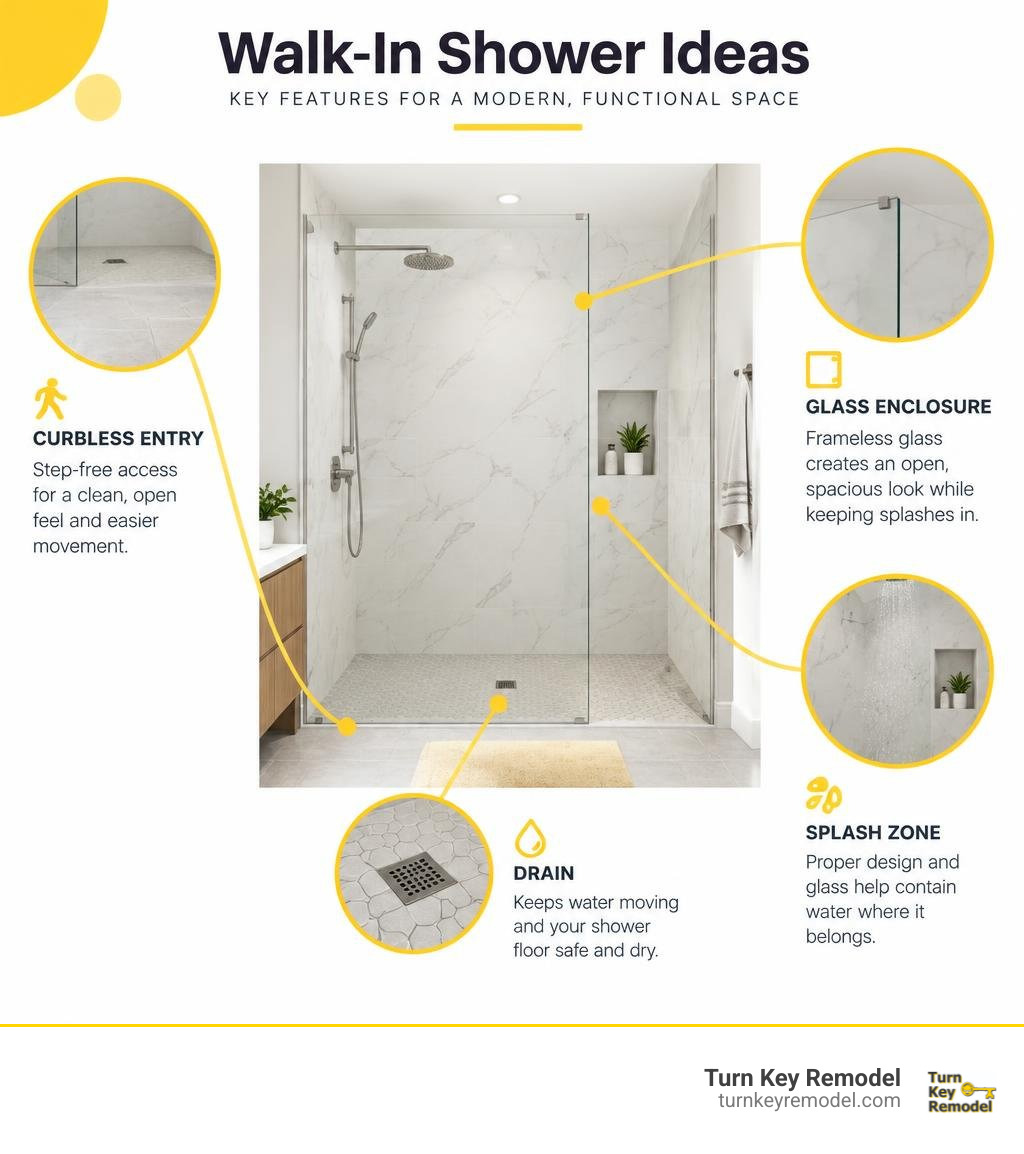
A walk-in shower remodel can take several directions. Choose a curbless shower for step-free access, frameless glass for an open look, or a tub-to-shower conversion to make better use of an existing alcove. In a smaller bathroom, a low curb or glass door may contain splashes better than a fully open design. Start with your available space and how you want to use the shower; finishes come next. When planning a comprehensive bathroom remodel, walk-in shower installations balance open spatial flow, accessible design, and everyday luxury.
I’m Mark Apicella, owner and president of Turn Key Remodel, with over eight years of remodeling experience. For homeowners planning a bathroom remodel walk-in shower upgrade, I bring specialized kitchen and bath project experience, in-house design support, and end-to-end project management.
Explore our essential project resources:
Inspiring Bathroom Remodel Walk In Shower Design Concepts
Modernizing your bathroom starts with reconsidering how you move through the room. Removing bulky fiberglass enclosures and replacing them with open, airy designs instantly elevates your daily routine into a spa-like retreat. Whether you are aiming for sleek minimalism or warm, textured organic styles, exploring our curated Bathroom Gallery provides a clear view of how spatial planning transforms ordinary spaces across Orange County, Yorba Linda, and Anaheim Hills into luxurious havens.
Curbless Walk-In Showers vs Traditional Curbs
The primary architectural decision in any walk-in conversion is choosing between a zero-threshold curbless entry and a traditional shower curb. A traditional curb rises 3 to 5 inches above the floor, serving as a physical dam to keep water inside the shower pan. In contrast, a curbless shower creates a seamless, flush transition where the bathroom floor extends directly into the shower footprint without any steps.
While traditional curbed showers are slightly simpler to frame, curbless designs eliminate the primary tripping hazard in the bathroom, provide complete wheelchair accessibility, and visually expand the room by removing physical floor breaks.
| Feature | Curbless (Zero-Threshold) Shower | Traditional Curbed Shower |
|---|---|---|
| Threshold Height | 0 inches (flush with main floor) | 3 to 5 inches raised dam |
| Accessibility | Universal design, roll-in ready | Step-over required |
| Visual Appeal | Seamless, expansive spa aesthetic | Defined, compartmentalized zone |
| Framing Complexity | Requires recessed subfloor or floor build-up | Standard flat subfloor framing |
| Splash Management | Relies on floor slope and showerhead placement | Contained mechanically by the curb |
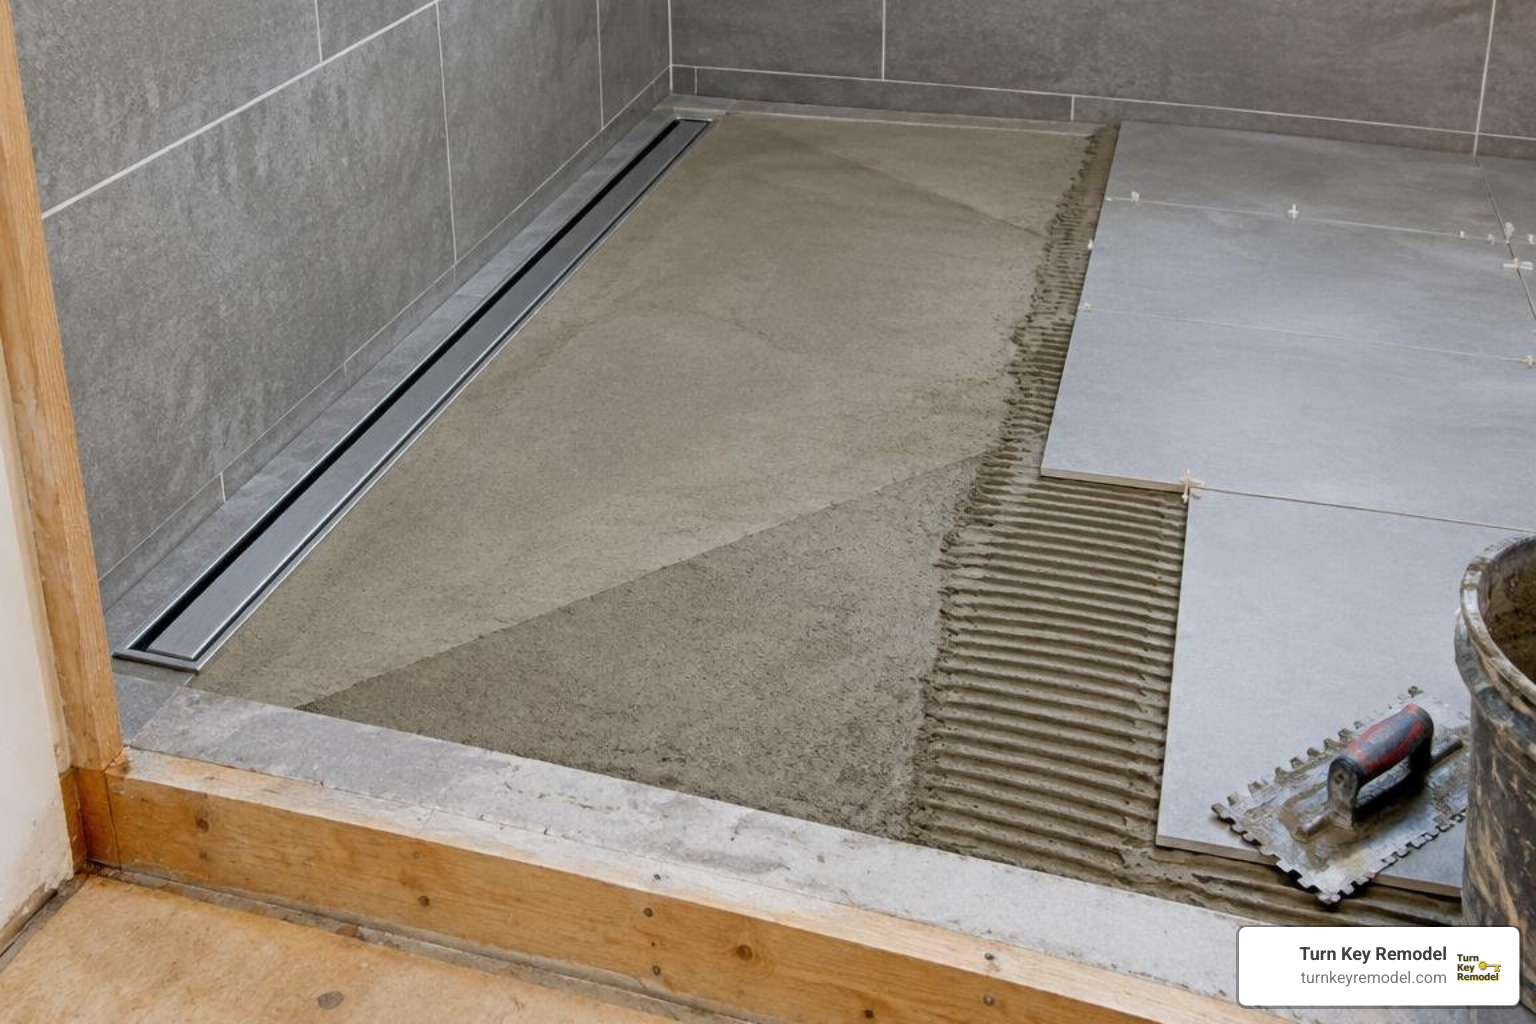
| Tile Options | Ideal for continuous large-format tiles with linear drains | Often requires small mosaics for center drains |
Shower Enclosures: Frameless Glass, Pony Walls, and Doorless Layouts
Selecting the right enclosure shapes both light transmission and warmth retention. Frameless glass panels crafted from 3/8-inch or 1/2-inch tempered architectural glass provide structural stability without heavy metal borders, allowing natural light to flood every corner. Applying factory hydrophobic coatings ensures water sheets off effortlessly, drastically reducing mineral buildup and maintenance.
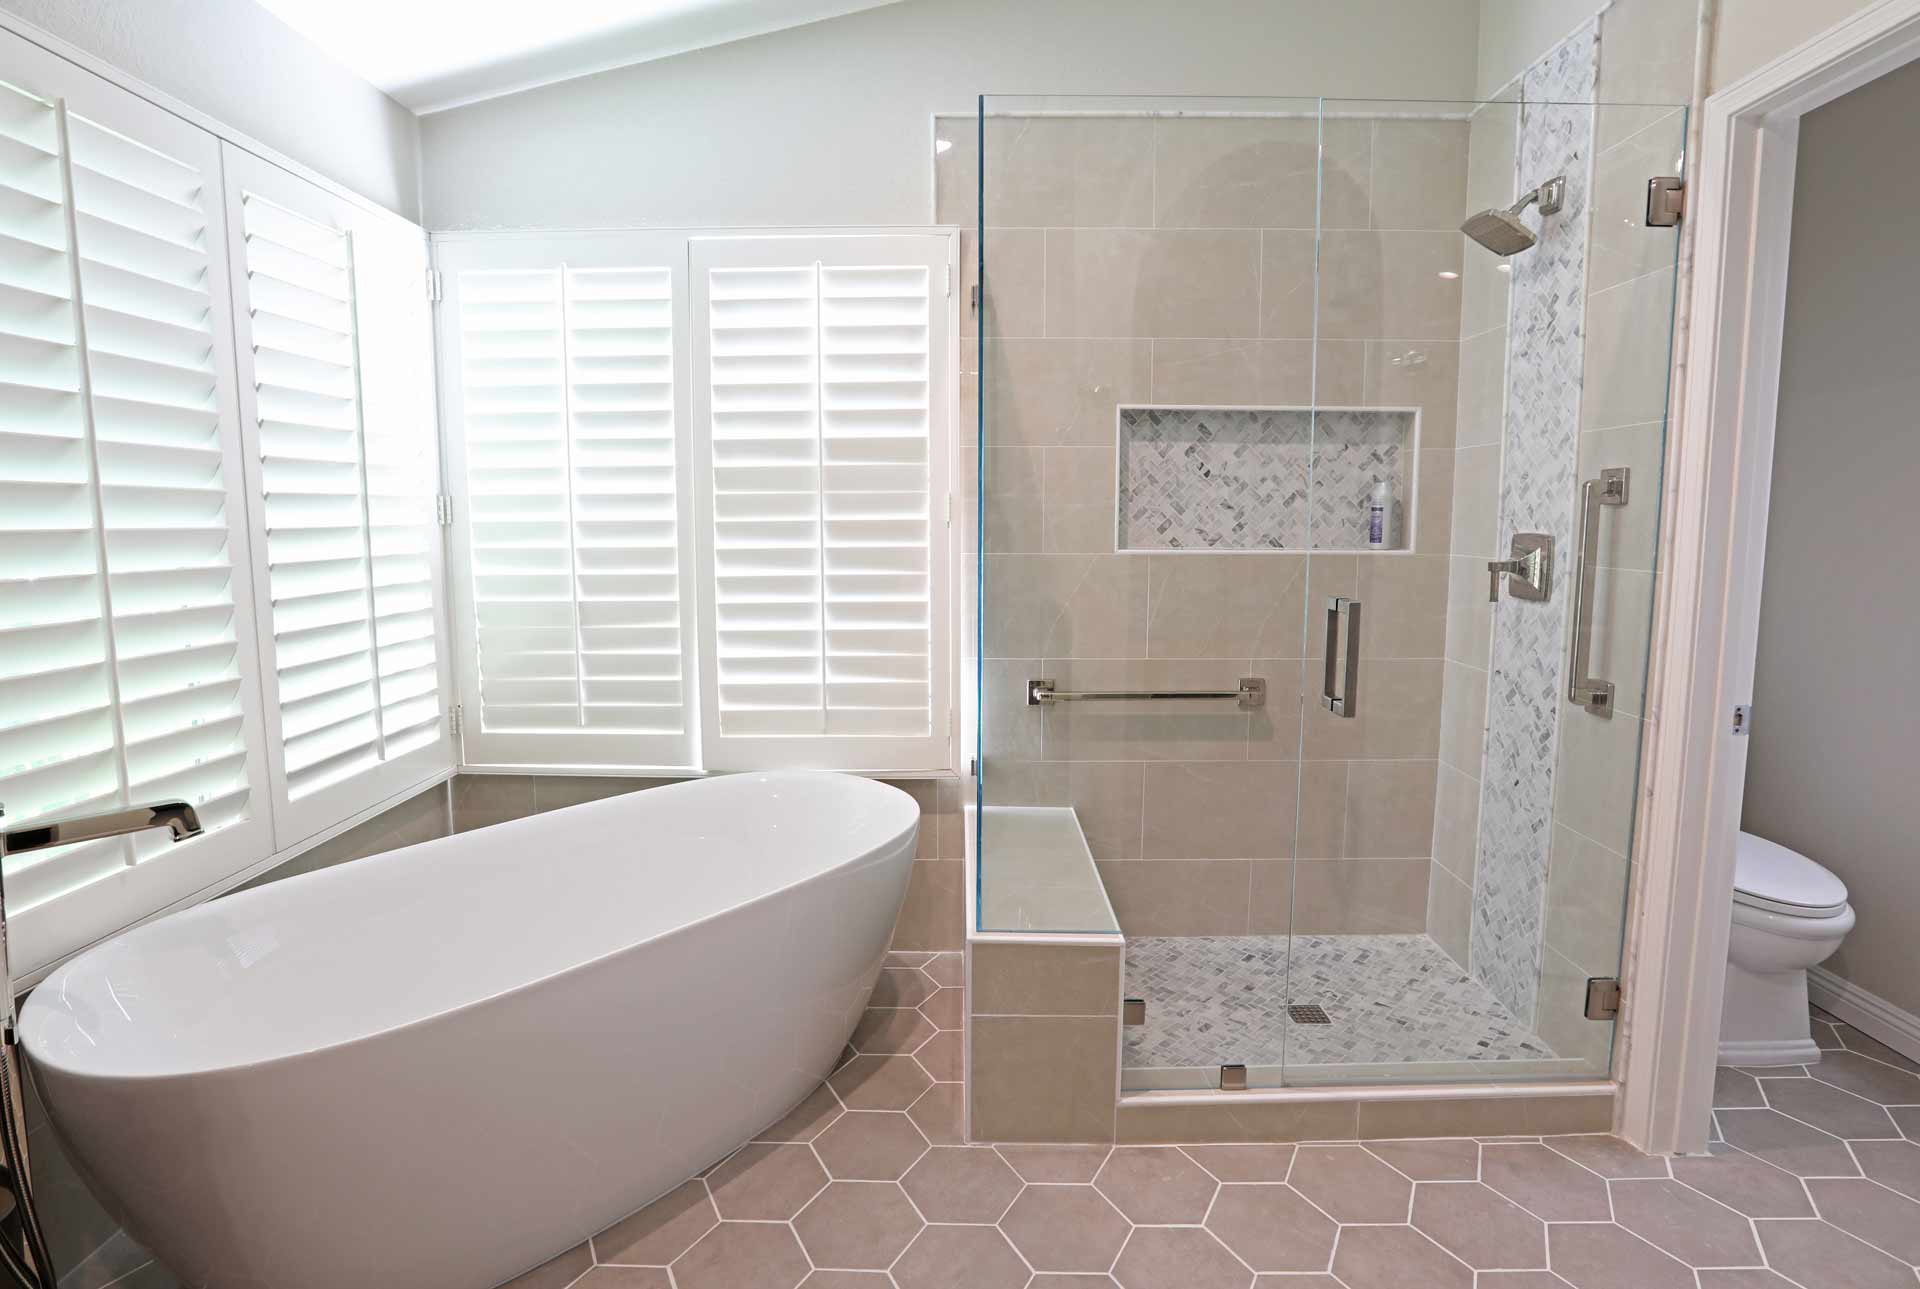
Pony walls (structural half-walls) offer a balance between openness and functional separation. Capping a pony wall with frameless glass creates a dedicated splash barrier while hiding plumbing lines or shampoo niches from immediate view upon entering the bathroom. For homeowners seeking a bold layout, fully doorless open wet rooms eliminate swinging doors entirely. Integrating radiant in-floor heating into these open layouts prevents drafts and ensures rapid floor drying after every shower.
Tub-to-Shower Conversions for Modern Layouts
Standard bathtubs occupy significant real estate while rarely matching modern lifestyle needs. Replacing an unused 60×30-inch tub alcove with an expansive walk-in shower optimizes tight footprints without requiring full structural additions. When evaluating everything to know about bathroom conversion from tub to shower, homeowners find that converting existing alcoves preserves original plumbing supply stacks while dramatically improving daily usability.
If you still enjoy soaking, you can also explore how to add a tub to your walk in shower space by designing a wet-room layout that encloses both a freestanding tub and shower fixtures within a single waterproofed footprint.
Technical Requirements: Sizing, Drainage, and Waterproofing
A successful shower remodel relies entirely on invisible precision behind the tile. Without code-compliant floor pitch, strategic drainage, and unbroken waterproofing membranes, even the most expensive designer tiles will succumb to moisture intrusion over time.
Sizing and Dimensions for a Bathroom Remodel Walk In Shower
Planning dimensions requires balancing physical comfort with building code standards. The National Kitchen and Bath Association (NKBA) recommends a minimum interior footprint of 36 by 36 inches for a comfortable walk-in shower, though some building codes permit 30 by 30 inches in tight alcoves. For homeowners optimizing compact layouts in Placentia or Tustin, implementing strategic floor plan ideas to make your 7×10 bathroom feel twice as big helps ensure adequate clearance without crowding vanities.
For curbless or doorless designs, depth is critical. Plan for at least 48 inches (120 cm) of depth along the spray axis to contain water bounce naturally. Ensure you maintain at least 24 to 30 inches of clear walkway space outside the shower opening for effortless movement.
Floor Slope Standards and Linear vs Center Drains
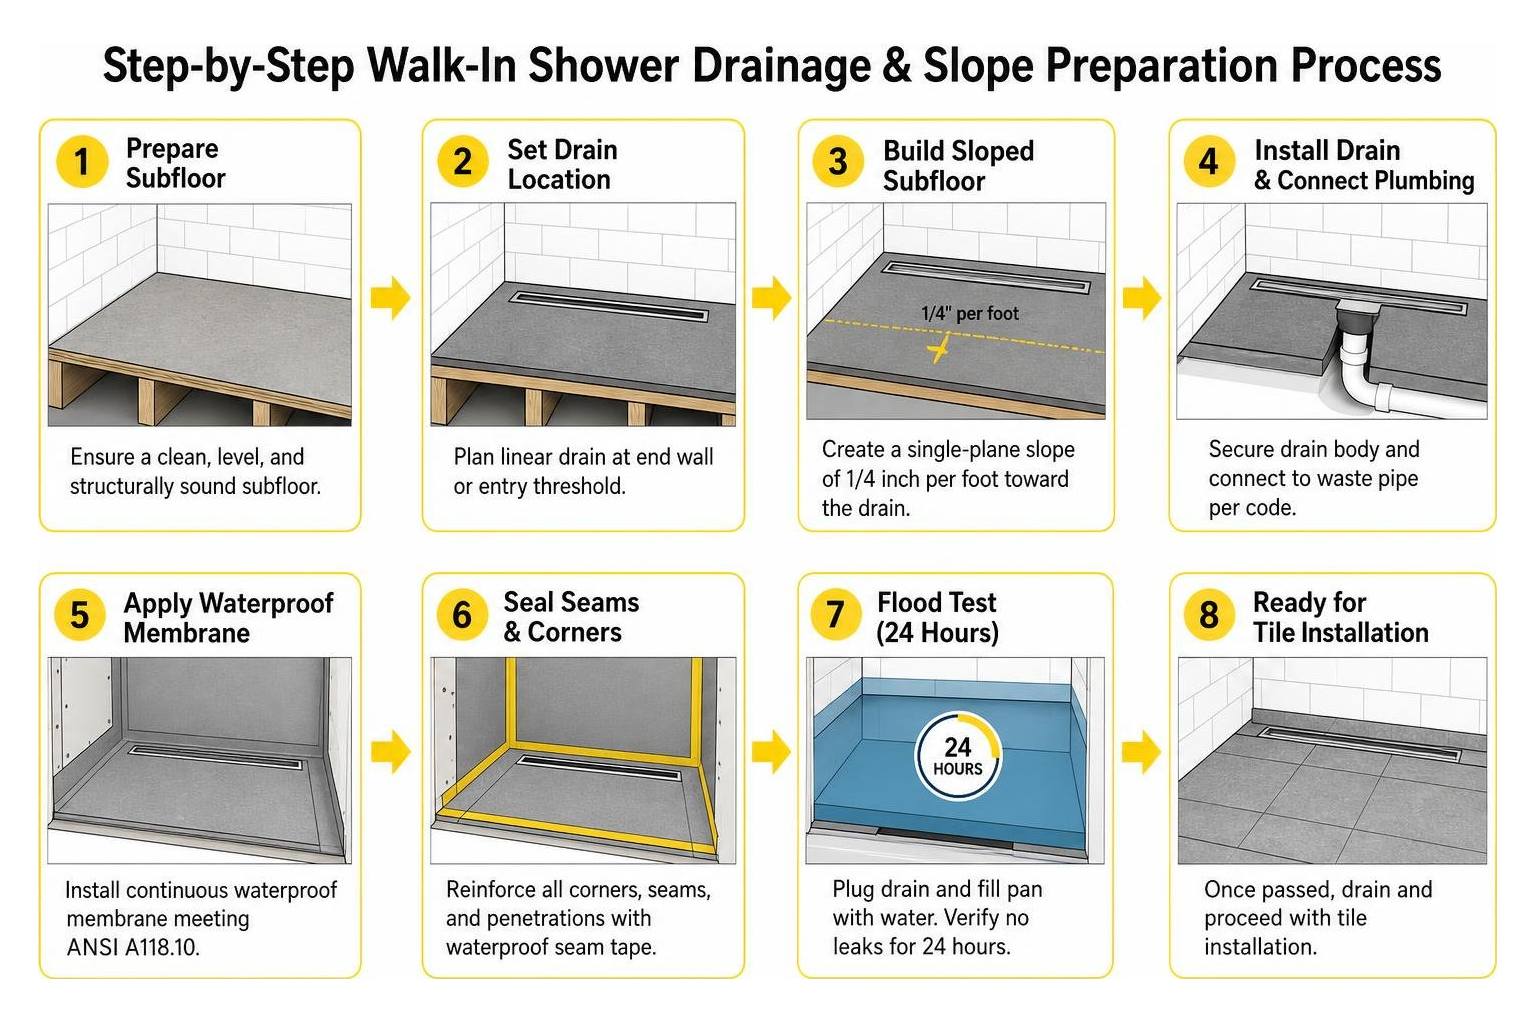
Water management is governed by physics and strict plumbing codes. The International Plumbing Code mandates a shower floor slope of exactly 1/4 inch per foot toward the drain. An insufficient pitch leads to standing water and slippery soap scum, while an excessive pitch creates an uncomfortable, uneven footing.
The type of drain you select dictates the entire floor geometry:
- Linear Drains: Positioned flush along an end wall or the entry threshold, linear drains require a single, uni-directional slope. This flat plane allows the installation of modern large-format tiles without tricky relief cuts.
- Traditional Center Point Drains: Placed in the middle of the shower floor, center drains require a four-way “funnel” pitch sloped from all four corners, necessitating smaller mosaic tiles to accommodate the multi-directional curves.
Critical Waterproofing Steps and Moisture Barriers
Tile and grout are decorative, water-shedding surfaces—they are not inherently waterproof. Absolute moisture containment requires an underlying, continuous membrane meeting ANSI A118.10 standards.
Contractors typically choose between bonded sheet membranes (such as Schluter-KERDI) or multi-coat liquid-applied elastomeric membranes. Every internal corner, wall-to-floor transition, and screw penetration must be reinforced with specialized waterproof seam tape. Once installed, conducting a mandatory 24-hour flood test—plugging the drain and filling the shower pan with water—verifies structural integrity before any tile is laid. Homeowners studying this process can reference a step-by-step DIY waterproofing guide to better appreciate the rigorous barrier requirements involved.
Material Selection: Prefab Kits vs Custom Tile vs Solid Surface
Your choice of surface materials defines long-term maintenance, installation timelines, and overall budget allocation.
| Material System | Average Timeline | Maintenance Level | Design Versatility | Relative Cost |
|---|---|---|---|---|
| Prefabricated Acrylic Kits | 2 to 3 Days | Very Low (No grout) | Limited sizes and finishes | $ (Budget) |
| Solid-Surface Slabs | 3 to 5 Days | Low (Minimal seams) | High-end modern slabs | $$ (Mid to High) |
| Custom Handcrafted Tile | 1 to 2 Weeks | Moderate (Requires grout sealing) | Unlimited colors, patterns, and niches | $$$ (High-End) |
Custom Tile and Slab Options
Custom tile remains the gold standard for personalized luxury. Glazed porcelain tiles deliver exceptional durability, zero water absorption, and convincing natural marble or slate aesthetics. When selecting floor tile, confirm a dynamic coefficient of friction (DCOF) rating of 0.42 or higher to ensure reliable slip resistance under wet, soapy conditions.
Installing sheet-mounted mosaic tiles on the shower floor naturally increases traction due to the higher density of grout joints. Upgrading to epoxy or high-performance urethane grouts eliminates porosity, resisting mildew and preventing chemical staining permanently.
Prefabricated Shower Kits and Solid-Surface Bases
For streamlined renovations, prefabricated acrylic bases offer rapid, cost-effective installation with built-in slopes and integrated thresholds. However, for a refined aesthetic without extensive tile maintenance, custom solid-surface bases (such as Corian or engineered quartz) provide a luxurious middle ground. As showcased in a Designer’s Notebook on modern spa sanctuaries, solid-surface systems eliminate grout lines entirely, providing seamless, non-porous surfaces that wipe clean in seconds.
Costs, Permitting, and Universal Design Features
Careful budgeting ensures your remodel proceeds smoothly from architectural plans through final fixture testing without costly financial surprises.
Budgeting Your Bathroom Remodel Walk In Shower Costs
Nationwide, a walk-in shower installation averages around $9,000, with most standard projects landing between $6,000 and $12,000. Full-scale custom remodels involving structural framing, high-end tile, and luxury dual shower systems range from $4,000 to over $20,000. While building a basic shower yourself might cost $900 to $2,800 in raw materials, hiring a licensed contractor to build a walk-in shower typically runs $3,500 to $8,000 for skilled labor and project management.
Approximately 38 percent of homeowners report paying more than anticipated due to mid-project material upgrades or unaddressed subfloor repairs. For detailed breakdowns on labor allocations and local city permits (which typically run $250 to $500), explore our guide on understanding the average cost of a tub to shower conversion.
Universal Design and Aging-in-Place Upgrades
Incorporating universal design ensures your bathroom remains safe, comfortable, and functional through every stage of life without sacrificing modern luxury:
- ADA Grab Bars: Mount structural grab bars 33 to 36 inches above the finished shower floor into solid wood blocking placed inside wall cavities before closing drywall.
- Ergonomic Seating: Built-in floating benches or fold-down teak seats should sit 17 to 19 inches from the floor, adding a 12 to 15-inch resting ledge.
- Thermostatic Anti-Scald Valves: Pressure-balancing thermostatic valves maintain constant water temperature regardless of water usage elsewhere in the home.
- Dual Showerheads: Combine a fixed overhead rain showerhead with an adjustable handheld wand for effortless rinsing and seated convenience.
Critical Mistakes to Avoid During Your Remodel
Avoid these frequent construction oversights to ensure long-term durability and safety:
- Inadequate Bathroom Ventilation: Skipping or undersizing the exhaust fan traps moisture, causing ceiling mold. Install a dedicated exhaust fan rated at least 50 CFM (or higher for large master baths).
- Insufficient Floor Pitch: Failing to maintain a strict 1/4-inch per foot slope toward the drain causes chronic water puddling and grout deterioration.
- Shortchanging the Splash Buffer: Installing glass panels narrower than 36 inches on doorless designs allows overspray to wet exterior bathroom drywall.
- Applying Incomplete Waterproofing: Relying on single-coat liquid membranes or skipping corner reinforcement tape invites catastrophic leaks into the subfloor.
- Hiring Unvetted Subcontractors: Working with unlicensed handymen rather than dedicated design-build specialists increases the risk of code violations; protect your investment by finding and vetting reliable local bathroom remodel contractors.
Frequently Asked Questions About Walk-In Showers
What is the minimum recommended size for a walk-in shower?
The National Kitchen and Bath Association recommends a minimum interior footprint of 36 by 36 inches for comfortable movement. While 30 by 30-inch spaces meet basic building codes, larger dimensions such as 36 by 60 inches comfortably accommodate built-in benches, multi-head fixtures, and spacious door swings.
How do you prevent water from escaping a doorless curbless shower?
Water containment relies on maintaining a strict 1/4-inch per foot floor slope toward a high-capacity linear drain, positioning rain showerheads to spray downward rather than outward, and providing a minimum 48-inch splash buffer zone from the fixture to the opening.
Will replacing a bathtub with a walk-in shower affect home resale value?
Upgrading a dated tub-shower combo to a custom walk-in shower in the primary master bathroom generally increases property value and buyer appeal. To preserve broad resale appeal for families with young children, keep at least one standard soaking bathtub in a secondary or hallway bathroom.
Conclusion
A well-executed walk-in shower transforms your daily routine, combining architectural elegance, universal accessibility, and long-term durability. Whether you envision a zero-threshold curbless shower with custom porcelain tile or an efficient alcove conversion in Brea or Yorba Linda, expert craftsmanship and meticulous waterproofing make all the difference. Turn Key Remodel provides end-to-end project management, seamless communication, and in-house design expertise to bring your vision to life. Ready to upgrade? Reach out to transform your space with professional bathroom remodeling today.